EDIT 09/12/2013 ..... these are not the badges someone has just cast (badly) and is selling on ebay.
I made these out of curiosity and not for profit. I have given away some of the badges I cast, I sent these out for free to fellow mini enthusiasts.
I just wanted to set the record straight, I didn't ever intend to make money from this and wouldn't like to think other forum members had seen these ebay badges and assume they came from me.
Hi, I'm new here, my names Ollie and I'm slowly rebuilding my mkII super deluxe.
Although my car is still a wreck I spent a good while trying to find the correct badges for it and being a non cooper repro's were not available so I thought I'd have a go at making some myself.
I'm not sure I'm posting in the correct section as this may well be how not to do it but here goes.
First of all I needed to find a badge to copy. Half decent ones were going on ebay for around £40 or more sometimes but I eventually came across one that was wrongly advertised cracked and broken that was ok for copying. The broken areas I rebuilt using an epoxy filler and filled/sanded back into the original profile.
Getting the paint off the original was tricky but I found soaking it in DOT4 brake fluid overnight did the trick without melting the plastic.
I made a moulding box out of Lego but anything could be used so long as its water tight. The Lego worked quite well with only a bit of grouting needing to be done between the bricks with plasticine.
I don't have a photo of this part sorry, I'll try to explain.
-Make a box at least 1" bigger all the way around the outside of the badge to be cast and around 3" to 4" high
-Fill tightly with plasticine modelling clay about 1" high
-Push your badge into the plasticine until it is half way in, it is important to remember a casting line will be present and to make sure the line is on the unseen edges. Use a modelling spatula to fill up to the badge edge, spend time to get it as good as you can, it will save time in the long run.
-A pouring hole is needed for the casting resin and it can be made now I just laid out a path using some alloy bar, Venting holes can be cut in after or matchsticks/cocktail sticks work ok. If it goes wrong its easy to cut the silicon when its cured with a sharp scalpel knife. Also don't forget to make locating holes in the plasticine so the mould halves go back together in exactly the right place. The pictures probably explain this better than I can.
-When you have a good seal pour in the moulding silicon rubber. This stuff will have loads of bubbles in from mixing, pour high and slow so you get a thin constant pour, don't stop and start and don't attempt to pour over the detail. Pour from one place in the corner and let it creep over the detail. I have had success with painting a thin layer of silicon carefully over the detail first but it was a last resort s there was one area on a mould that air was getting stuck.
I found a release agent was not needed at this stage.
-Let the silicon cure and remove everything from the Lego box.
The next part is really easy
-Put the cured silicon back in the casting box with the badge the other way up and put on a very thin layer of mould release (a scraping of Vaseline works ok)
-Pour on the silicon as before completely encapsulating the badge and let it cure.
Provided all went well you should now have two halves of a mould that you can use multiple times. The mould will need some support, I just cut some MDF to suit and hold it all together with elastic bands when pouring.
Pouring the casting resin is similar to the silicon in method, I found air bubbles less common if I turned the mould very slowly through 360 degrees a couple of times during pouring.
Casting new badges for the mkII
-
Ollie78
- 850 Super
- Posts: 178
- Joined: Sun Sep 15, 2013 8:50 pm
Casting new badges for the mkII
You do not have the required permissions to view the files attached to this post.
Last edited by Ollie78 on Mon Dec 09, 2013 6:04 pm, edited 1 time in total.
-
Ollie78
- 850 Super
- Posts: 178
- Joined: Sun Sep 15, 2013 8:50 pm
Re: Casting new badges for the mkII
You can see that mould got a little stuck as I didn't have enough release agent. The silicon takes pretty good detail, if you look at the tassels on the shield detail it hasn't missed anything.
Here are some early attempts that I cooked up in our oven at home, they did go a little brown, it looks like nicotine staining but I think that may be due to a dirty home oven contaminating the curing process.
The casting resin I used has additives in it to make it UV stable so they will perhaps fare better than the originals that seem to craze a lot.
I just have to try to find some suitable paint now. The black the red and the gold are easy but the silver is causing me some problems as its a chromed finish, silver paint in there looks a bit rubbish.
Cheers, Ollie
You do not have the required permissions to view the files attached to this post.
-
nippycars
- 998 Cooper
- Posts: 424
- Joined: Tue Jan 31, 2012 9:39 pm
Re: Casting new badges for the mkII
very clever and very nice. will you be doing mk1 horn pushes soon?? 
Website now LIve, www.nippycarsonline.com
-
Ollie78
- 850 Super
- Posts: 178
- Joined: Sun Sep 15, 2013 8:50 pm
Re: Casting new badges for the mkII
Thanks, Probably not to the mkI horn pushes, not in the immediate future anyhow as I don't own a mkI. When I get time I might make the mkII Austin steering wheel badge insert as I've just managed to get one in scabby condition.
Really like most finding time is my problem. I have to go to work and I have young children. If you want to try yourself though its not that difficult.
Really like most finding time is my problem. I have to go to work and I have young children. If you want to try yourself though its not that difficult.
-
Gray
- 998 Cooper
- Posts: 591
- Joined: Thu Jun 24, 2010 2:31 pm
- Location: Nailsworth, Glos.
- Has thanked: 1 time
Re: Casting new badges for the mkII
Another cheap easy way to make casting boxes is just a thick card wall around the item hot glued to the base, once cured this then just peels away and can be binned.
-
InimiaD
- 1275 Cooper S
- Posts: 1526
- Joined: Thu Jul 01, 2010 11:20 pm
- Location: West of Offas Dyke.
- Been thanked: 1 time
Re: Casting new badges for the mkII
I'm very impressed with your efforts.
Got me thinking about what other obsolete badge type items can be re-made.
As you say, a lot of patience and time is needed to get everything made in the first instance, but once the moulds are done things get a bit easier.
Got me thinking about what other obsolete badge type items can be re-made.
As you say, a lot of patience and time is needed to get everything made in the first instance, but once the moulds are done things get a bit easier.
-
Andrew1967

- 1275 Cooper S
- Posts: 7927
- Joined: Thu Jun 24, 2010 6:35 pm
- Location: Usually in my garage on the east coast of Norfolk, UK
- Been thanked: 8 times
Re: Casting new badges for the mkII
Great work Ollie. Hope you get the finished results you deserve. Please keep us all up to date.
My Dad is finishing off a Mk2 SDL restoration and the badges have been a problem to locate.
We have now managed to find a NOS rear badge and surround but the bonnet badge is one 'that will do', not being prepared to pay the stupid eBay prices.
My Dad is finishing off a Mk2 SDL restoration and the badges have been a problem to locate.
We have now managed to find a NOS rear badge and surround but the bonnet badge is one 'that will do', not being prepared to pay the stupid eBay prices.
-
Ollie78
- 850 Super
- Posts: 178
- Joined: Sun Sep 15, 2013 8:50 pm
Re: Casting new badges for the mkII
Thanks Graeme, yeah card casting boxes work great as you say and take less time to sort out, good point. They are probably more suited to one part moulds though. The beauty with Lego is that is holds a square, regular shape so the first silicon cast can be put straight back in turned through 180 degree's and cast on top of. I think Lego is great, I've been playing with it all my life and don't plan on stopping any time soon. Its clever stuff.
InimalD, thanks but really its not that time consuming. I have done it a few times at work taking copies for reference of architectural carvings and that's what got me thinking. I just used casting resin rather than plaster, I did it to satisfy my curiosity as much as anything.
Andrew is your Dads car an Austin or a Morris? New front bezels are available from Somerfords. Have you tried cleaning up the badge? I have found 600-1200-2000 grit wet and dry progressively followed by some T-cut and polish brings up old badges quite nice.
I've given away most of the decent Austin badges I made already but your welcome to one for your Dads car if I can find a decent one in the box. I'm just not sure there is one left without the air bubbles trapped around the coat of arms.
They need painting as well I'm afraid. Send me a message if you'd like one.
Have you got a steering wheel badge for your mkII? They go for silly money as well. I just realised that one of my other Austin badges is the same as the mkII insert, there is no gold on it though just black red and chrome. not sure what car its from.
-
Vegard

- 1275 Cooper S
- Posts: 2042
- Joined: Mon Jun 28, 2010 1:33 pm
- Location: Norway
- Contact:
-
surfblue63
Re: Casting new badges for the mkII
Have you thought of trying Silver Leaf for the chrome parts? It can be picked up from good art supply shops and the interweb. It's quite easy to apply as well.Ollie78 wrote:
I just have to try to find some suitable paint now. The black the red and the gold are easy but the silver is causing me some problems as its a chromed finish, silver paint in there looks a bit rubbish.
Cheers, Ollie
-
Ollie78
- 850 Super
- Posts: 178
- Joined: Sun Sep 15, 2013 8:50 pm
Re: Casting new badges for the mkII
8 port heads, no, that is unless you can provide me with one to copy. 
Possible legal issues aside I did think about casting the Vortz inlet manifold I have... for about 5 minutes, then realized a problem, I lack the skills knowledge and apparatus needed for the job. I visited a foundry a couple of years ago where they do a lot of work for Damien Hirst. Its a bit different to pouring a drop of resin.. and a lot more expensive. I guess that's what you were getting at though.
Thanks Surfblue, Silver leaf, that's a good call. I have no idea how to use/apply it. Would it adhere to resin and would it be possible to get it into the recesses of the coat of arms. Thinking about it if it worked gold could be used for the shield. Isn't the Paul Smith badge gilded?
-
surfblue63
Re: Casting new badges for the mkII
I used it once when customising a guitar. I used something that's called "size" as an adhesive. Again any decent art supplier will sell it.
This link has lots of info on applying gold and silver leaf.
http://www.studioarts.co.uk/links/hints ... ndtips.htm
This link has lots of info on applying gold and silver leaf.
http://www.studioarts.co.uk/links/hints ... ndtips.htm
-
Andrew1967
- 1275 Cooper S
- Posts: 7927
- Joined: Thu Jun 24, 2010 6:35 pm
- Location: Usually in my garage on the east coast of Norfolk, UK
- Been thanked: 8 times
-
Gray
- 998 Cooper
- Posts: 591
- Joined: Thu Jun 24, 2010 2:31 pm
- Location: Nailsworth, Glos.
- Has thanked: 1 time
Re: Casting new badges for the mkII
I would use a different clear resin which does not require an oven to cure as we never had any discolouration when we were casting commercially, and to avoid any air bubbles we degassed the resin before pouring and after pouring, with fairly uncomplicated items like the badges it should be fairly easy to avoid air bubbles. Now hot metal getting the air out before the metal cooled was a totally different game!
The orange and wide black bands were purely to hold the cable in registration in the mould.
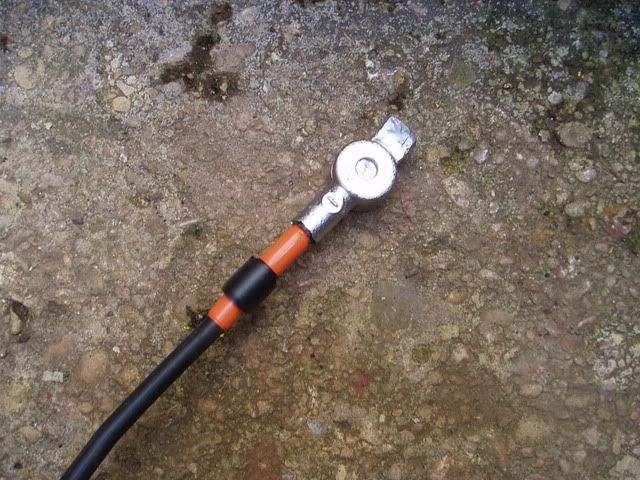
The orange and wide black bands were purely to hold the cable in registration in the mould.

-
Ollie78
- 850 Super
- Posts: 178
- Joined: Sun Sep 15, 2013 8:50 pm
Re: Casting new badges for the mkII
I did try another resin that didn't require an oven cure but didn't have much joy with it. There was no yellowing but the silicone mould has something in it/ or cools the resin too quickly causing a slight tack on the surface of the cured resin. Air bubbles were not a problem in the resin as such (not visibly anyway), as the liquid resin rises up the mould air seems to gets trapped around the detail where I cant vent. Its very hit and miss, turning the mould during pour seems to help. I guess these things would be made using vacuum or centrifuge in commercially controlled environments?
What is it that your casting Graeme if you don't mind my asking, what's your background, you seem to know what your talking about.
I'm doing this at a hobby level really, I have made (often crude) casts at work of architectural carvings and the like for reference and reproduction but as I am a stonemason/carver/conservator my experience is very limited. I started this just to satisfy my curiosity and having made a few useable badges and still having the moulds I'm satisfied. I have read that clear epoxy resin could be the answer but its more expensive and I've spent enough money already having tried 2 types.
-
Gray
- 998 Cooper
- Posts: 591
- Joined: Thu Jun 24, 2010 2:31 pm
- Location: Nailsworth, Glos.
- Has thanked: 1 time
Re: Casting new badges for the mkII
I use to work with my b-in-law resin casting giftware Ollie but now work for a bronze sculpture company, and yes tack can be a problem, there are so many resins out there now that anything is possible with additives it is a matter of talking to the right supplier, you can quite often get free samples if they think you are a commercial enterprise  A vacuum chamber will pull any bubbles out of any detail but you are talking more £££, I have an old one laying about but the pump died along time back.
-
Tim
- 1275 Cooper S
- Posts: 1294
- Joined: Thu Jun 24, 2010 11:55 pm
- Location: Tasmania, Australia
- Has thanked: 4 times
- Been thanked: 23 times
Re: Casting new badges for the mkII
Its essential that the silicone used in the mould is compatible with the clear resin. The resin I have says that the the mould needs to be Platinum Based/Addition Cure Silicone, not tin cure silicone, or the cast will be defective.
Tim
Tim
1951 Morris Commercial J Type Van
1955 BSA C11G
1961 Morris Mini Traveller
1969 Triumph TR6R
1977 Leyland Moke Californian
1955 BSA C11G
1961 Morris Mini Traveller
1969 Triumph TR6R
1977 Leyland Moke Californian
-
69k1100
- 850 Super
- Posts: 114
- Joined: Sat Sep 21, 2013 12:04 pm
Re: Casting new badges for the mkII
Hi! I have wandered around this forum for a while (from aus) and I played around with casting the mini k badges (same as an Oxford b16 badge) I believe the silver background is achieved through vacuume metallisation. Paint the colours then deposite aluminium under a vacuum then seal with a coat of silver paint (if you look at a mk1 horn badge it has a layer of silver paint over the metalised base)
-
mk1
- Site Admin
- Posts: 19835
- Joined: Thu Jun 24, 2010 11:30 am
- Location: Away with the Faries
- Has thanked: 3 times
- Been thanked: 10 times
Re: Casting new badges for the mkII
EXCELLENT WORK OLLIE!
I have made a few similar items in the past using polyeurathane "fast cast " type products, but have never had any success at all with clear / transparent casting. If you don't mind me asking, what type of resin did you use in the example above, it looks terrific.
M
I have made a few similar items in the past using polyeurathane "fast cast " type products, but have never had any success at all with clear / transparent casting. If you don't mind me asking, what type of resin did you use in the example above, it looks terrific.
M
-
Ollie78
- 850 Super
- Posts: 178
- Joined: Sun Sep 15, 2013 8:50 pm
Re: Casting new badges for the mkII
Thanks for the compliment...what a great website your running here, thanks for your efforts.
As mentioned before casting has been very hit and miss.
I'm not entirely sure on the resin types, I still have them so could give you details if you like, ebay buys from a company called polycraft.
I think the first type I used was a polyester resin that required an oven cure, it has some minor yellowing, to what degree seems to depend on (possibly) a number of variables. For example, how dirty your home oven is, how long you think you can get away with the (rather strong) smell before wife makes comments etc..
The second I think was a synthetic acrylic resin, it has surface tack issues (probably caused by the silicone mould) and is a lot more brittle, tested to destruction by my four year old.
Both resins are UV stable through additives I believe. The second resin also seems to respond well to a quick blast at 180' to get rid of tack.
I tried to make a new batch the other week as a member on here needed a mkII bonnet badge, some looked a bit poorly others had air bubble issues so I had to send out a slightly yellow one from a previous baking effort.
There's not a lot in it but I prefer the poly resin as it seems tougher.
I would try an epoxy resin if I started again as I think it might be less fussy, its more expensive though. I can't recommend either of the resins I tried as they are not perfect and the results so unpredictable, in my kitchen at least.
I'll do some more badges when I get a bit more welding done on the mkII...maybe I'll try some other unavailable designs if I find a more suitable resin. I need a car to attach them to first though really.
Ollie