What a cracking adventure! And some great pictures too.
Thanks for taking the time to share them with everyone.
'64 Aussie Morris 850
-
java gt
- 998 Cooper
- Posts: 436
- Joined: Sat Jan 14, 2012 8:04 pm
- Location: Half way between Dublin and Belfast
-
AWOODY
- Basic 850
- Posts: 75
- Joined: Sat May 18, 2013 11:49 am
- Location: Sydney Australia
Re: '63 Aussie Morris 850
Great weekend although I was not there for all of it , but I was a part of the sports 850 team .
-
timmy201

- 1275 Cooper S
- Posts: 1962
- Joined: Mon Jun 10, 2013 9:57 am
- Location: Australia
- Been thanked: 19 times
Re: '63 Aussie Morris 850
mk1 wrote:What a cracking adventure! And some great pictures too.
Thanks for taking the time to share them with everyone.
java gt wrote:That sounds like it was a cracking weekend.
Thanks guys, we had a really nice weekend away (well 5 days!)AWOODY wrote:Great weekend although I was not there for all of it , but I was a part of the sports 850 team .
I've been buying and fiddling the last couple of weeks, with most of that involving the electrical side and the exhaust. The exhaust had been blowing on the join where the manifold meets the down pipe. It looked like I didn't push it on far enough before clamping it tight. I fiddled with it for an hour on my back trying to get it to fit on properly and then decided to take off the manifold and do it on the bench. You can see where the pipe has been crushed by the exhaust clamp..

In hindsight it was a good idea as I discovered there was a leak at the head too.

I spent another couple of hours trying to get it to fit together properly on the bench before deciding nothing was round and it wouldn't go back together. I took it off to an exhaust shop and they sorted it for the grand total of $20. The middle exhaust hanger had torn too, so it was an easy time to replace it.

When the manifolds were off it was the perfect opportunity to replace the broken speedo cable and the ancient radiator hoses.

I've never been a fan of electrical wiring, and there was a problem as the IGN light would turn on when the car was off and turn off when the car was running. The generator had been swapped for an alternator a few years before I got the car and the regulator wiring looked a bit dubious. After a bit of reading and poking around it turned out one of the wires on the alternator was on the wrong terminal and that solved the IGN light problem. The alternator on the car is internally regulated, so to simplify the wiring and remove the horrible scotchlocks I removed the regulator altogether.

Purists look away.. It's now stored safely in the original parts box.

Here is the engine all back together. The new radiator hoses have been installed along with the new speedo cable. There is also a new firewall blanket which looks nicer.

A few people in Australia have been using the programmable Accuspark ignition module and I decided to get one. The current distributor is a 45D copy with vacuum advance and a "Mini Sparc 2120" kit that uses a Bosch ignition module (the black box on the inner wing) and modern coil. There isn't necessarily anything wrong with it, but it takes up a bit of room and doesn't look quite right. I have no idea on the ignition curve, other than it's OK at full advance.

In a box of parts that came from my grandfather with the car was the original 25D distributor. It's still in good condition and will need a new set of plug leads. I'm not 100% on whether I will use the vacuum advance as the unit is 50 years old and might not be working correctly.

To go with the 25D is an electronic ignition module, Stealth Blackbox and a matching coil. While I'm not expecting a big difference on this engine, it will be nice to know I can keep it for future engine plans and tune it accordingly. The benefit of the Accuspark system is that you lock out the mechanical advance and do all the advance and dwell using a program on the computer. You can adjust the advance very easily and run a curve that isn't possible with springs and weights and you can hide the unit up under the dash.

Another mini owner had a drive of my car during the Bathurst event and noticed my seat was very far forward despite being at the back of the adjustment. I then found out later cars had different seat brackets to my car which give you a bit more leg room. A pair popped up on eBay so I grabbed them.

My original ones are at the front, and only have one hole to choose from. My new pair has the extra holes to move the seat back. It's much more comfortable now!

-
AWOODY
- Basic 850
- Posts: 75
- Joined: Sat May 18, 2013 11:49 am
- Location: Sydney Australia
Re: '63 Aussie Morris 850
Hey Tim I am using a modified Subaru Leone dizzy in both my minis fits fine works great and you just about cannot tell that it not an A series dizzy , it has the good japanese electronic guts that don't have the problems of the Lucas dizzys , they are put together by one of the guys in the club and there are a LOT of guys in the club using them , just a thought.
-
timmy201
- 1275 Cooper S
- Posts: 1962
- Joined: Mon Jun 10, 2013 9:57 am
- Location: Australia
- Been thanked: 19 times
Re: '63 Aussie Morris 850
During the Christmas holiday break I installed the Accuspark Stealth Blackbox system and the original 25D distributor.
First up the mechanical advance was locked up by removing the springs and wiring them tight. The points were also replaced with an electronic ignition kit. The distributor is one of the few items going from the "original parts" box back into the car and not vice versa (I also found the original coil, but that'll stay on the shelf).

The old igniton system was then removed. It included the Bosch style ignition module on the right, modern Bosch coil in the middle along with a 45D.

The 25D was installed to check the electronic points were working correctly and set the base timing. As the new Stealth unit would be managing the advance timing the base timing was set to TDC. The distributor now acts as a crank angle sensor. I cut up the old ignition leads to use with the side entry cap to get the car working for the moment, but I have got some original type Champion plug caps that'll be used with new leads.

I dug out the old laptop we had lying around to see if I could install the accuspark program on it. Getting the program running and the blackbox to communicate to the computer took longer than swapping the distributor! A basic timing map was loaded on the unit to start with. Loading a new map takes a minute or two, so very quick. You can also set a max RPM limit, mine is very low as that's when the standard 998 valve springs start to give up.

Next up I installed the blackbox, it has four wires (distributor, coil, earth, positive) so even I could manage it. The wire between the distributor and coil is removed, and the signal now goes through the Blackbox. It is currently temporarily mounted under the dash until I've finished tuning it.

I've also rerouted the mechanical temp gauge tube and it's much tidier now under the bonnet.

It ran really well on the test drive and it's now very easy to make changes to the igniton timing. It's similar in concept to the Aldon Amethyst (except cheaper and no vacuum) and much easier to fit and hide than a Megajolt style system. Once the box is hidden under the dash the only way to tell is by looking at the wiring around the distributor and coil.
First up the mechanical advance was locked up by removing the springs and wiring them tight. The points were also replaced with an electronic ignition kit. The distributor is one of the few items going from the "original parts" box back into the car and not vice versa (I also found the original coil, but that'll stay on the shelf).
The old igniton system was then removed. It included the Bosch style ignition module on the right, modern Bosch coil in the middle along with a 45D.
The 25D was installed to check the electronic points were working correctly and set the base timing. As the new Stealth unit would be managing the advance timing the base timing was set to TDC. The distributor now acts as a crank angle sensor. I cut up the old ignition leads to use with the side entry cap to get the car working for the moment, but I have got some original type Champion plug caps that'll be used with new leads.
I dug out the old laptop we had lying around to see if I could install the accuspark program on it. Getting the program running and the blackbox to communicate to the computer took longer than swapping the distributor! A basic timing map was loaded on the unit to start with. Loading a new map takes a minute or two, so very quick. You can also set a max RPM limit, mine is very low as that's when the standard 998 valve springs start to give up.
Next up I installed the blackbox, it has four wires (distributor, coil, earth, positive) so even I could manage it. The wire between the distributor and coil is removed, and the signal now goes through the Blackbox. It is currently temporarily mounted under the dash until I've finished tuning it.
I've also rerouted the mechanical temp gauge tube and it's much tidier now under the bonnet.
It ran really well on the test drive and it's now very easy to make changes to the igniton timing. It's similar in concept to the Aldon Amethyst (except cheaper and no vacuum) and much easier to fit and hide than a Megajolt style system. Once the box is hidden under the dash the only way to tell is by looking at the wiring around the distributor and coil.
-
timmy201
- 1275 Cooper S
- Posts: 1962
- Joined: Mon Jun 10, 2013 9:57 am
- Location: Australia
- Been thanked: 19 times
Re: '63 Aussie Morris 850
When I got the car it had an aftermarket oil pressure gauge and the original sender for the warning light was removed. I picked up a new sender and T-piece and plumbed it in and now I've got a working oil pressure warning light (although hopefully I don't need to use it!). Also while under the bonnet the original 25D I'd installed had the screw on type vacuum advance line. I got a short section of pipe so that I could connect it up to the HS4, which has the vacuum point on the opposite side of the carb to the original HS2. The car is now running fantastic, although the oil pressure at idle is starting to get on the low side.

I then had a problem with the brake master cylinder calling it quits. The pedal went straight to the floor and there was fluid was in the drivers floorpan. Luckily this happened when the car was in the garage and not while driving. The clevis pin was stuck in pretty tight and needed a good few hours of effort to get it out!

I ordered in a new master cylinder and extension sleeve to keep an eye on the fluid level.

The master was bench bed and installed and now it's all working nicely again.

The 1098 block was collected from the engine shop, the work done was:
Bored out to +080 (1166cc)
Decked block
New pistons installed to rods
Rods checked and straightened
Cam bearings installed
Cam reground
Cam followers reground

And this is the 12G82 crank I picked up (a few years ago now). Once I can dig out the engine stand I can get started on the short block assembly.

I've also now got a decent sized workbench (which Mrs timmy201 helped me to build) and I'm no longer working weekends so I've got no excuse now!

I also received something a bit special in the post today from South Africa, after a couple of months on the water my 12G2827 crank turned up. It's going to be added to the storage rack for a future project
I then had a problem with the brake master cylinder calling it quits. The pedal went straight to the floor and there was fluid was in the drivers floorpan. Luckily this happened when the car was in the garage and not while driving. The clevis pin was stuck in pretty tight and needed a good few hours of effort to get it out!
I ordered in a new master cylinder and extension sleeve to keep an eye on the fluid level.
The master was bench bed and installed and now it's all working nicely again.
The 1098 block was collected from the engine shop, the work done was:
Bored out to +080 (1166cc)
Decked block
New pistons installed to rods
Rods checked and straightened
Cam bearings installed
Cam reground
Cam followers reground
And this is the 12G82 crank I picked up (a few years ago now). Once I can dig out the engine stand I can get started on the short block assembly.
I've also now got a decent sized workbench (which Mrs timmy201 helped me to build) and I'm no longer working weekends so I've got no excuse now!
I also received something a bit special in the post today from South Africa, after a couple of months on the water my 12G2827 crank turned up. It's going to be added to the storage rack for a future project
-
roger mcnab
- 998 Cooper
- Posts: 609
- Joined: Mon Feb 08, 2016 9:19 am
- Been thanked: 3 times
Re: '63 Aussie Morris 850
hi
that is a great little mini that you have there i like the shot of stanwell park and the fact that you were able to gather all those bits
my clubman project is slowly taking shape the front sub frame is modified to take the 1800 gearbox just needs blasting and a good paint job then i can try finding a few more bits for said gear box not as many as mini ones but some are still around
then comes the engine 3.5 rover and more work but the engine and gearbox will be slightly lighter than the mini gear ratios will be a challenge
but is the mini still running well
cheers roger mcnab
-
timmy201
- 1275 Cooper S
- Posts: 1962
- Joined: Mon Jun 10, 2013 9:57 am
- Location: Australia
- Been thanked: 19 times
Re: '63 Aussie Morris 850
Thanks Rodger. The mini is still running well, we had a drive down to a car show a couple of weeks agoroger mcnab wrote:hi
that is a great little mini that you have there i like the shot of stanwell park and the fact that you were able to gather all those bits
my clubman project is slowly taking shape the front sub frame is modified to take the 1800 gearbox just needs blasting and a good paint job then i can try finding a few more bits for said gear box not as many as mini ones but some are still around
then comes the engine 3.5 rover and more work but the engine and gearbox will be slightly lighter than the mini gear ratios will be a challenge
but is the mini still running well
cheers roger mcnab

Last weekend we had another run through the National Park which was also nice, although a little on the cold side

Another long term project has finally been completed! I bought this tank almost a year ago now, unfortunately it had a locking fuel cap on it with no key. Getting the cap off damaged the filler neck, so I had a new neck section put on and gave it a good clean out.

I measured up the hole and used a hole saw to cut it out.

Luckily the tank fit in fine

I had a few problems getting the link pipe in, but it's all sorted now and nice to have some extra range.

-
winabbey

- 998 Cooper
- Posts: 640
- Joined: Thu Apr 18, 2013 1:45 am
- Location: Melbourne, Australia
- Has thanked: 3 times
- Been thanked: 13 times
Re: '63 Aussie Morris 850
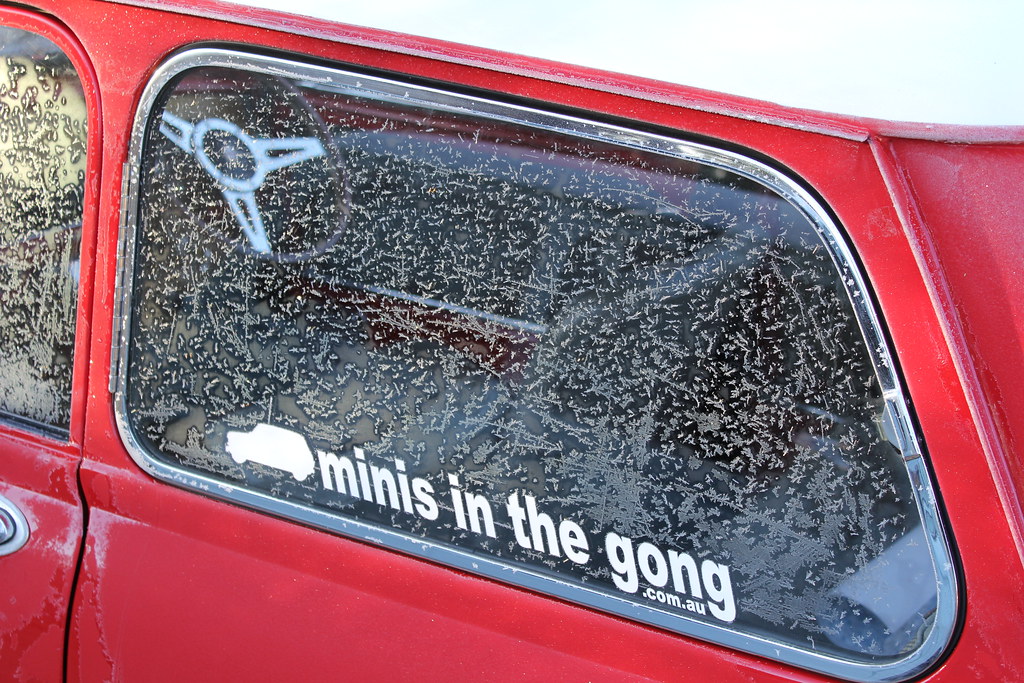
Nice period Morris 850 sticker on the rear window, which can be purchased here - https://www.ebay.com.au/sch/mythingsfor ... 7675.l2562
timmy201 wrote:
-
timmy201
- 1275 Cooper S
- Posts: 1962
- Joined: Mon Jun 10, 2013 9:57 am
- Location: Australia
- Been thanked: 19 times
Re: '63 Aussie Morris 850
A little progress the last couple of weeks, I borrowed a dial indicator gauge to start getting the short block assembled. The end float was a bit outside of spec, so I ordered in some +003 thou thrust bearings. The first set of big end bearings I bought turned out to be junk too, so I got some new ACL bearings which look much better. The crank has picked up some strange marks on the middle main journal, so it's been sent off to see if it's savable. From memory it's at -020 already, so I'm hoping it will grind up ok...
When I got the car it had Cibie H4 conversion headlights in it. While they worked well they never looked quite right. They seemed to stick out too much past the chrome rings and just looked a bit odd


I ordered some Wipac Quadoptic units and some 3H1031 rubber gaskets as the old ones were disintegrating and covered in overspray.

The Wipac lights are much nicer profile (on the right)

They look much nicer, especially as the headlights are a very prominent feature of the front end of the car.

New one in the foreground, old one at the back. The last step is to re-wire the parking lights as the new headlights take a different size bulb

When I got the car it had Cibie H4 conversion headlights in it. While they worked well they never looked quite right. They seemed to stick out too much past the chrome rings and just looked a bit odd
I ordered some Wipac Quadoptic units and some 3H1031 rubber gaskets as the old ones were disintegrating and covered in overspray.
The Wipac lights are much nicer profile (on the right)
They look much nicer, especially as the headlights are a very prominent feature of the front end of the car.
New one in the foreground, old one at the back. The last step is to re-wire the parking lights as the new headlights take a different size bulb
-
timmy201
- 1275 Cooper S
- Posts: 1962
- Joined: Mon Jun 10, 2013 9:57 am
- Location: Australia
- Been thanked: 19 times
Re: '63 Aussie Morris 850
The headlights and parking lights (sidelights) have now been wired in, although I still need to complete the headlight aiming. I've also removed the corner bars to restore the base 850 look. The number plate was moved down below the bumper. The standard Aussie number plates are a bit taller and normally have a bracket to lift them up.

I've also done a little bit of work in the engine bay. I've put the washer bottle back in, checked the tappets and spark plugs and put in a new set of plug leads. Unfortunately this has highlighted the fact the washer pump now leaks into the footwell when you try and use it

I've been working on this dash for a while, it turned out OK but I've learnt a few things for when I make the next one. I've got the tacho working again as I'd wired it in wrong earlier and also relocated it to be on the steering column. The drivers seat also got a new layer of foam in the base as it was quite squashed and deteriorated after 50+ years. Almost ready for this years' big trip!

I've also done a little bit of work in the engine bay. I've put the washer bottle back in, checked the tappets and spark plugs and put in a new set of plug leads. Unfortunately this has highlighted the fact the washer pump now leaks into the footwell when you try and use it
I've been working on this dash for a while, it turned out OK but I've learnt a few things for when I make the next one. I've got the tacho working again as I'd wired it in wrong earlier and also relocated it to be on the steering column. The drivers seat also got a new layer of foam in the base as it was quite squashed and deteriorated after 50+ years. Almost ready for this years' big trip!
-
timmy201
- 1275 Cooper S
- Posts: 1962
- Joined: Mon Jun 10, 2013 9:57 am
- Location: Australia
- Been thanked: 19 times
Re: '63 Aussie Morris 850
Rylstone 2017 was another awesome trip!
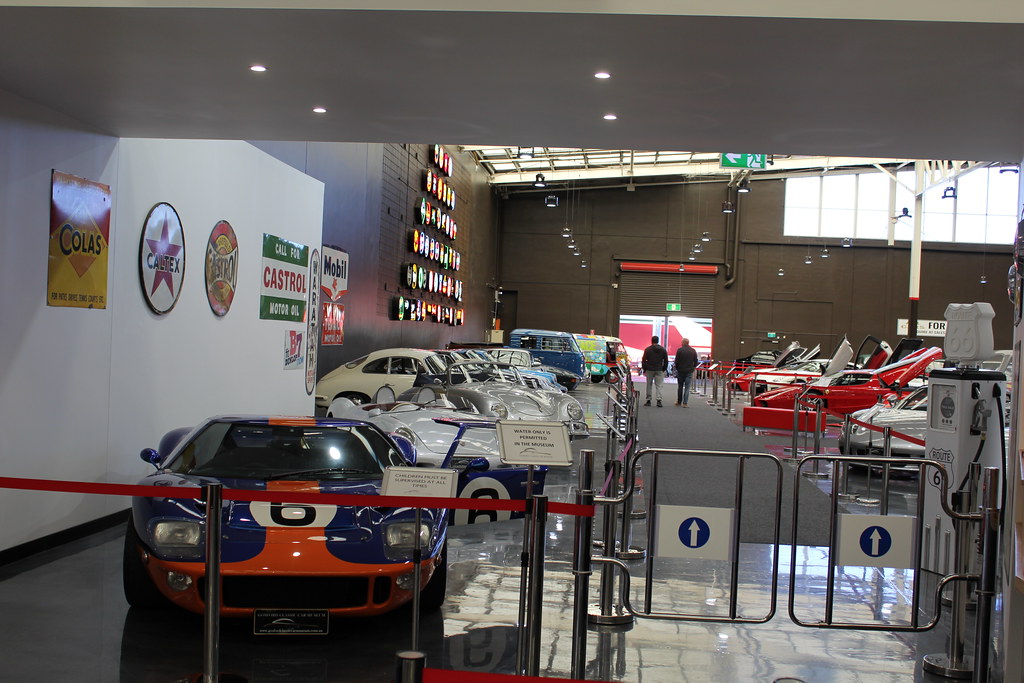
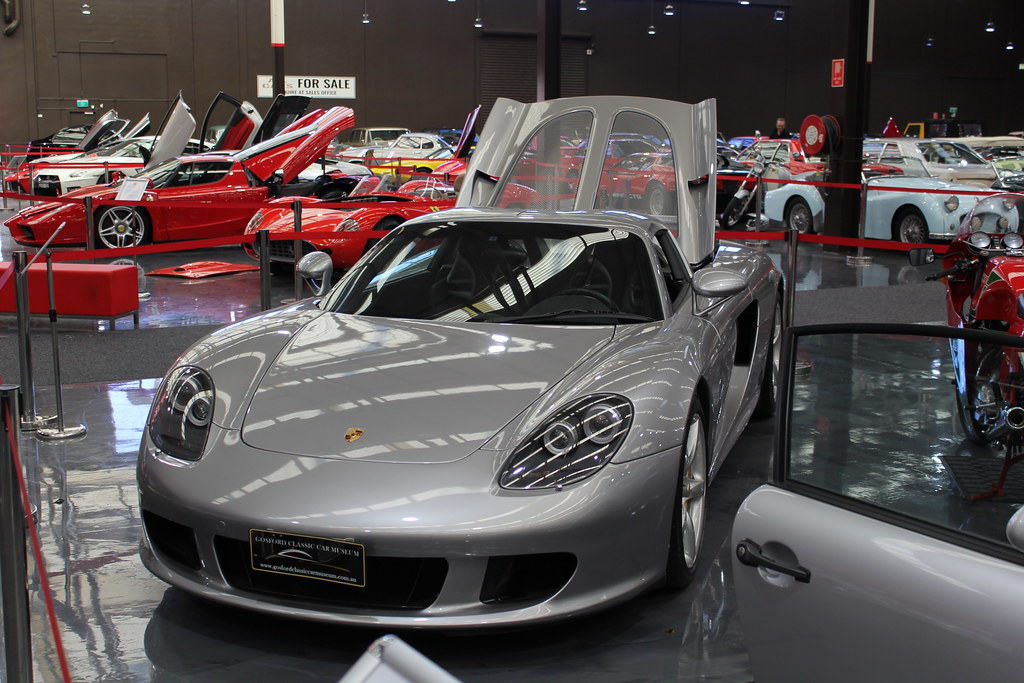
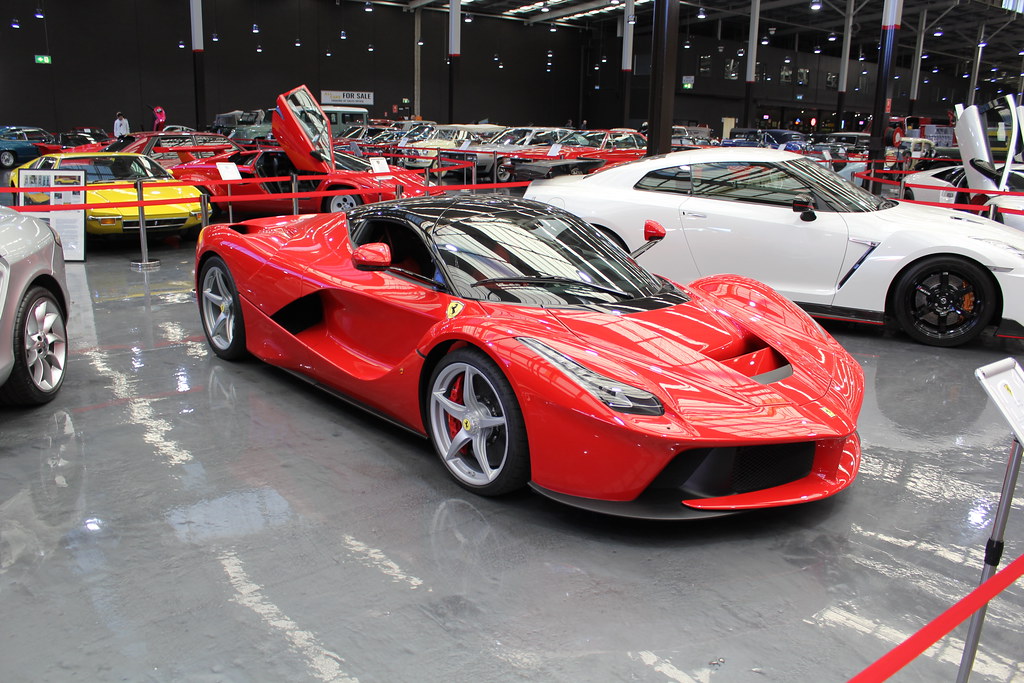
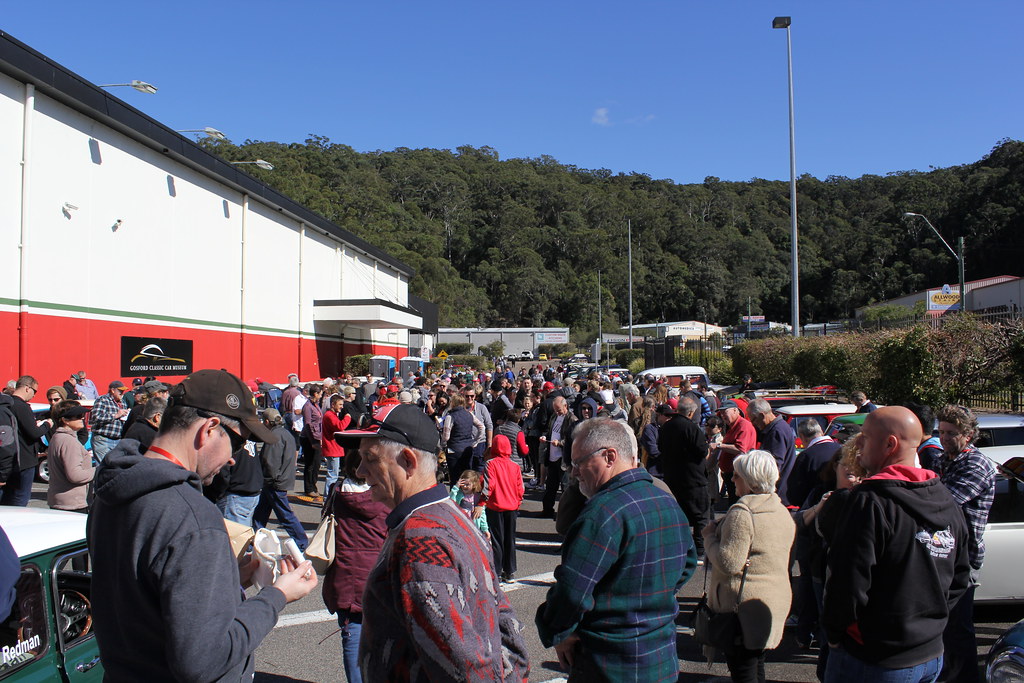
Friday afternoon we got to the Gosford Classic Car Museum and had a look around for a few hours
On Saturday morning we met up with the group and got our registration pack
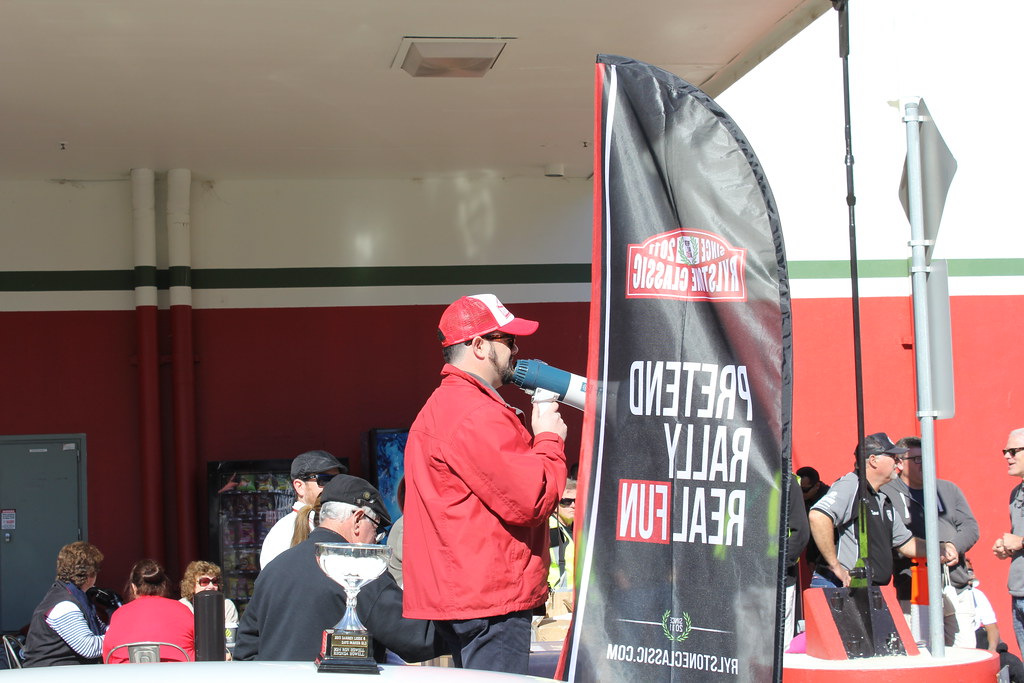
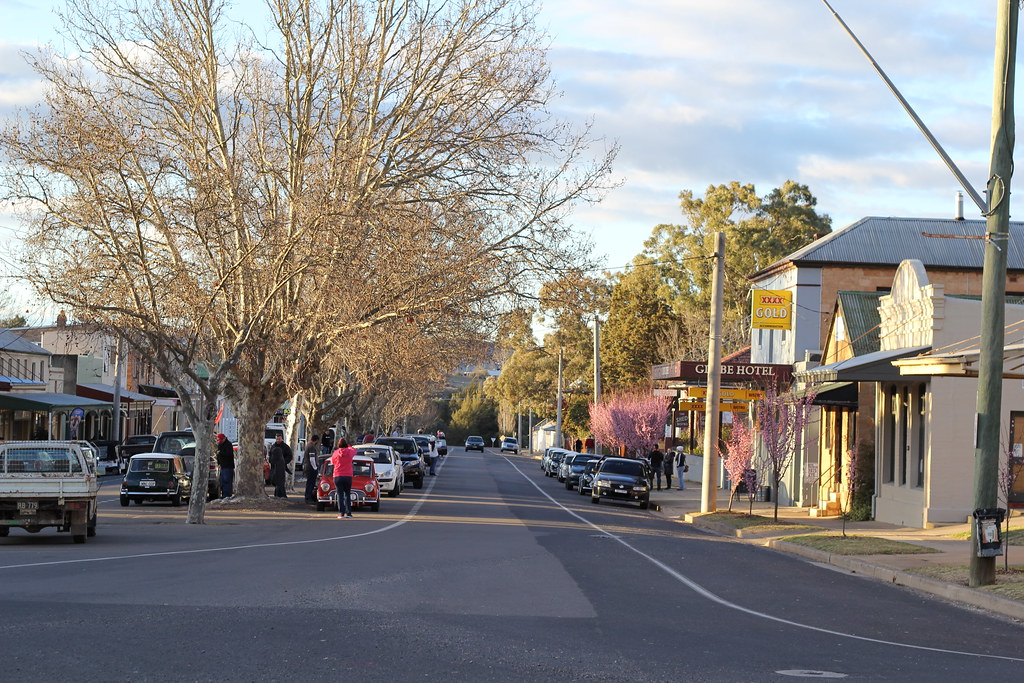
We got into Rylstone a bit earlier this year which was nice! The beer was cold (as was the temperature outside) and the fireplace inside was nice and warm


It was a frosty start on Sunday morning. The car was difficult to start, with it only trying to kick over when the starter button was released. I think the diagnosis was the blackbox was getting insufficient voltage to run during cranking. It started fine with a roll start down the hill.
All up we did about 850km and no major issues which was great!
Friday afternoon we got to the Gosford Classic Car Museum and had a look around for a few hours
On Saturday morning we met up with the group and got our registration pack
We got into Rylstone a bit earlier this year which was nice! The beer was cold (as was the temperature outside) and the fireplace inside was nice and warm
It was a frosty start on Sunday morning. The car was difficult to start, with it only trying to kick over when the starter button was released. I think the diagnosis was the blackbox was getting insufficient voltage to run during cranking. It started fine with a roll start down the hill.
All up we did about 850km and no major issues which was great!
-
timmy201
- 1275 Cooper S
- Posts: 1962
- Joined: Mon Jun 10, 2013 9:57 am
- Location: Australia
- Been thanked: 19 times
Re: '63 Aussie Morris 850
I also picked up the 12G202 cylinder head from the engine shop during the trip. It had a bit of work done:
27.2mm / 1.07" exhaust valves
31.75mm / 1.25" inlet valves
Unleaded exhaust seats
Bronze valve guides
Combustion chamber & port work
Modification of inlet manifold to suit head
Skimmed flat

27.2mm / 1.07" exhaust valves
31.75mm / 1.25" inlet valves
Unleaded exhaust seats
Bronze valve guides
Combustion chamber & port work
Modification of inlet manifold to suit head
Skimmed flat
-
NZmember
- 998 Cooper
- Posts: 343
- Joined: Sat Apr 07, 2012 11:45 pm
- Location: New Zealand
- Been thanked: 1 time
Re: '63 Aussie Morris 850
Nice work on the head - was that one of those rusty things from page 1 that you stuck in the vinegar?
-
timmy201
- 1275 Cooper S
- Posts: 1962
- Joined: Mon Jun 10, 2013 9:57 am
- Location: Australia
- Been thanked: 19 times
Re: '63 Aussie Morris 850
I got the head in a big bunch of parts a little later. It had a thin layer of grease on it and looked very near to new, there were no marks from spark plugs or the head being tightened down. The gasket face still looked freshly milled too
Before:


Before:
-
timmy201
- 1275 Cooper S
- Posts: 1962
- Joined: Mon Jun 10, 2013 9:57 am
- Location: Australia
- Been thanked: 19 times
Re: '63 Aussie Morris 850
I found this rocker cover on ebay a few weeks ago. It'll come up pretty well with a polish and re-paint, for the moment it matches the patina of the engine bay and is even painted the same colour!


-
Sergio37
- Posts: 12
- Joined: Tue Mar 07, 2017 8:34 pm
-
timmy201
- 1275 Cooper S
- Posts: 1962
- Joined: Mon Jun 10, 2013 9:57 am
- Location: Australia
- Been thanked: 19 times
Re: '63 Aussie Morris 850
Thanks! The reverse Cooper steel wheels are long gone, and I won't really miss them.. They were heavy, weren't properly round and they kept going flat! I've got a set of 850 3.5" wheels which might make a comeback when the current tyres run out of tread.Sergio37 wrote:So nice car!!!! Best look for me is with steelies
Congratulations
I also like the look of the alloy Cooper S style wheels. You get the visual effect of the 60's wheel with the lightness and modern features of alloy wheels. In the distant future when I get some disc brakes I'd love a set of these
http://minisport.com.au/mini-10x45-coop ... m-set-of-4
-
Sergio37
- Posts: 12
- Joined: Tue Mar 07, 2017 8:34 pm
Re: '63 Aussie Morris 850
And what about the Rose Petals ? will look perfect in your beautiful car .