Mk2 Cooper
-
rich@minispares.com

- 1275 Cooper S
- Posts: 6806
- Joined: Thu Aug 08, 2013 3:16 pm
- Been thanked: 2 times
-
Callum
- 998 Cooper
- Posts: 469
- Joined: Thu Sep 25, 2014 9:01 pm
-
Callum
- 998 Cooper
- Posts: 469
- Joined: Thu Sep 25, 2014 9:01 pm
Re: Mk2 Cooper
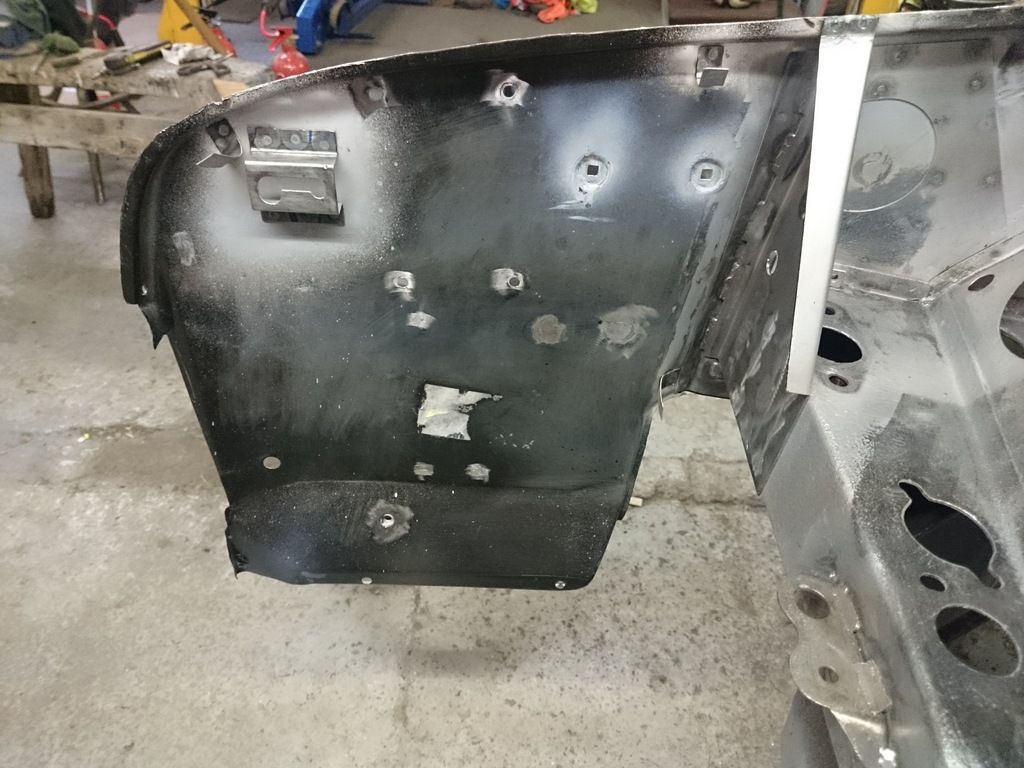
Got all the front end bolted on today to sort the panel gaps out. The wings weren't a great fit, the profile at the front was nowhere near that of the bonnet
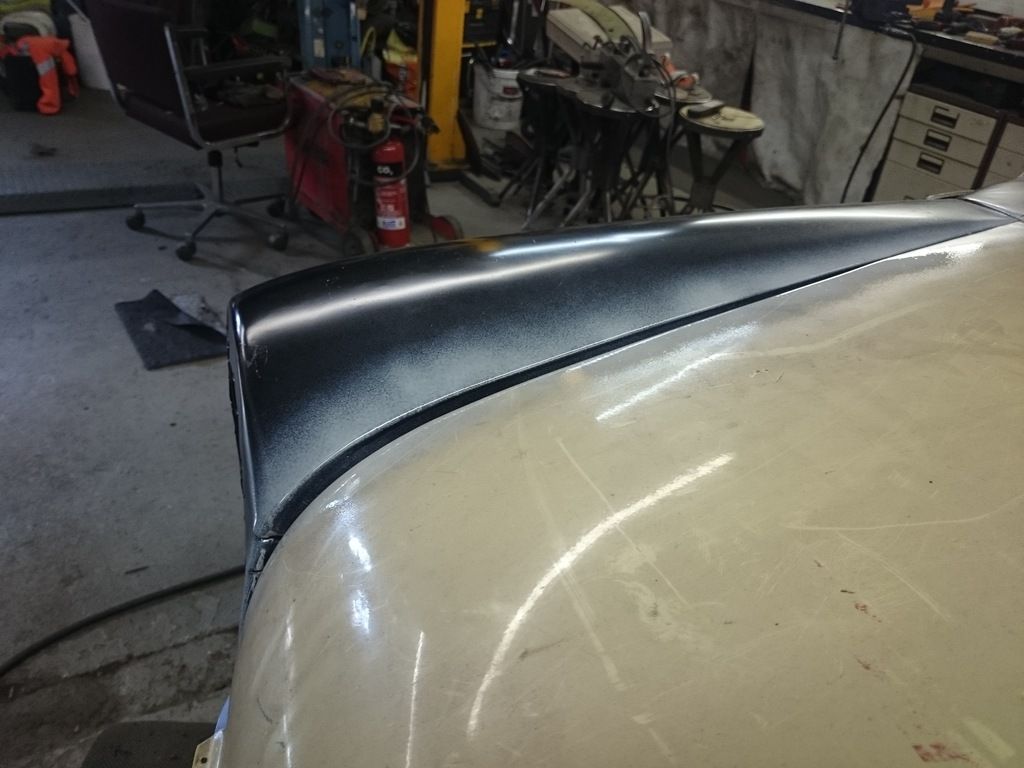
It wasn't much better down the edge either and around the scuttle needed some work
So after a full day of bashing the gaps aren't far off now
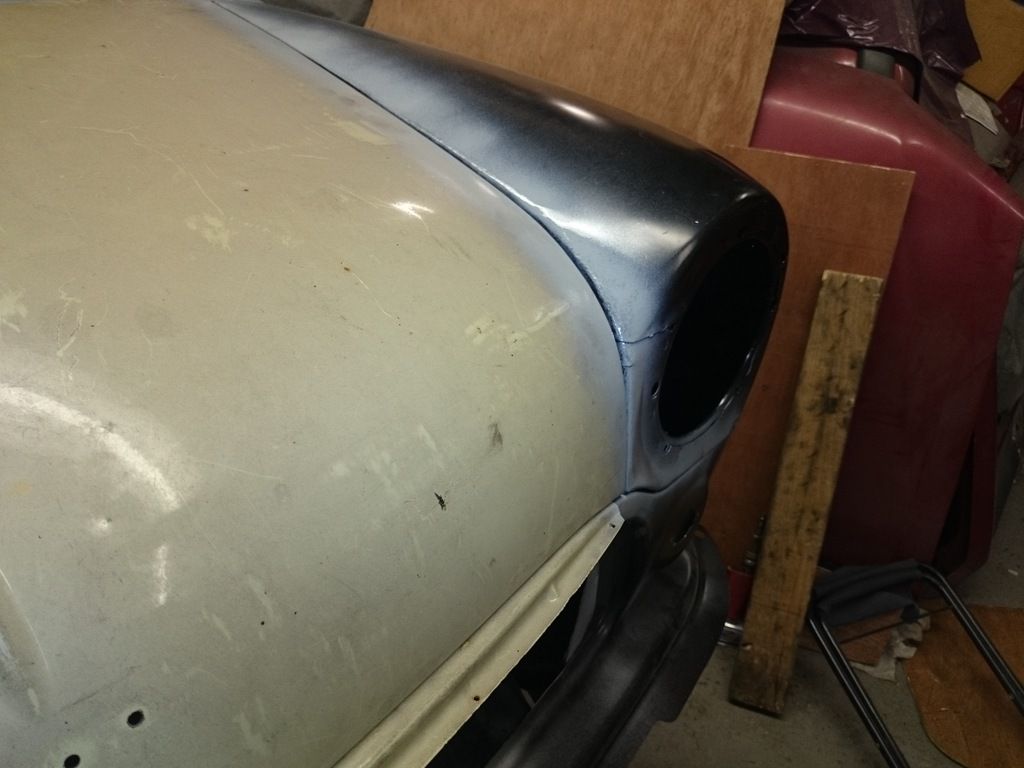
Will unbolt the wings and front panel and get them ready for welding next. Got the dash rail welded in yesterday aswell

Cheers

It wasn't much better down the edge either and around the scuttle needed some work

So after a full day of bashing the gaps aren't far off now


Will unbolt the wings and front panel and get them ready for welding next. Got the dash rail welded in yesterday aswell

Cheers
-
Ollie78
- 850 Super
- Posts: 178
- Joined: Sun Sep 15, 2013 8:50 pm
Re: Mk2 Cooper
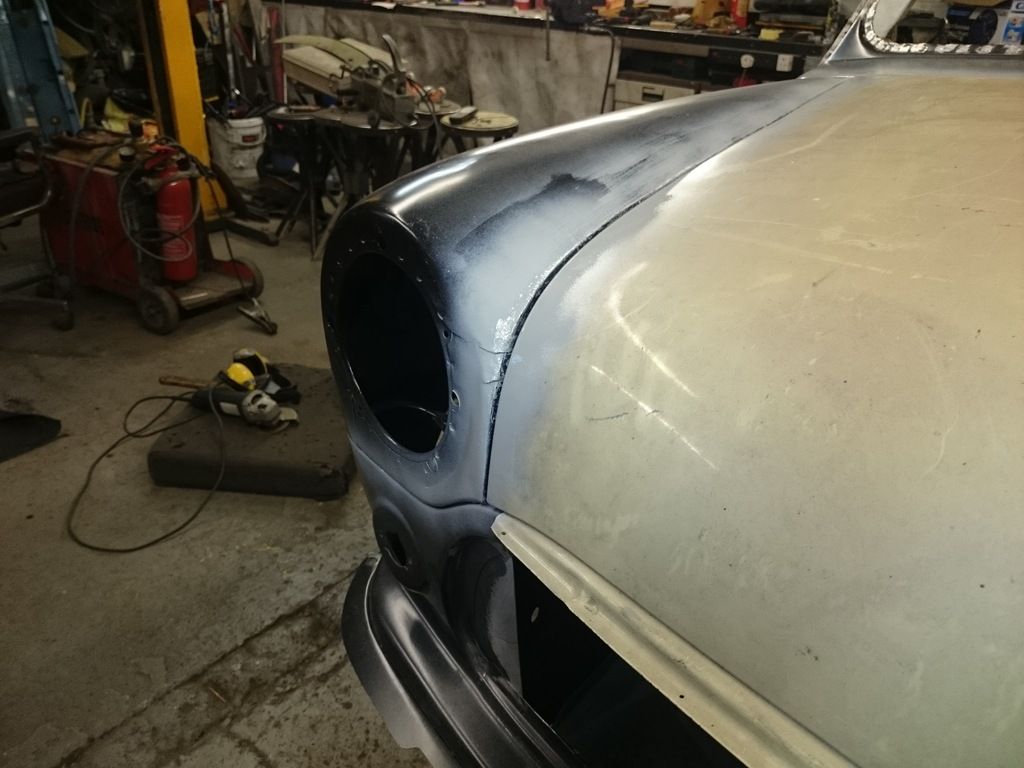
Well done that looks great, I'd be happy if mine looked that good. Did you need to cut or unpick around the headlamp rings to close that bonnet to wing gap?
Ollie.
Ollie.
-
Callum
- 998 Cooper
- Posts: 469
- Joined: Thu Sep 25, 2014 9:01 pm
Re: Mk2 Cooper
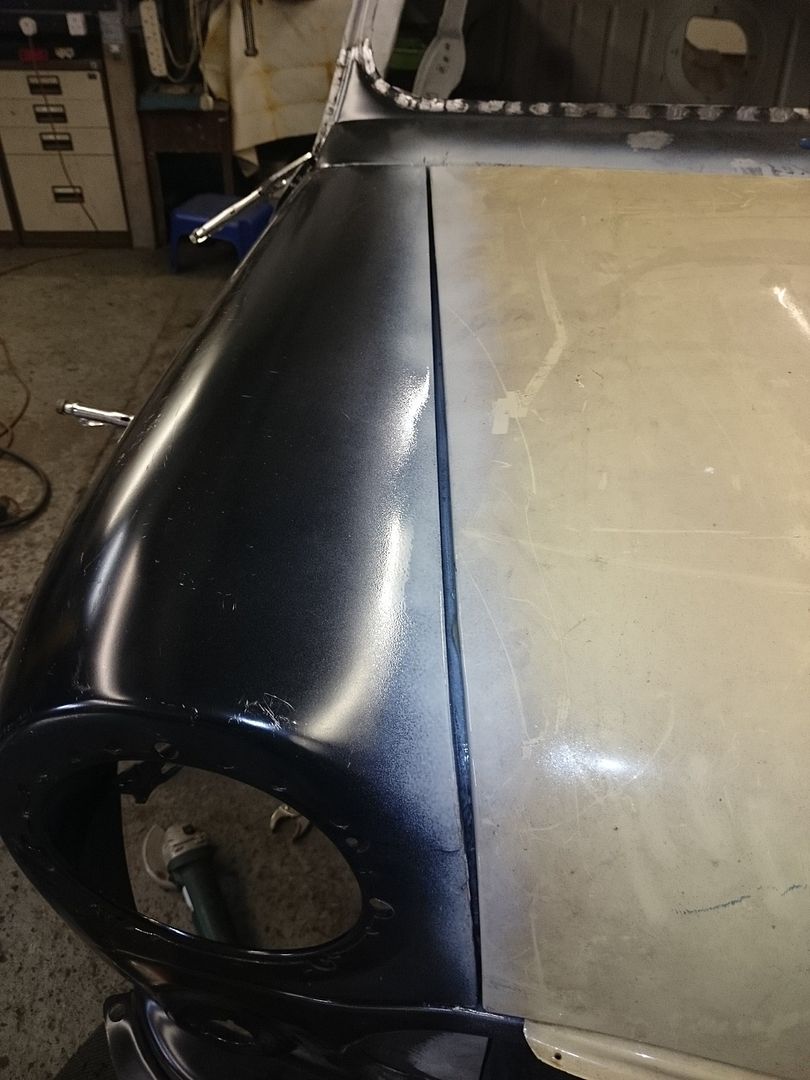
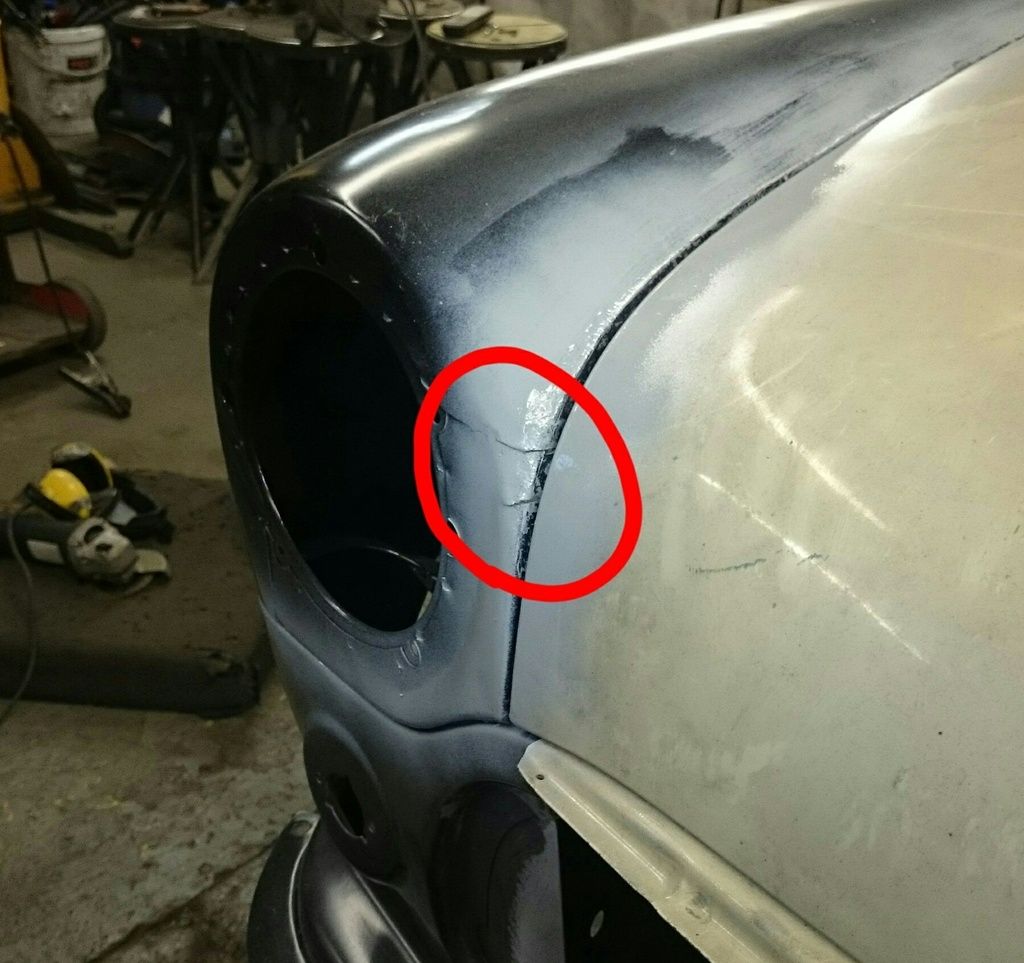
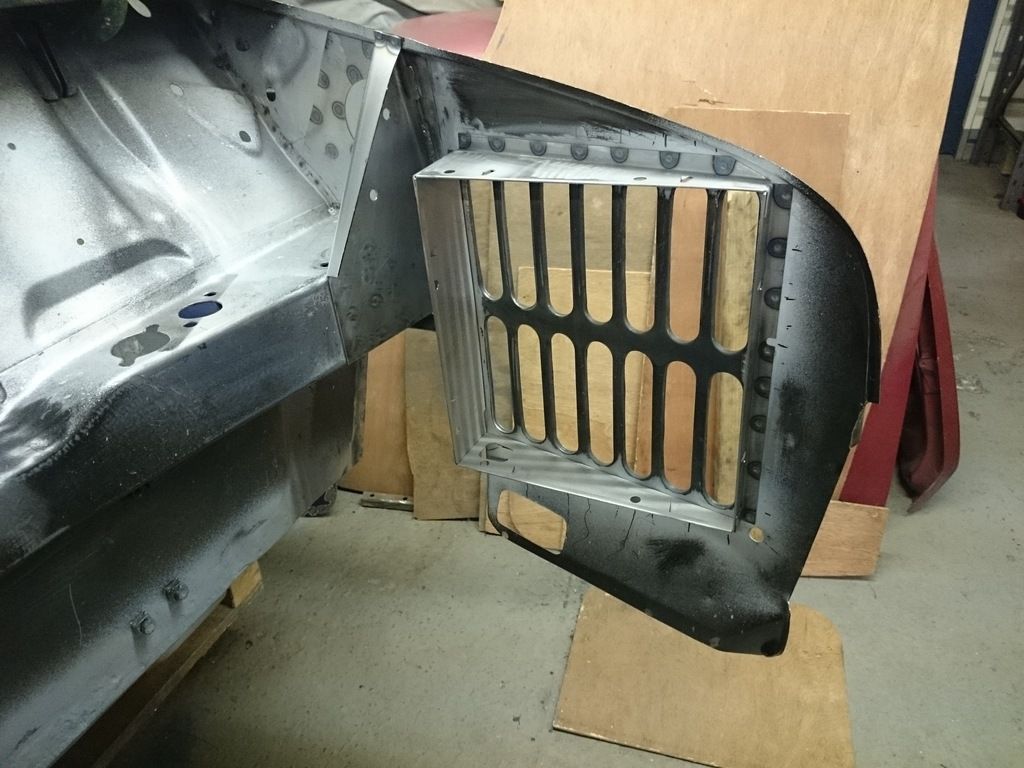
Thanks Ollie. I didn't have to unpick the rings but I did have to cut the wing just under joint where the top part of the wing meets the bottom part. You can see it in this picture, the top line is the wing joint the bottom is the cut line. It still needs some work so is a little rough still.

-
Callum
- 998 Cooper
- Posts: 469
- Joined: Thu Sep 25, 2014 9:01 pm
Re: Mk2 Cooper
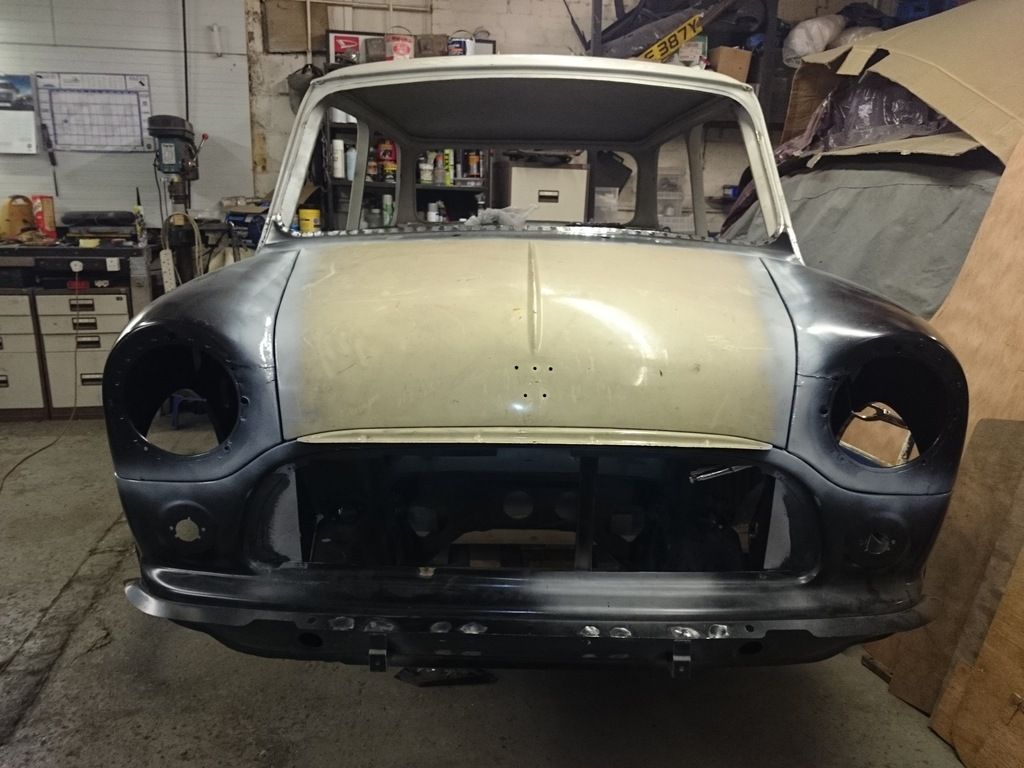
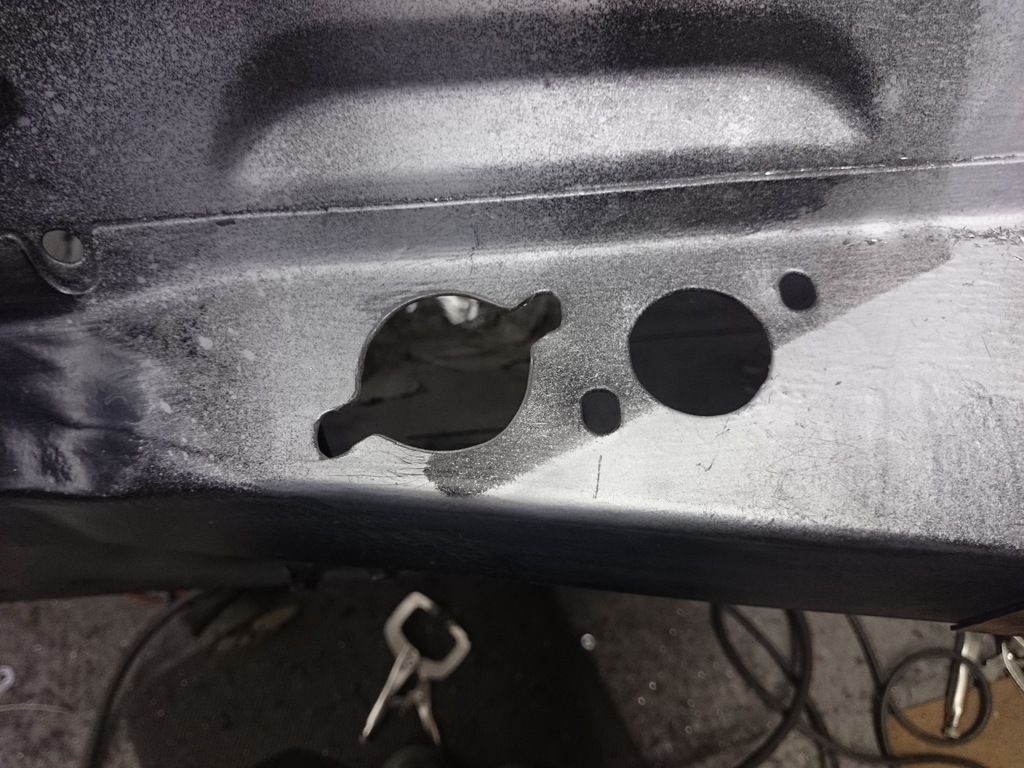
Been working on small details in the engine bay yesterday wanted to get them all done before the wings go on.
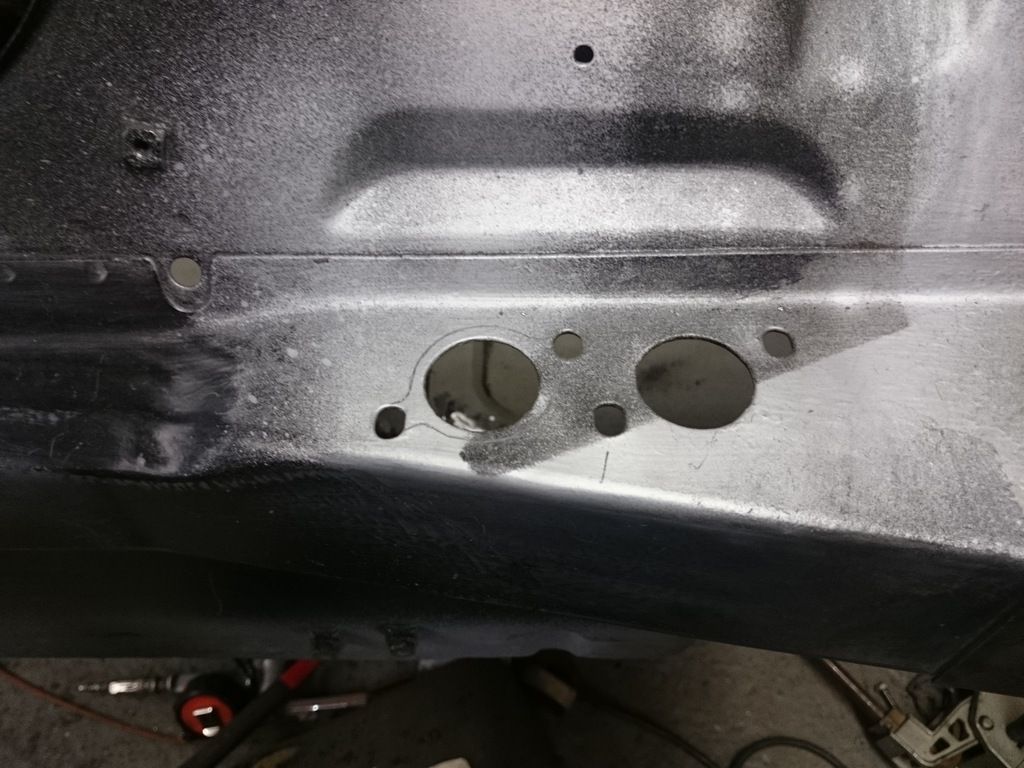
The bulkhead was off a mk1 so i copied the mk2 on saturn shape over to the crossmember where the master cylinders go
Before
After
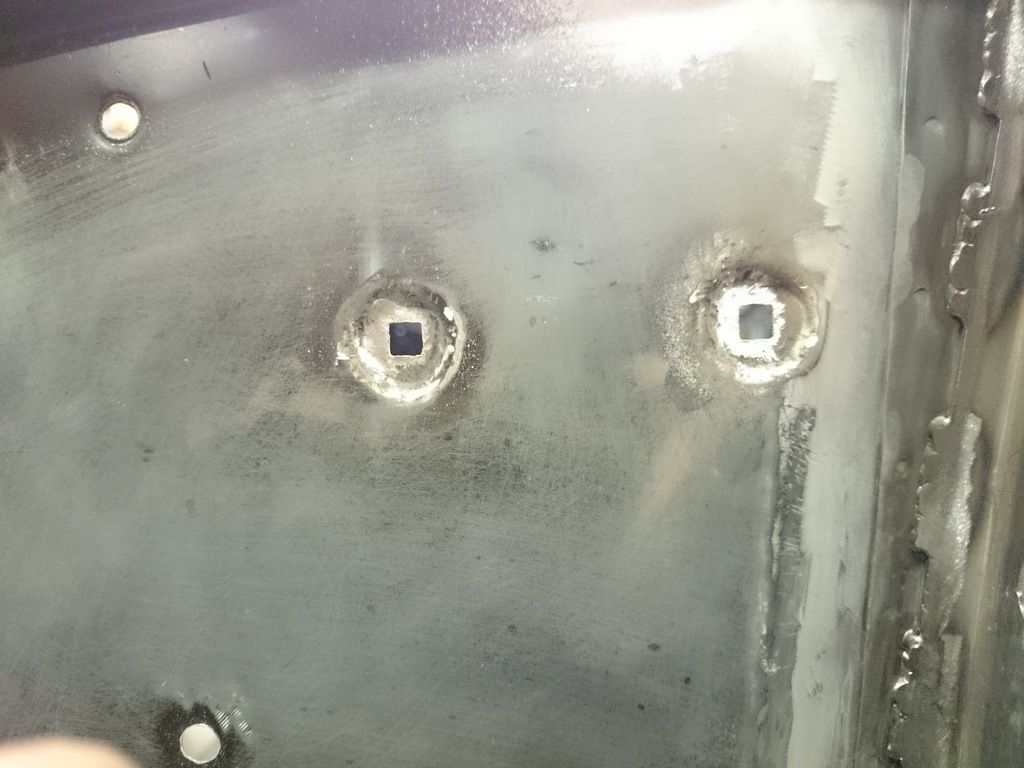
The square holes that the voltage regulator fixes to wernt central, think it must of moved when it was pressed, so i put them right
Before
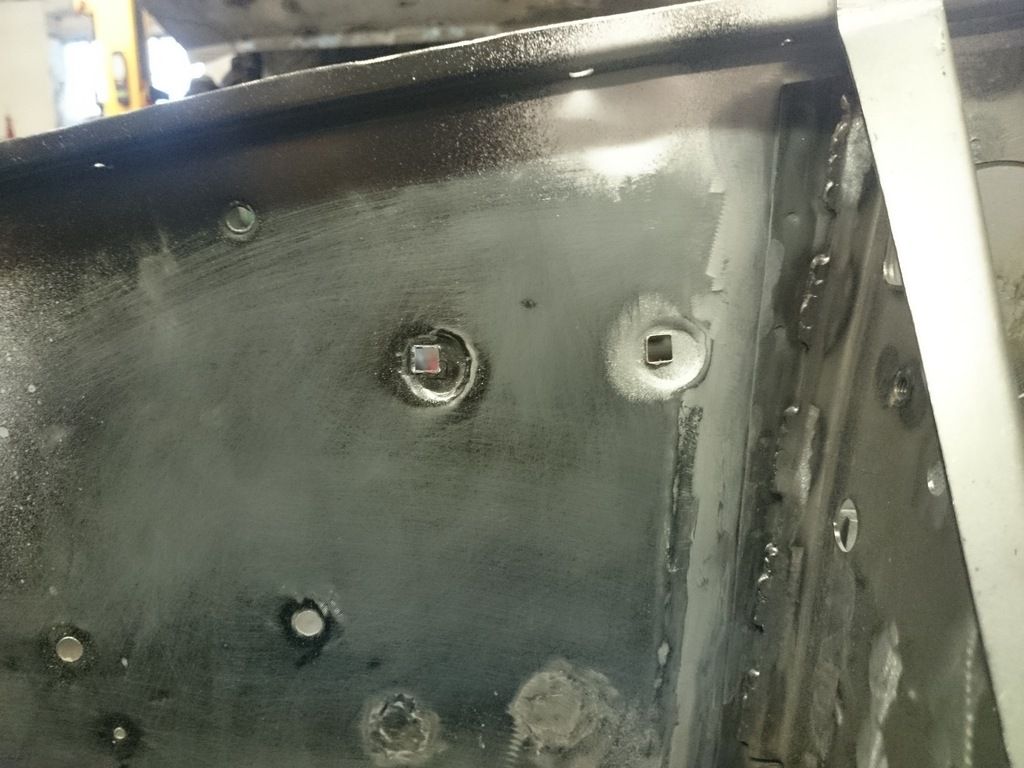
After
Welded the engine steady bracket back on and decided to strengthen it up with some triangulation and a few stitch welds, maybe a bit over the top but this did break off on my last mini
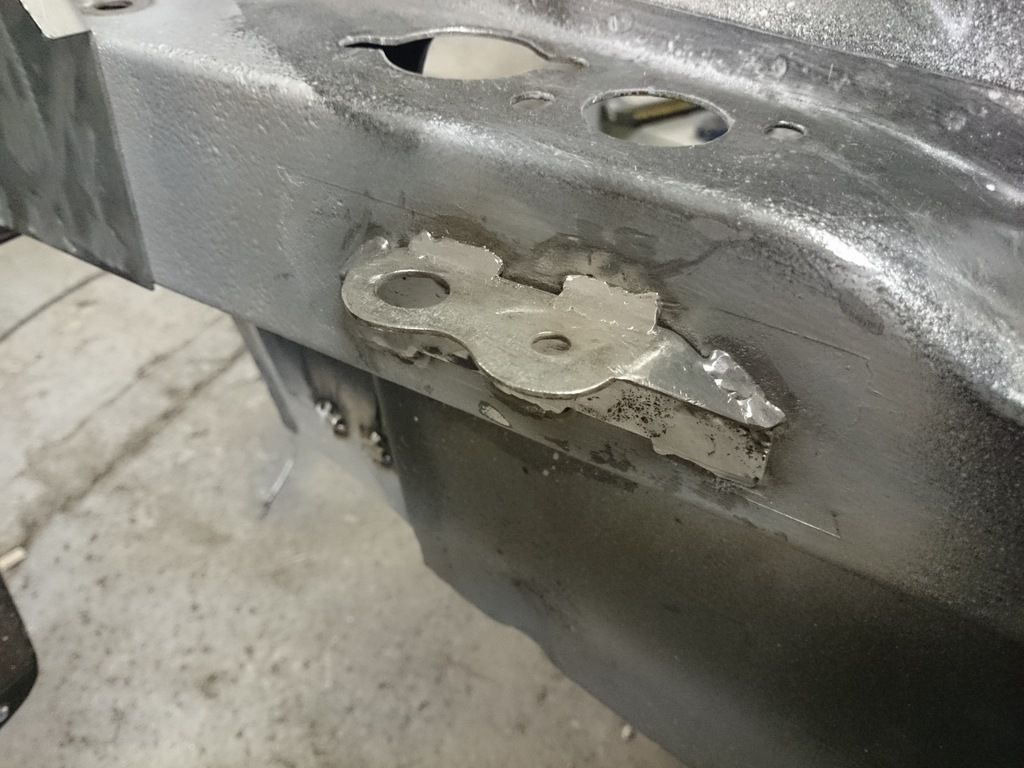
Got the bonnet prop bracket back on, thats that side done
Then the other side was just the radiator cowl
Wings and front panel next
The bulkhead was off a mk1 so i copied the mk2 on saturn shape over to the crossmember where the master cylinders go
Before

After

The square holes that the voltage regulator fixes to wernt central, think it must of moved when it was pressed, so i put them right
Before

After

Welded the engine steady bracket back on and decided to strengthen it up with some triangulation and a few stitch welds, maybe a bit over the top but this did break off on my last mini

Got the bonnet prop bracket back on, thats that side done

Then the other side was just the radiator cowl

Wings and front panel next
-
coopers1968
- 850 Super
- Posts: 184
- Joined: Sat Dec 06, 2014 4:17 pm
Re: Mk2 Cooper
Impressive work...i thought i had a hard restoration..but after seeing projects come alive like these it gives me more energy to finish off mine:)
keep them pics coming as your teaching me along the way!
thanks
keep them pics coming as your teaching me along the way!
thanks
Morris mini 1275cc 65'
Austin mini cooper s 1275cc 68'
Austin mini Super deluxe 850cc 69'
Austin mini cooper s 1275cc 68'
Austin mini Super deluxe 850cc 69'
-
Dr.Mabo

- 998 Cooper
- Posts: 513
- Joined: Wed Jun 27, 2012 1:05 pm
- Location: Germany
- Been thanked: 27 times
-
Ollie78
- 850 Super
- Posts: 178
- Joined: Sun Sep 15, 2013 8:50 pm
Re: Mk2 Cooper
Nice job Callum, I had a look at my mk2 at the weekend and see I will have exactly the same problem with the front wings. Its the new heritage wings, they fit nice with the bonnet (new heritage on mine) all the way down the inner wing until just under the join then splay out just like yours before you modified them.
Good idea with the engine steady, mine had mostly come off and also cracked the bulkhead crossmember with a diagonal split. Keep the pics coming, its motivating me to get started with mine again, you've overtaken me now
Ollie
Good idea with the engine steady, mine had mostly come off and also cracked the bulkhead crossmember with a diagonal split. Keep the pics coming, its motivating me to get started with mine again, you've overtaken me now
Ollie
-
Callum
- 998 Cooper
- Posts: 469
- Joined: Thu Sep 25, 2014 9:01 pm
Re: Mk2 Cooper
Thanks Ollie, it must be quite common with the wings then, will be an easy fix for you.
I remembered that yours had cracked, I think I should of added a spreader plate inside the crossmember like you did also, maybe I still will.
Your build thread has been my biggest reference whilst working through mine, it's funny that I have passed you now, will have to figure the rest out for myself
-
java gt
- 998 Cooper
- Posts: 436
- Joined: Sat Jan 14, 2012 8:04 pm
- Location: Half way between Dublin and Belfast
Re: Mk2 Cooper
You are to be congratulated on your progress so far,I have read this and Ollies thread many times as I study how to tackle my MKI in the garage.I am slowly buying all the panels for it but the sterling/euro exchange has made it even more expensive at the moment.Looking forward to the next instalment of progress.
-
Callum
- 998 Cooper
- Posts: 469
- Joined: Thu Sep 25, 2014 9:01 pm
-
Callum
- 998 Cooper
- Posts: 469
- Joined: Thu Sep 25, 2014 9:01 pm
Re: Mk2 Cooper
(update from what has been lost)
Got the wings welded to the front panel today, was going to prime them in my epoxy mastic aswell but one part of the 2 pack has gone off so need to order some more.
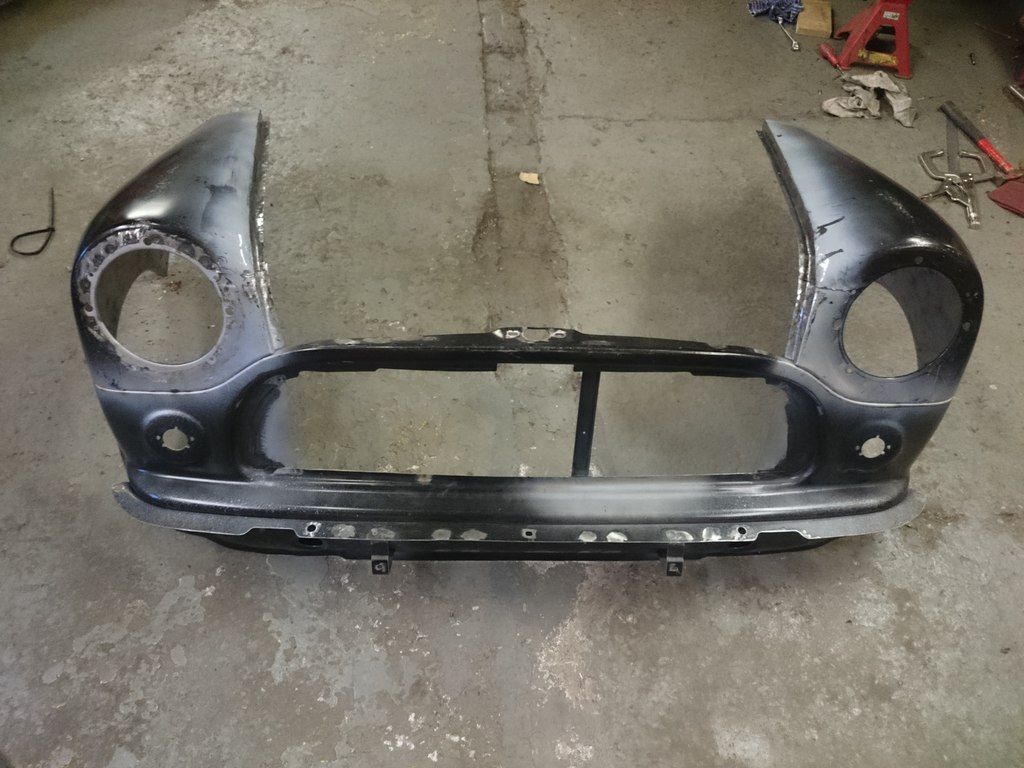

Got the wings welded to the front panel today, was going to prime them in my epoxy mastic aswell but one part of the 2 pack has gone off so need to order some more.


-
Callum
- 998 Cooper
- Posts: 469
- Joined: Thu Sep 25, 2014 9:01 pm
Re: Mk2 Cooper
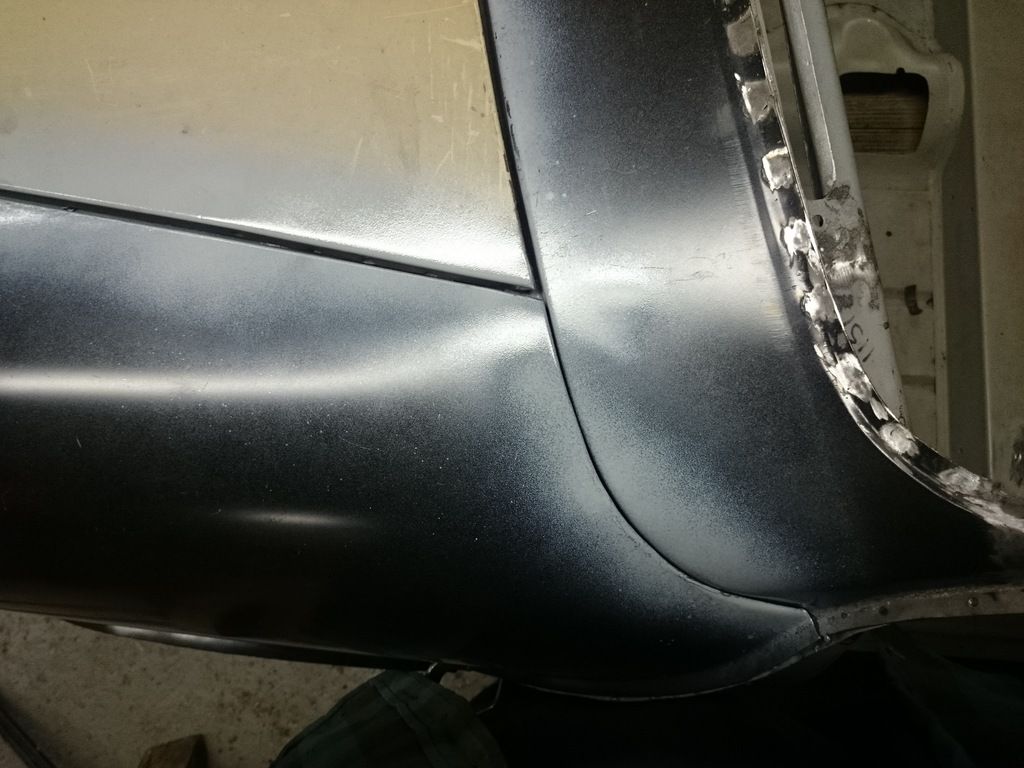
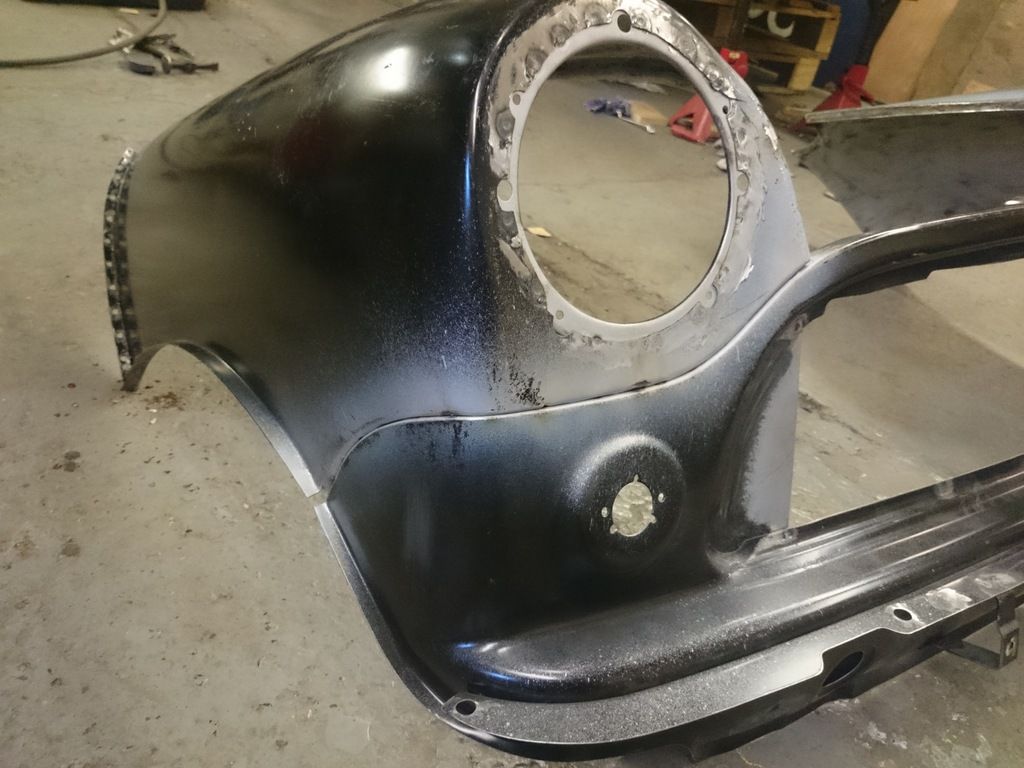
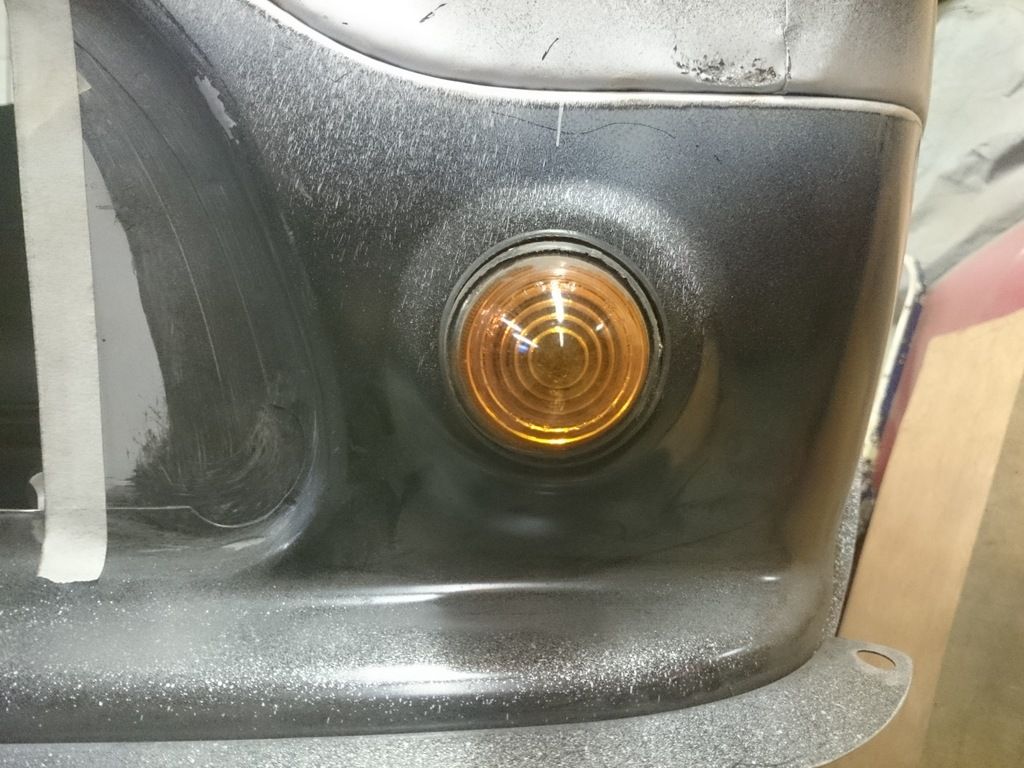
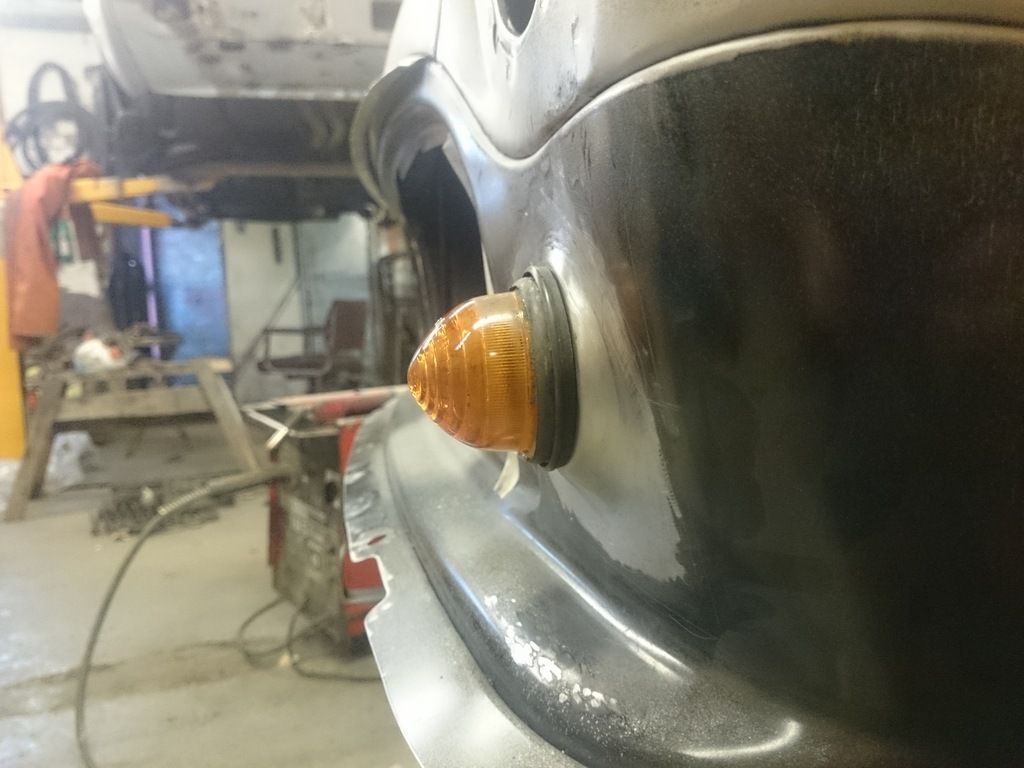
Started on changing the indicator plinths back to original. Didn't realise m machine made the smaller ones until recently, at first i thought i would have to leave it with the larger ones.
Got the passenger side in tonight
Before
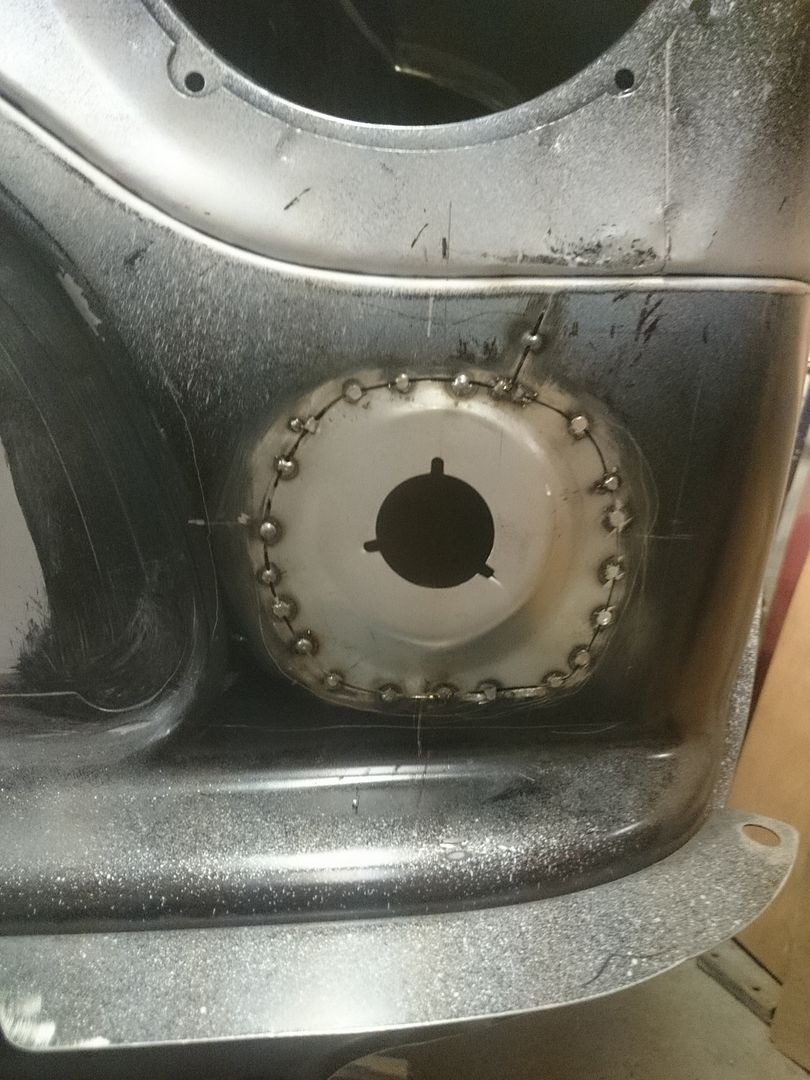
Conversion panel tacked in
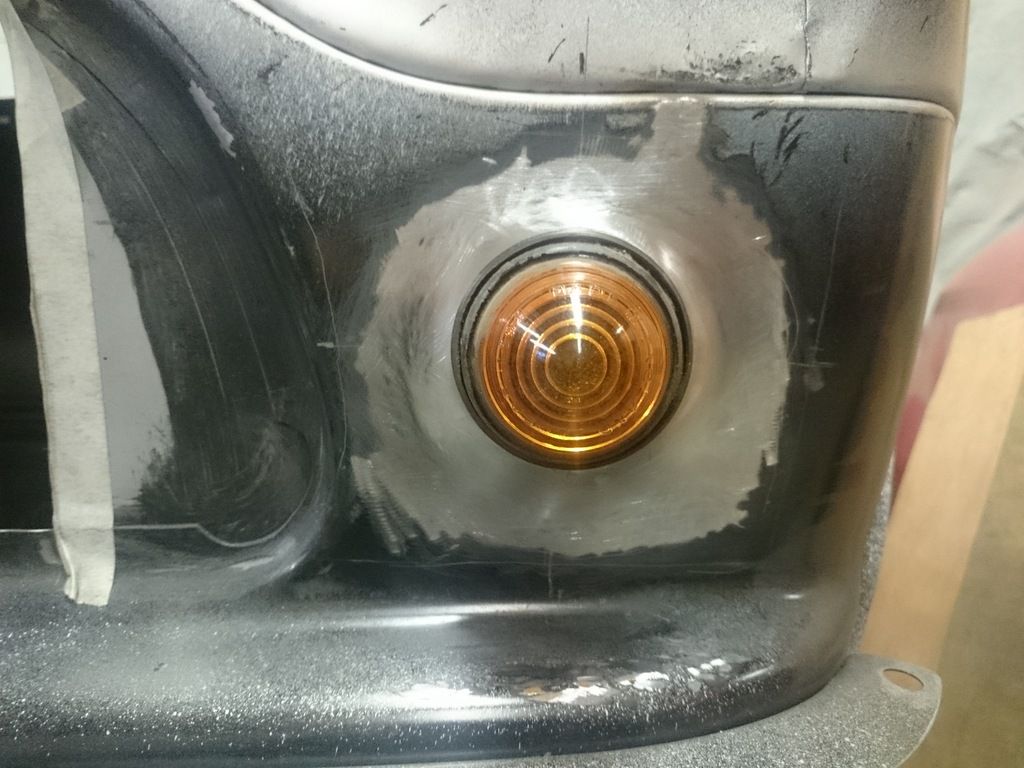
Welded and lininshed
Got the passenger side in tonight
Before

Conversion panel tacked in

Welded and lininshed


-
STG95F
- 1275 Cooper S
- Posts: 1423
- Joined: Fri Jan 14, 2011 6:10 pm
- Location: West Midlands
Re: Mk2 Cooper
Is that a repair panel from M- Machine for the smaller indicators ? or do you have to buy a complete front panel ?
Ian
Ian
-
Callum
- 998 Cooper
- Posts: 469
- Joined: Thu Sep 25, 2014 9:01 pm
Re: Mk2 Cooper
It's a repair panel, the 2nd picture shows the repair panel tacked in, the last picture shows it fully weldedSTG95F wrote:Is that a repair panel from M- Machine for the smaller indicators ? or do you have to buy a complete front panel ?
Ian
-
1064overbore
- Basic 850
- Posts: 38
- Joined: Sun Aug 10, 2014 10:13 pm
Re: Mk2 Cooper
Didnt know later plinths were larger! when did they change over?
Oh and i must say, the panel gaps you're getting satisfy me more than they probably should.
Oh and i must say, the panel gaps you're getting satisfy me more than they probably should.
Last edited by 1064overbore on Thu Apr 23, 2015 11:09 pm, edited 1 time in total.
-
STG95F
- 1275 Cooper S
- Posts: 1423
- Joined: Fri Jan 14, 2011 6:10 pm
- Location: West Midlands
Re: Mk2 Cooper
HI Callum . Thanks for the reply .
Is it a new panel M-Machine started doing recent ?
Ian
Is it a new panel M-Machine started doing recent ?
Ian
-
Callum
- 998 Cooper
- Posts: 469
- Joined: Thu Sep 25, 2014 9:01 pm
Re: Mk2 Cooper
Thanks very much, I have only recently found out about the different sizes myself so I'm not sure when they changed to the large one?1064overbore wrote:Didnt know later plinths were larger! when did they change over?
Oh and i must say, the panel gaps you're getting satisfy me more than they probably should.