Page 3 of 7
Re: 1964 Rust project
Posted: Fri Jun 09, 2017 8:14 am
by Frogeye61
Thanks, good point. I will use spacers both around the edge and between door and closing edges while determining fit of the A panel.
Re: 1964 Rust project
Posted: Wed Jun 14, 2017 8:35 am
by Frogeye61
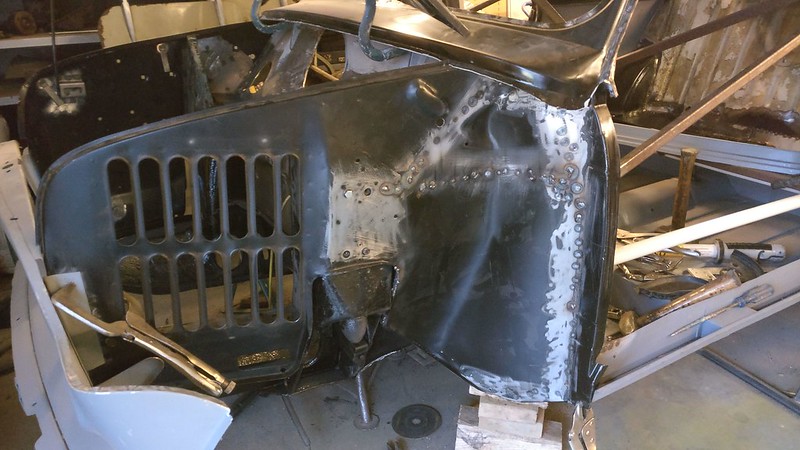
Well, I fixed up the inner A-post panel...
 IMG_20170612_195741s
 by
frogeye61, on Flickr
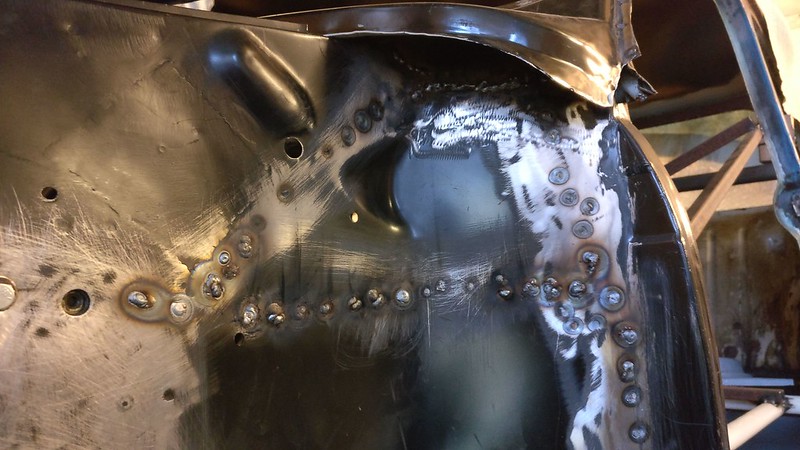
cleaned up the edge flanges, cleaned up the inner fender where it meets the flanges, and spot welded the left inner fender in place. Then plug welded where I couldn't reach with the spot welder, and CO2 welded finishing edges.
 IMG_20170613_211539s
 by
frogeye61, on Flickr
The top is ready for the scuttle double plate
 IMG_20170613_211658s
 by
frogeye61, on Flickr
Re: 1964 Rust project
Posted: Wed Jun 21, 2017 10:16 am
by Frogeye61
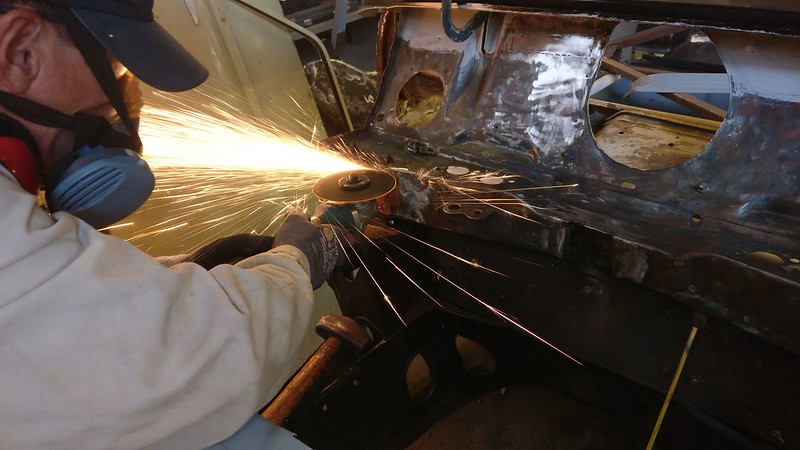
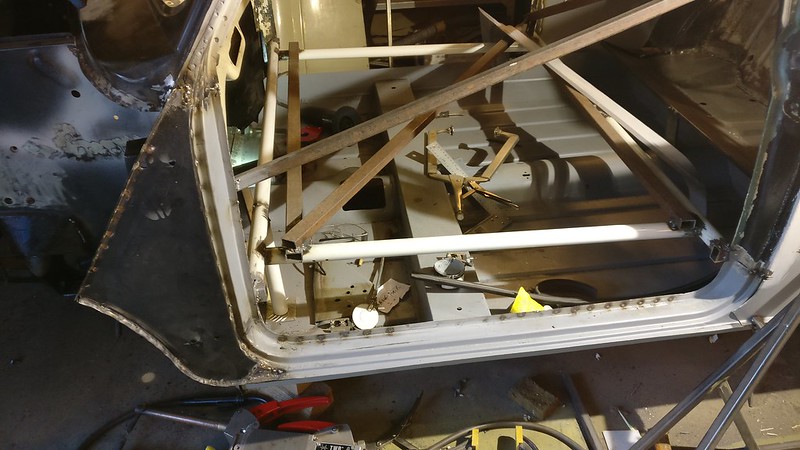
Well, this Tuesday we took care of a number of smaller items.
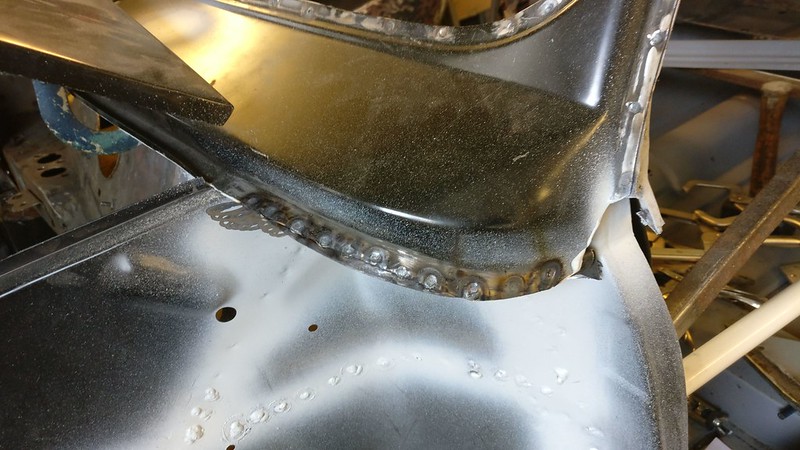
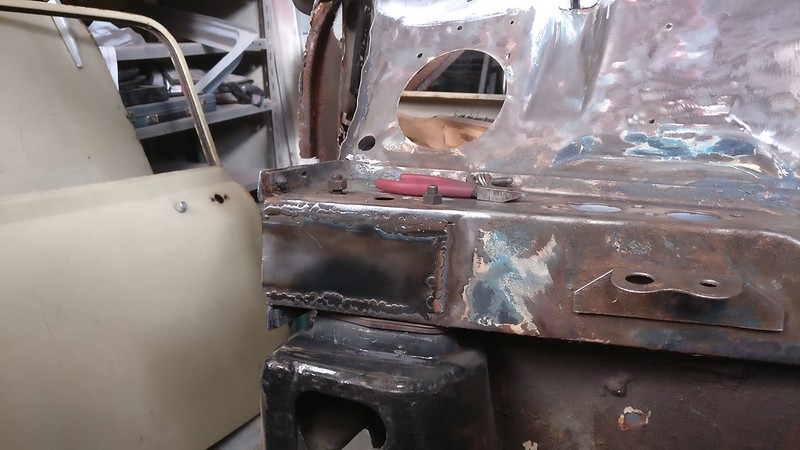
Scuttle closing panel, though a bit hard to see in the photos. Used the spot welder on the front edge and full weld against the inner fender.
 IMG_20170620_192136s
 by
frogeye61, on Flickr
 IMG_20170621_073814s
 by
frogeye61, on Flickr
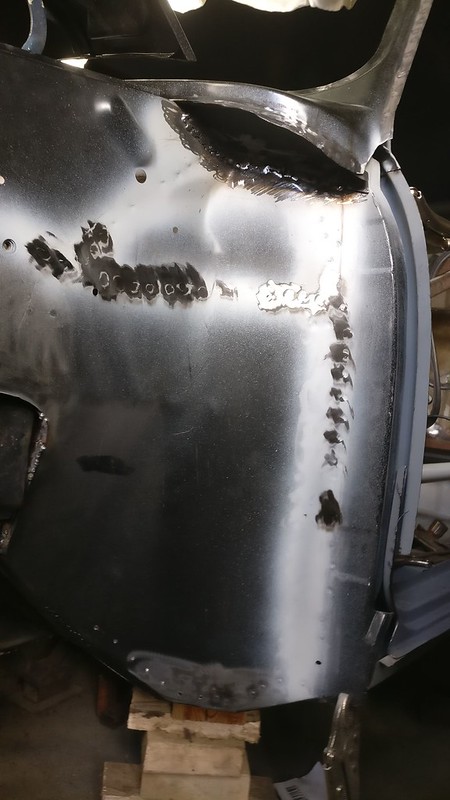
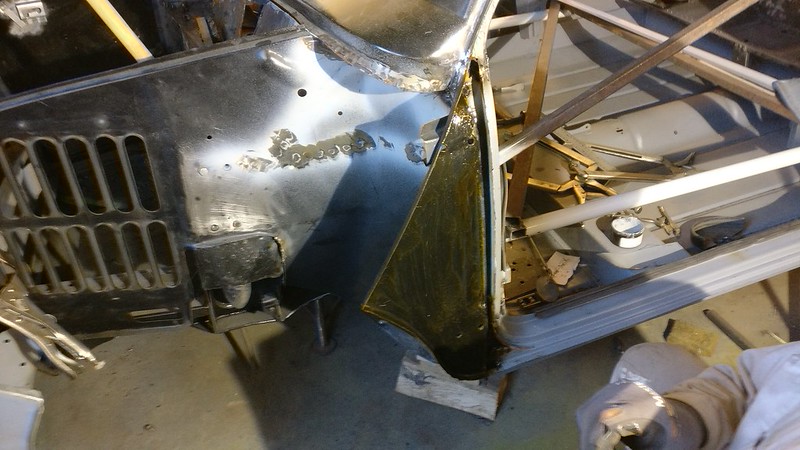
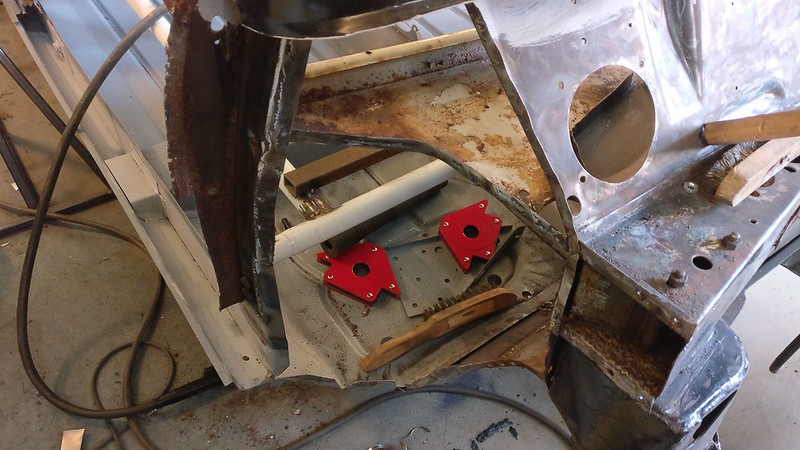
Repaired the rust behind the right side fender brace
 IMG_20170620_194111s
 by
frogeye61, on Flickr
I must say it still needs a bit of clean-up but thoroughly cleaned inside and rust protected. The brace itself also got some lovely new numbers. (not pictured)
 IMG_20170621_073822s
 by
frogeye61, on Flickr
The rear subframe braces were welded in place. They aren't too bad, but need a bit of finishing.
 IMG_20170621_073915s
 by
frogeye61, on Flickr
Under-door panel is trimmed to fit the surrounding panels.
 IMG_20170621_073946s
 by
frogeye61, on Flickr
And the A post rear face is to be positioned correctly with relation to the door.
 IMG_20170621_073957s
 by
frogeye61, on Flickr
Productive evening, though I would like things to go a bit faster.
Re: 1964 Rust project
Posted: Sat Jun 24, 2017 9:25 pm
by Van13
Well done for tackling this mini it's nice to see talented people at work
Re: 1964 Rust project
Posted: Mon Jun 26, 2017 10:10 am
by Frogeye61
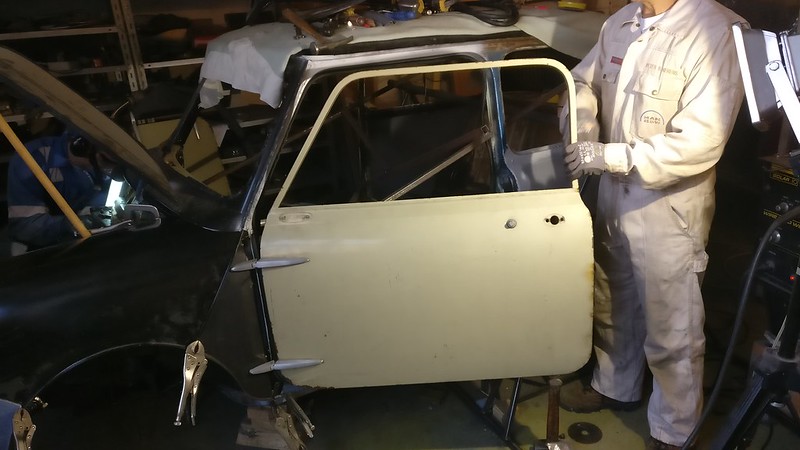
Lots of fun last weekend.
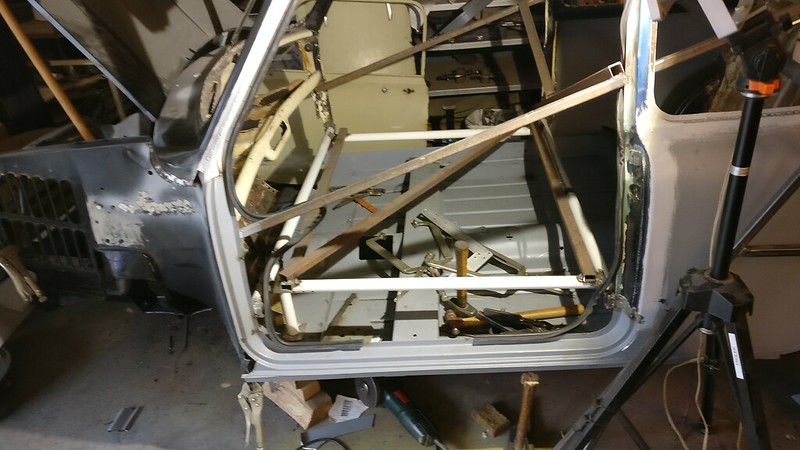
The 64 Mini: I've been working on fitting the left side door, adjusting and placing the door step, door pillar, and inner A-panel in relation to the front wing, inner fender and front panel. Everything got clamped or tack welded together with the door bolted to hinges and bolted to the inner A-panel with spacers to replace the outer A-panel. The door seal strip was also partially installed to hold distance between the door and body.
Door is held vertically with a single C-clamp and in towards the body with another. A couple iterations of door step panel placement with tack welds and I found just the right place. Door fits well all around. A panel fits well, and front wing fits against inner fender, A-panel, front grille surround, and of course the bonnet.
 IMG_20170624_161616
 by
frogeye61, on Flickr
The fit here is absoutely NOT good.
 IMG_20170624_163108
 by
frogeye61, on Flickr
Much better.
 IMG_20170624_172952
 by
frogeye61, on Flickr
 IMG_20170624_173003
 by
frogeye61, on Flickr
 IMG_20170624_173125
 by
frogeye61, on Flickr
 IMG_20170624_163516
 by
frogeye61, on Flickr
Re: 1964 Rust project
Posted: Wed Jun 28, 2017 9:43 am
by Frogeye61
Well, after the door fit nicely last weekend, we used our usual Tuesday evening "boy's night" and after very much re-checking tack-welded the inner A-panel in place. We checked the door for motion...
 IMG_20170627_183928
 by
frogeye61, on Flickr
and since everything was ok, I went ahead and full welded the A-panel. There were several pieces that needed some small patches but it seemed ok in the end. We then gave a thorough covering with waxoil (cavity wax, hulerumsbeskyttlese)...
 IMG_20170627_203315
 by
frogeye61, on Flickr
and mounted the outer A-panel with spot welds along the exposed edges and along the foot step and A post cover. (not completely finished in this photo)
 IMG_20170627_211939
 by
frogeye61, on Flickr
Re: 1964 Rust project
Posted: Wed Jun 28, 2017 3:14 pm
by Frogeye61
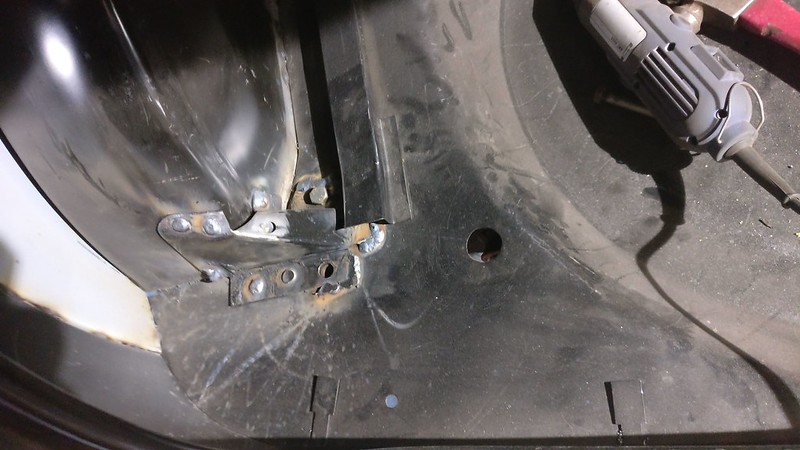
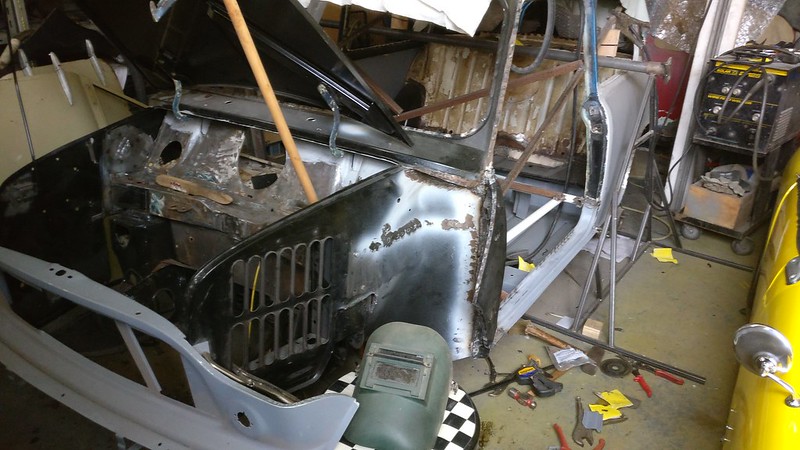
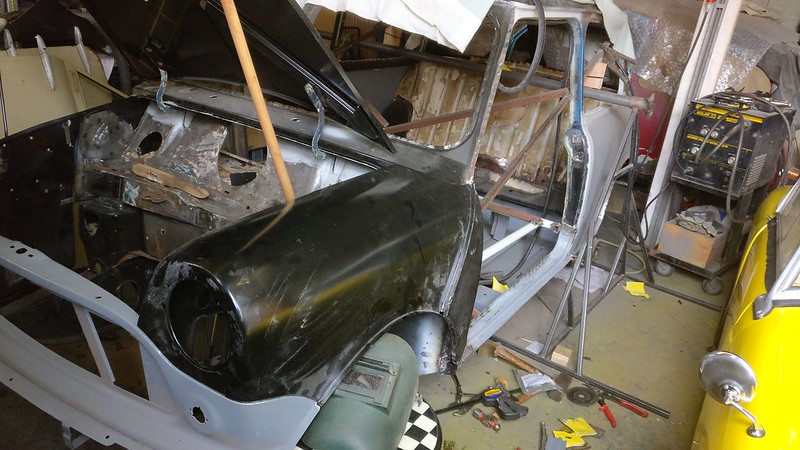
While I was doing the left door opening and A-panel, Tim was working on the right inner wing. Front floor patch is done but not yet the edges of the A-post vertical panel or dash shelf. The inner wing fits well for now.
 IMG_20170628_074501
 by
frogeye61, on Flickr
Regarding fit of the left wing, it seems quite good, as in it can be placed directly on top of the existing surrounding metal and has good gap with the bonnet, A-panel, and front panel.
 IMG_20170628_074555
 by
frogeye61, on Flickr
 IMG_20170628_074547
 by
frogeye61, on Flickr
Re: 1964 Rust project
Posted: Thu Jun 29, 2017 5:55 pm
by Andrew1967
Excellent work here and I'll say again that I'll be referring to this thread many times when I start my S project.
Re: 1964 Rust project
Posted: Mon Jul 03, 2017 9:47 am
by Frogeye61
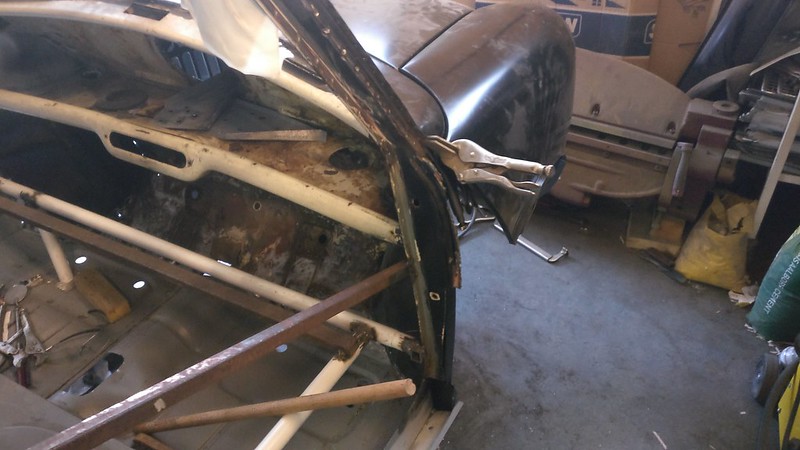
Due to domestic requirements and duties, I only got a bit to work on the Mini. I managed to repair all the flanges which attach the right front inner wing to the body. Most had been badly rusted and cut to remove the rust. One, the parcel shelf had been accidentally cut in half. It's a good thing he didn't cut it completely off. I butt welded new flanges on all places which were missing, and the bottom inner panel of the A-post was also missing. This piece was otherwise spot welded to the inner panel of the floor section. All parts ground smooth awaiting Tuesday when we will install the inner wing.
 IMG_20170702_175023
 by
frogeye61, on Flickr
 IMG_20170703_074905
 by
frogeye61, on Flickr
Re: 1964 Rust project
Posted: Mon Jul 03, 2017 10:02 am
by Frogeye61
Ja, I also found time to make a template for inner wing protectors. Very necessary in Denmark, especially with the odd MK1 design of hinge mount reinforcements being directly exposed to road dirt.
First a cardboard template
 IMG_20170629_170624
 by
frogeye61, on Flickr
Then another better cardboard template (not shown) then an aluminium template made of 0.3 mm aluminium.
 IMG_20170629_175235
 by
frogeye61, on Flickr
The final will be of 1.5 mm aluminium. The edges will be cut back a bit so I can mount a sealing rubber edge. Mounting will be onto the shock flange mount bolts, bolts on the front panel, and I will weld small flanges onto the lower door hinge reinforcement and lower inner wing.
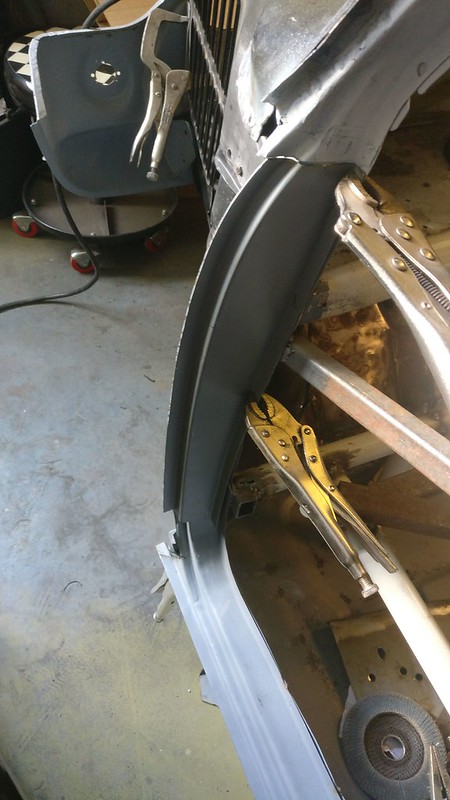
It fits under the wing
 IMG_20170629_175141
 by
frogeye61, on Flickr
and radiator air will have to exit between the inner wing protector and the front valence.
 IMG_20170629_175148
 by
frogeye61, on Flickr
Re: 1964 Rust project
Posted: Wed Jul 05, 2017 3:00 pm
by Frogeye61
Tuesday evening as usual; re-positioned the right side inner wing and after much checking and alignment spot welded the sections I could and then plug welded the sections I couldn't reach with the spot welder.
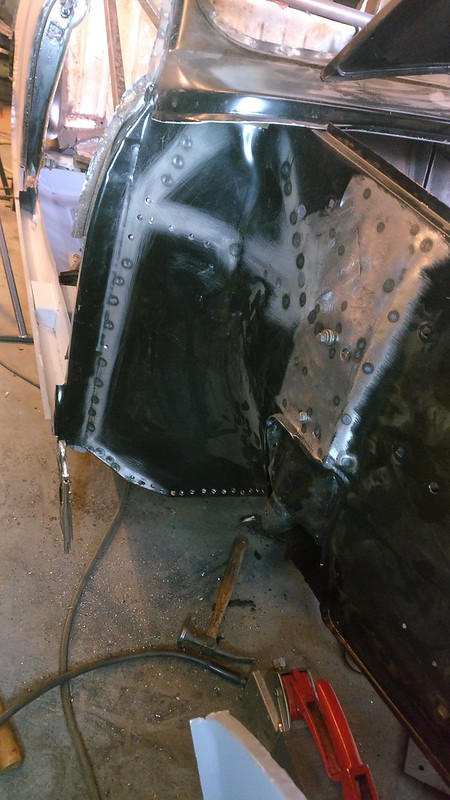 IMG_20170704_195609
 by
frogeye61, on Flickr
 IMG_20170704_195623
 by
frogeye61, on Flickr
Welded on the inner wing's replacement top flange and all internal welding
 IMG_20170705_074812
 by
frogeye61, on Flickr
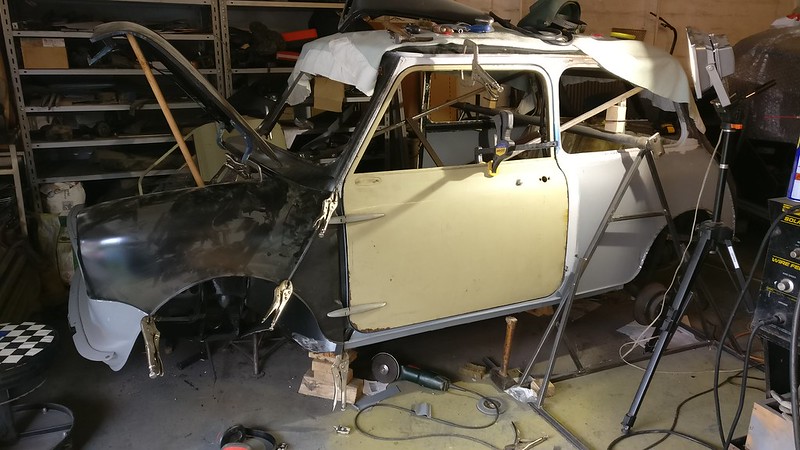
We tested temporary fitting of both wings, both before and after fitting the inner wings and front panel. A couple spots on the front panel to hold it in place and it might eventually look like these snaps.
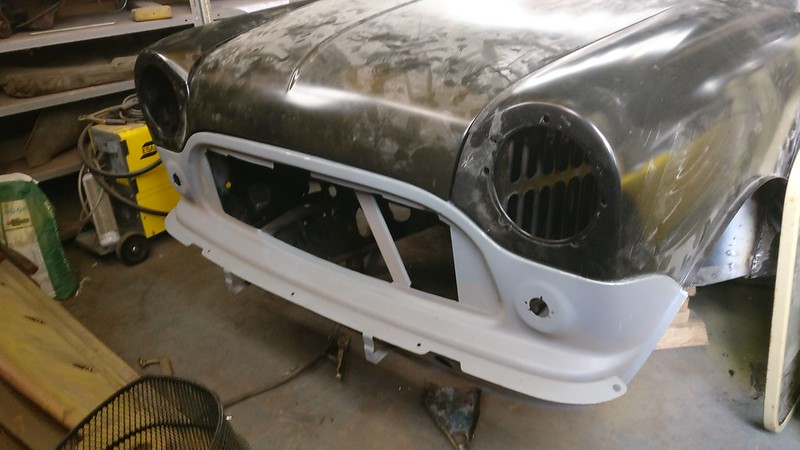 IMG_20170705_074753
 by
frogeye61, on Flickr
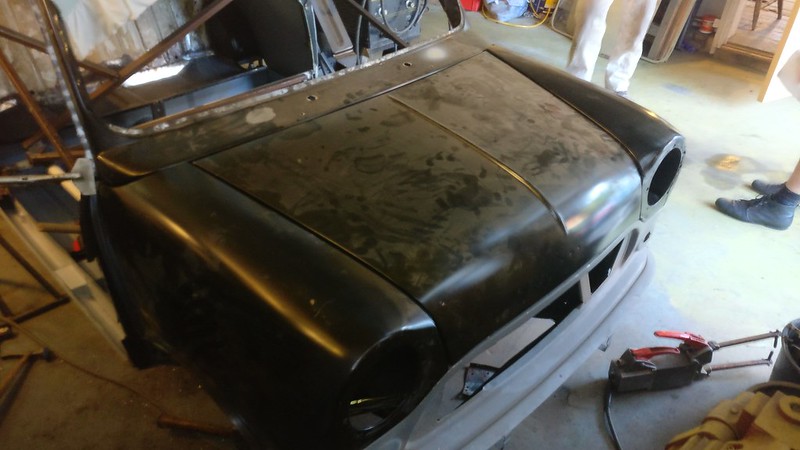 IMG_20170704_204551
 by
frogeye61, on Flickr
Right side A-panel, door and foot step panel still need fitting.
 IMG_20170704_204610
 by
frogeye61, on Flickr
Re: 1964 Rust project
Posted: Wed Jul 12, 2017 11:57 am
by Frogeye61
Last night's endeavors were less fruitful than expected. Sorry, no pictures as it would be very difficult to express the dilemma.
The exact culprit is elusive at this time, however symptoms are that the right side door, while spaced correctly to the right rear wing, and bolted to the A-panel via the two hinges, comes about 10 mm short of the front wing. The wing which itself is properly in line with the scuttle (one-piece together with windscreen surround), and also aligns properly with the front edge of the bonnet, and also with the front panel, whilst the bonnet is also nicely aligned with the scuttle.
Measurements done by Tim did not reveal the source of any discrepancy so I am now forced to measure again myself, and possibly to make some "unorthodox" solutions.
It may not seem like much done for the last week, but it does take quite a bit of time to properly align the panels. And because I didn't work on the Mini last weekend. I instead test drove my Frogeye. First time on the road since the early 80's (I've owned it since 73). For that you get a few pictures (and a short film).
 IMG_20170708_174452
 by
frogeye61, on Flickr
 IMG_20170708_145559
 by
frogeye61, on Flickr
 IMG_20170708_151844
 by
frogeye61, on Flickr
 VID_20170708_145208
 by
frogeye61, on Flickr
Re: 1964 Rust project
Posted: Wed Jul 12, 2017 12:19 pm
by Nick W
doors can vary in size from car to car, I had a nos door that was 10mm shorter than the other side door, I was told it was a Welsh door


if everything seems straight ,just mig a small strip on the front edge ,refit the door and then adjust the gap with a sanding disk.
Nick
Re: 1964 Rust project
Posted: Wed Jul 12, 2017 1:15 pm
by Callum
I did what Nick suggested on my doors. It was quite a big gap so chipped the flux off a welding rod and migged that down the edge
Re: 1964 Rust project
Posted: Fri Jul 14, 2017 12:51 pm
by Frogeye61
Well, I found a solution to the non-fitting components. I re-measured everything and found no fault with tim's measurements. Everything was ok. Possibly the only real problem is the scuttle flange could be a bit too long, therefore interfering with the front wing.
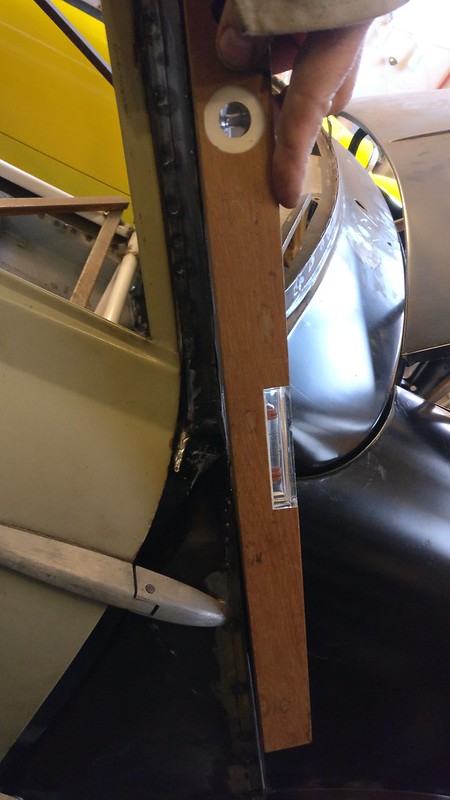
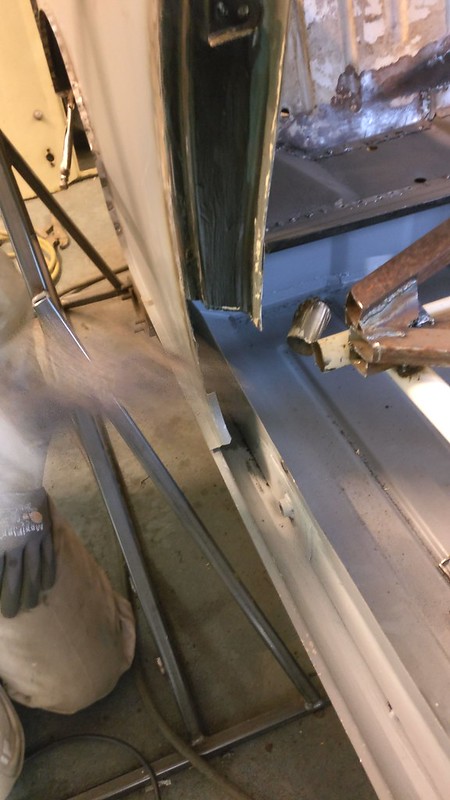
By keeping the door in the correct position with respect to the window frame and clearance to the rear wing, hinges as far forward as possible by slight filing on the mounting holes, A-panel as far forward as possible which also gave good clearance to the door and aligned with the windshield a-post, and with the front wing as far back as possible by slight forming of the contact point with the scuttle... I know that was long...
I have added a small sliver (8mm) to the length of the A-panel.
 IMG_20170712_082037
 by
frogeye61, on Flickr
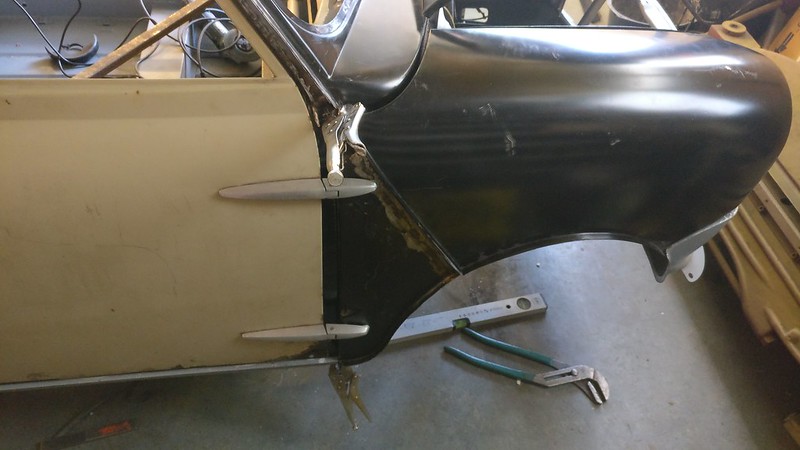
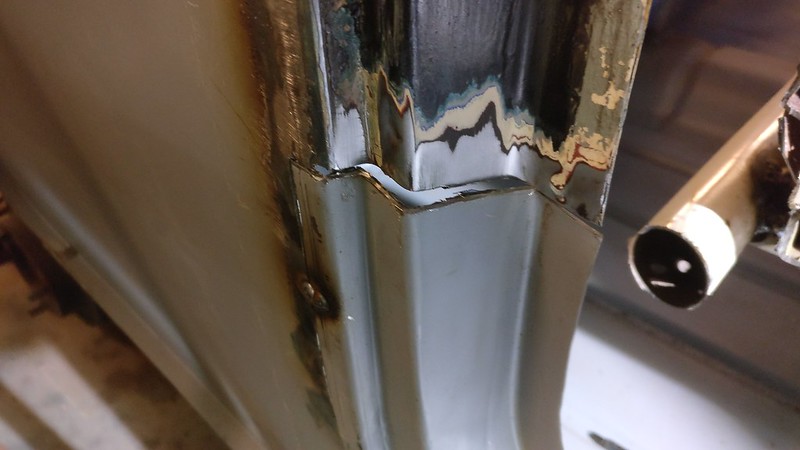
It now fits like a charm.
 IMG_20170712_203225
 by
frogeye61, on Flickr
This was absolutely not possible before. The seam was like a snake. It is now straight.
 IMG_20170712_203140
 by
frogeye61, on Flickr
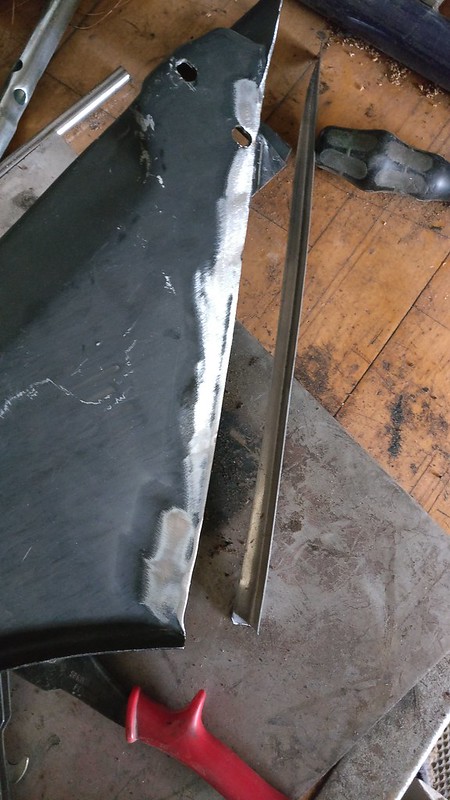
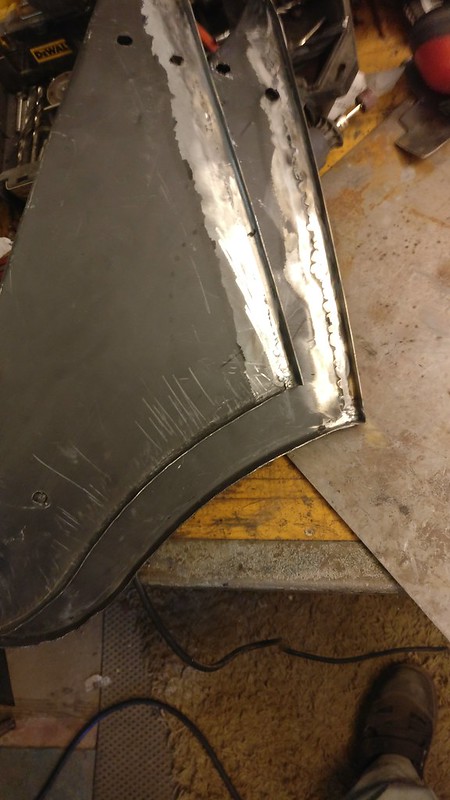
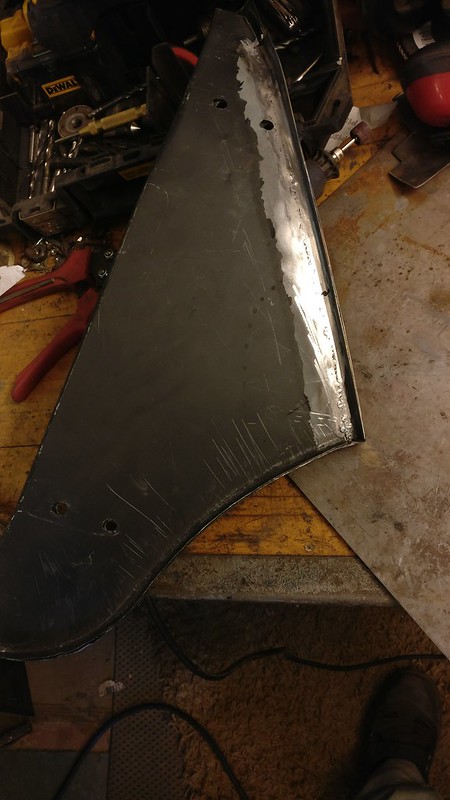
I have of course modified the outer A-panel to match. The bottom edge was deficient by about 5 mm so was beat into alignment.
 IMG_20170713_200854
 by
frogeye61, on Flickr
the two edges fit like a charm. (yes there are two panels in the photo)
 IMG_20170713_200851
 by
frogeye61, on Flickr
Re: 1964 Rust project
Posted: Wed Jul 19, 2017 9:22 am
by Frogeye61
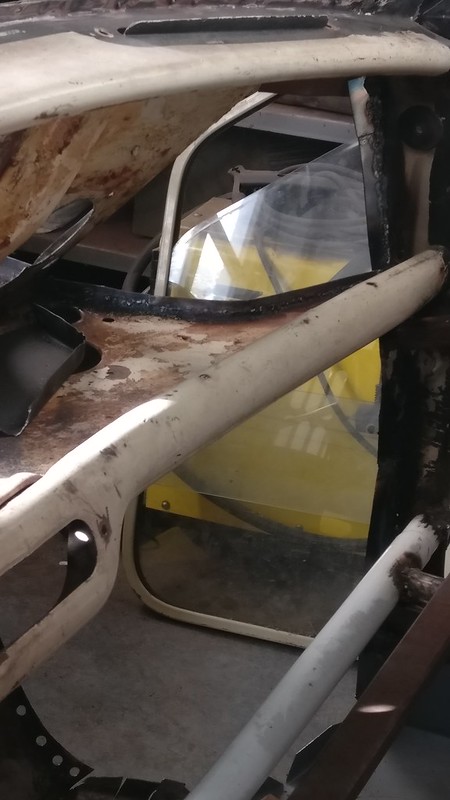
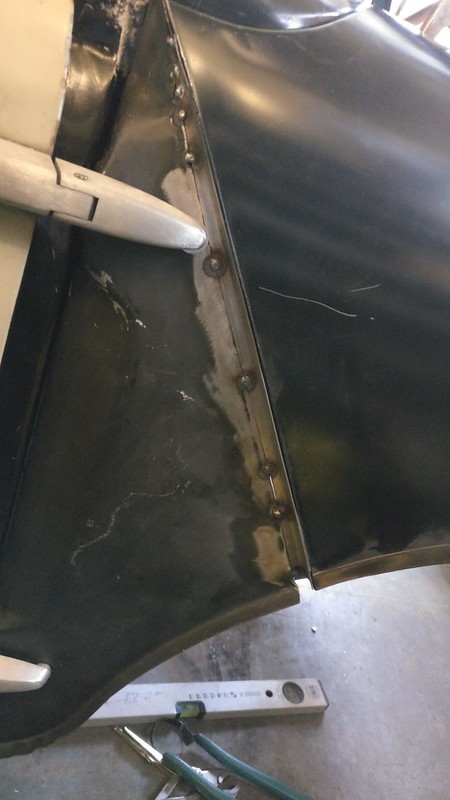
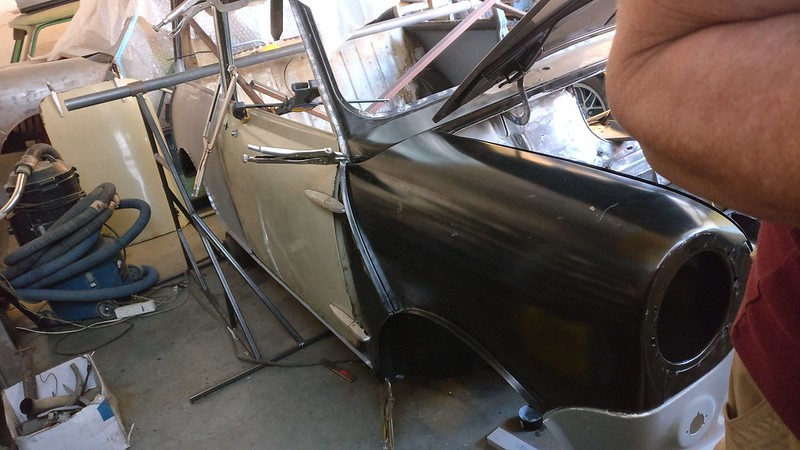
We finally got the A-panel mounted, aligned and welded in place. The door fits fine and despite the appearance in this photo, it really does fit at the bottom.
 IMG_20170715_160303
 by
frogeye61, on Flickr
 IMG_20170715_160334
 by
frogeye61, on Flickr
The yellow appearance is a reflection of something behind me. The inner A-panel is covered in rust protection.
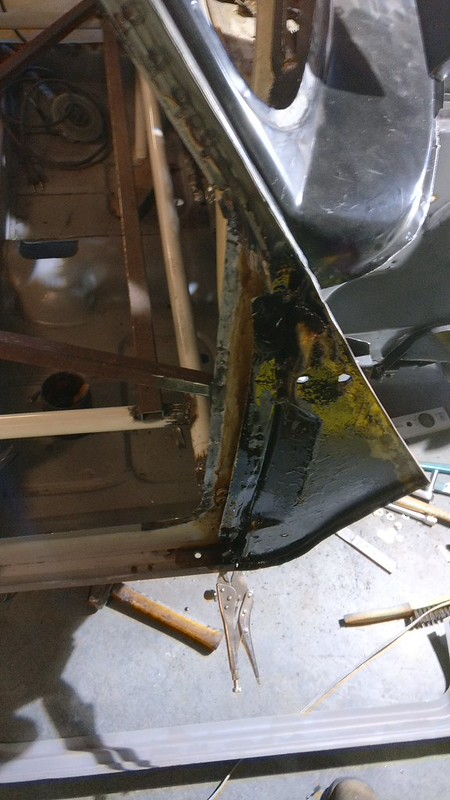 IMG_20170718_201749
 by
frogeye61, on Flickr
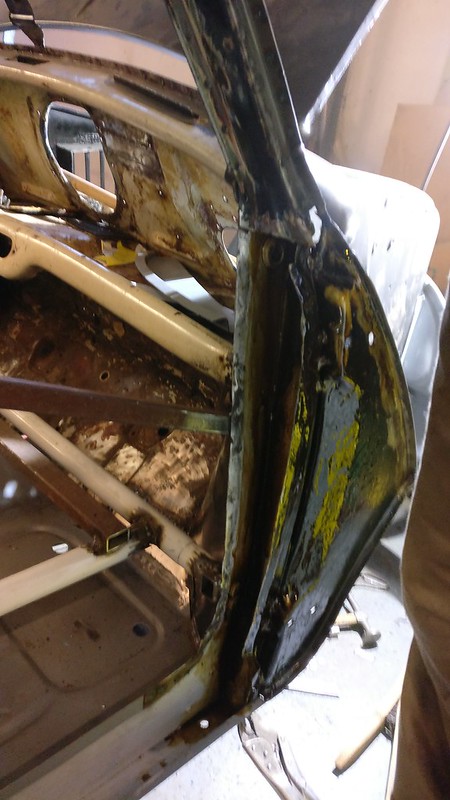 IMG_20170718_201805
 by
frogeye61, on Flickr
Welds inside the wing are ground reasonably smooth.
 IMG_20170718_201755
 by
frogeye61, on Flickr
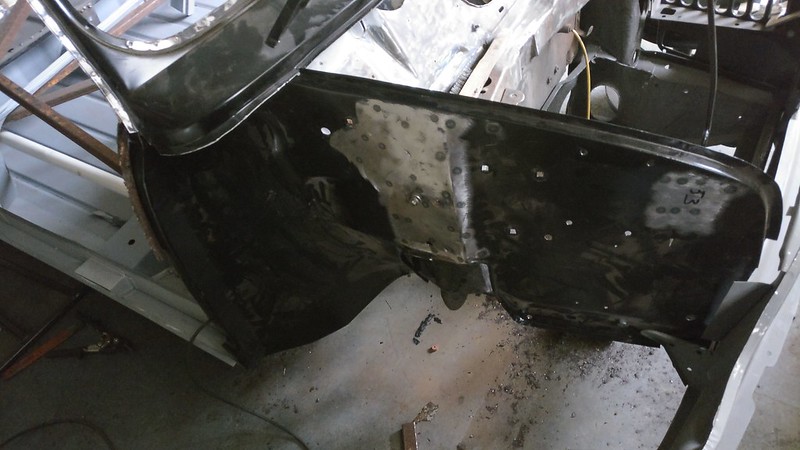
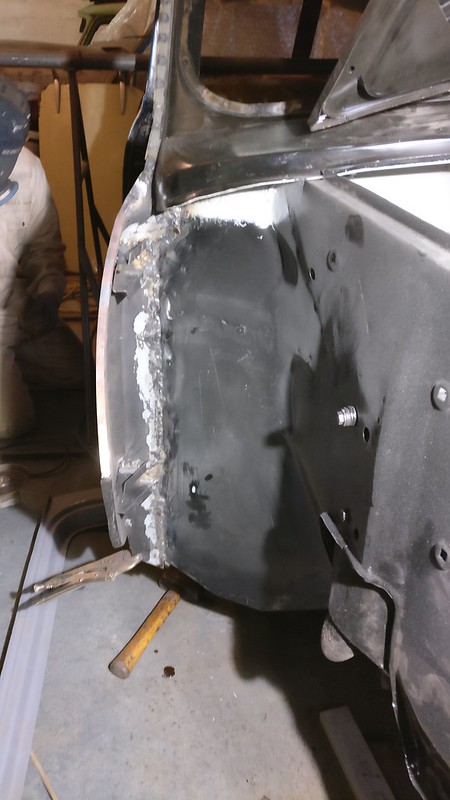
The rusty metal at the bottom of the right rear door surround is removed in favour of using the maximum metal available from a new door step panel. The support cage is removed from this corner and the car body hasn't yet collapsed.
 IMG_20170718_201818
 by
frogeye61, on Flickr
Problem is that the replacement door step is shaped wrongly from new. Easily repaired.
 IMG_20170718_205542
 by
frogeye61, on Flickr
Though no picture, I beat the corners into the correct shape and it looks superb. It fits the door very well with good door gap all along. Tonight I will weld this piece in place.
Re: 1964 Rust project
Posted: Wed Jul 19, 2017 9:30 am
by mk1
Fantastic work!
Just to be a downer for one moment, have you tried the doors with the door seals fitted?
Always a good bet when so much has been repaired.
Re: 1964 Rust project
Posted: Wed Jul 19, 2017 10:03 am
by Frogeye61
mk1 wrote:Fantastic work!
Just to be a downer for one moment, have you tried the doors with the door seals fitted?
Always a good bet when so much has been repaired.
Yes, actually I have, and this was due to "Mike - llmikeyj" mentioning it on Jun 08.
llmikeyj wrote:Just a thought, have you refitted your door seals when testing the door fit? Mine were fine until I put the rubbers in. Nightmare thereafter...
Mike
The rubbers can in any case be seen in this image:
 IMG_20170624_161616
 by
frogeye61, on Flickr
Re: 1964 Rust project
Posted: Thu Jul 20, 2017 7:04 pm
by 9330FN
Another point and it will come much later but remember to put in the sound deadening glued on to the underside of the roof between the roof and headlining otherwise the Mini will boom. I have a Mk3 that was restored and the noise was horrendos and I went right through the car until one of the lads at Minimine said 'oh that'll be the roof lining' - and it was.

Re: 1964 Rust project
Posted: Fri Jul 21, 2017 8:51 am
by mk1
remember to put in the sound deadening glued on to the underside of the roof between the roof and headlining otherwise the Mini will boom.
I have done that too. It's like riding round in a kettle drum!
I have also had the sound deadening pads sold by Newton drop off, so best to make sure they are stuck on very well.