Page 12 of 13
Re: Mhuffy The Traveller.
Posted: Mon Oct 06, 2014 12:25 pm
by minitravellerman
Looks awesome now she's finished and the rear door is a work of art.

Re: Mhuffy The Traveller.
Posted: Wed Oct 08, 2014 10:56 pm
by JC T ONE
Now when all is done on Mhuffy, you need a "new" project
 http://www.ebay.co.uk/itm/Mk-2-morris-m ... 41885e507b
This will keep you off them street corners

Re: Mhuffy The Traveller.
Posted: Thu Oct 09, 2014 9:12 pm
by InimiaD
Thank you for the kind comments guys. To be honest, having it road legal and nearly finished has been a bit of an anti climax really.
Since the MOT it's only been out once when I took it down to Pembrey on the weekend.
It'll be out again tomorrow to do a "1960's theme afternoon" in a primary school. My Mini club have done a few of these themed afternoons now.
I should be able to re-torque the head after tomorrow.
@ Jens. Wish I'd known about that vinyl primer beforehand. It would have saved a lot of fuss and bother.
My next project is hidden under a load of crap at the moment, but is very useful as a workbench for the time being.

That MK 2 Woody would be a nightmare to restore. It'll take ages unpicking all the previous repairs. Be interesting to see what it sells for. Looks like it will make good money.
There's no chance of the street corners being visited by me Jens. My "punishment" for hiding in the garage for the last few months is to re-decorate the kitchen and assorted rooms around the house.

Re: Mhuffy The Traveller.
Posted: Thu Oct 09, 2014 9:42 pm
by JC T ONE
Yes - cant even remember if i wrote in on my resto thread ? no chance we would have covered the Black headrest, only using the Gliptone.
Agree, that MK 2 will take a lot of hours to fix.
So you DO have a "new" project = after kitchen & rest of the house is done that is

Good to hear

Re: Mhuffy The Traveller.
Posted: Sat Apr 11, 2015 9:36 pm
by InimiaD
After the fuel tank deciding to part company with the rear of the Woody I spent the day "strapping" the tank on more securely.
Using Richspec's suggestion, ta Rich, I found a roll of "Builders Band" in the shed and set about fixing it to the under carriage.
The end product is a bit agricultural, but it'll do for now.
Fall off now you *%^$@><#!*~ thing.

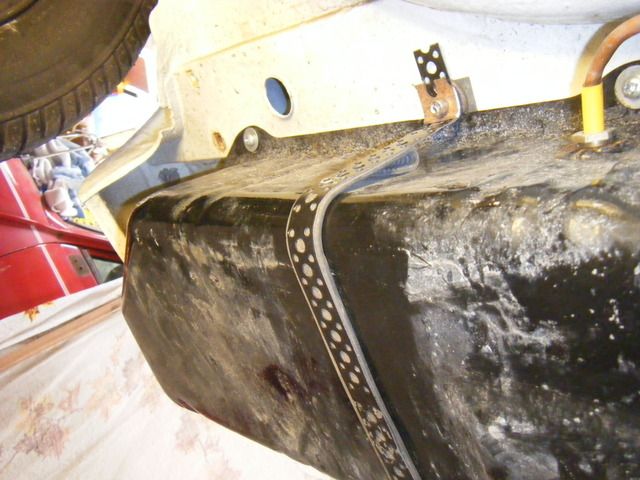
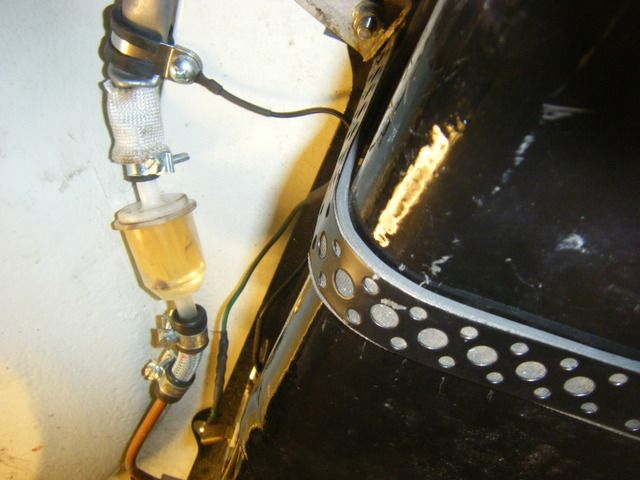
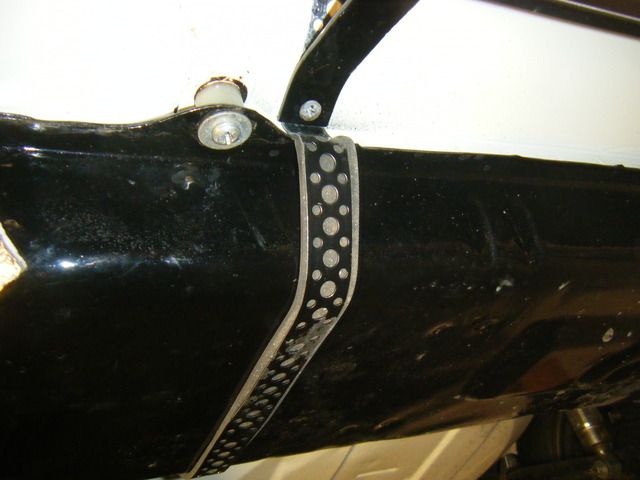
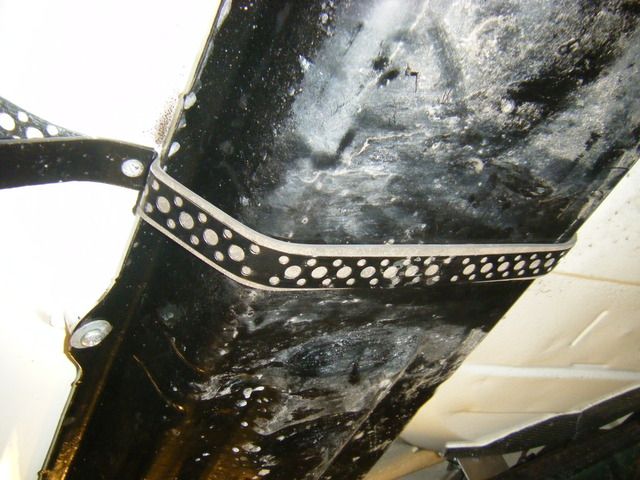
Note the perforated strapping. Saves a bit of weight.

Re: Mhuffy The Traveller.
Posted: Sat Apr 11, 2015 11:21 pm
by JC T ONE
Yea - dont like fuel tanks going walkies, without permission.
Re: Mhuffy The Traveller.
Posted: Mon Apr 13, 2015 10:07 am
by minitravellerman
Had the same problem myself a while back - I used a very similar remedy

Re: Mhuffy The Traveller.
Posted: Mon Apr 13, 2015 10:52 am
by java gt
Love the finished product and really like the rear door.I looked at doing something similar with my Clubman estate but I just could not figure out a hinge design that would allow the door to clear the drip rail.I would love to see how you overcame this as I love to see the answer.
Re: Mhuffy The Traveller.
Posted: Mon Apr 13, 2015 2:18 pm
by InimiaD
Ian. I thought I'd messed up fitting the tank somehow. It appears I am not alone with this phenomena.
@ Java GT. It took me a looong time to work it out. I've got a box full of card templates and mock up steel templates somewhere.
I will, of course have to patent the idea.


Re: Mhuffy The Traveller.
Posted: Mon Apr 13, 2015 5:28 pm
by java gt
I will gladly pay copyright of course,I had a large pile of copper wire templates as well.

Re: Mhuffy The Traveller.
Posted: Tue Apr 21, 2015 11:34 pm
by jac.pt
Looks awesome, your restoration topic is really good and full of good information for those who are making an identical work

Re: Mhuffy The Traveller.
Posted: Sun May 03, 2015 4:04 am
by atm92484
You've done some great work. I'm in the early stages of a Traveller restoration and your log has been very useful in figuring out where stuff goes. Thanks for sharing.

Re: Mhuffy The Traveller.
Posted: Tue Jun 30, 2015 10:11 pm
by InimiaD
It's a bit belated, but thank you for the nice comments guys.

Well after a couple of thousand miles under Mhuffy's belt I thought I'd give you an update on how things have gone.
As some of you know I used the ADO 16 type engine mounts as used by Janspeed on Jens W&P turbo Mini and Peters (Inter36) previous Mini.
The mod works well with very minimal engine rock, but, and it's a BIG but, I suspect that the engine mounting system is causing the intolerable vibration going through the whole car.
I had the wheels re-balanced to see if they were the cause and checked every nut and bolt in the suspension. All to no avail.
The vibration only occurs when cruising at about 65 mph so on a long trip, eg; Blyton, Beaulieu it was not a nice experience at all.
Considering the amount of sound proofing I fitted I was not happy with all the "harshness" inside the cabin.
After a lot of head scratching I decided to source some new ADO 16 engine mounts because I reckoned the repro ones I first bought were suspect.
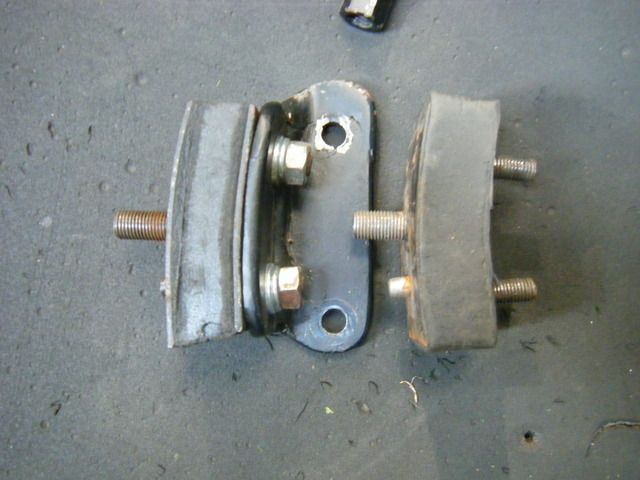
I sourced some older NOS items and when they arrived I did a comparison check. My suspicions about the shore hardness being too hard on the repro mounts was confirmed when i did the "fingernail" test. With the older NOS mounts the rubber was quite a bit softer in comparison to the repro mounts. BOOM.!
I've changed the easy front mount and after a quick blast the "harshness" appears to be reduced.

The other option was to drill small holes in the originally fitted mounts to "soften" them.
When I get the time I'll swop the rear repro mount over.
The older NOS mount fitted to the mounting bracket ready to go back in and the repro mounting for comparison.
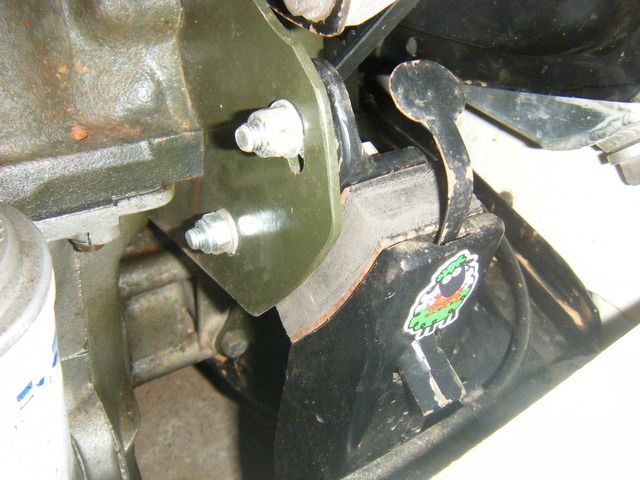
The mounting, back in it's hole.
Re: Mhuffy The Traveller.
Posted: Wed Jul 01, 2015 4:21 am
by JC T ONE
This is also one of the reasons for a restored car not to have the same smoothness, as a unrestored.
The repro rubber is just not up to same spec as the BMC items (surprice) seems like we keep going back to this subject.
Re: Mhuffy The Traveller.
Posted: Wed Jul 01, 2015 9:10 am
by mk1
I would like to hear more about this engine mounting mod please.
M
Re: Mhuffy The Traveller.
Posted: Wed Jul 01, 2015 4:59 pm
by 66Traveller
The problem with the fuel tank is that all of the fitting kits currently available have the wrong size screws in them - I compared them to the originals and they are shorter and thinner. As a result they don't work properly with the plastic fixings... I've always thought the Traveller / van petrol tank fixing arrangement was unsatisfactory - your mods are very sensible!
Re: Mhuffy The Traveller.
Posted: Wed Jul 01, 2015 9:49 pm
by InimiaD
mk1 wrote:I would like to hear more about this engine mounting mod please.
M
The bulk of the engine mounting mods is on pages 15 and 16 of this thread Mark which explains most of the mods. If there's anything that needs further info, let me know and I'll try to fill in the gaps as best I can.
The replacement mountings I found are actually Morris 1000 engine mounts which are apparently the same as the ADO 16 mounts.
Re: Mhuffy The Traveller.
Posted: Tue Jul 28, 2015 6:53 am
by Tim
That's very disappointing after all the work you put into it, hopefully replacing the rear one will solve the worst of it.
Tim
Re: Mhuffy The Traveller.
Posted: Tue Jul 28, 2015 11:14 am
by dougie1142
Very nice, I missed out on a very nice mk1 Traveller a year ago for a bargain price - always regretted it since. It really suits white..
Re: Mhuffy The Traveller.
Posted: Fri Nov 06, 2015 7:42 am
by 66Traveller
Hi,
Would you recommend Gliptone? What is the overall finish like?


