Mk2 Cooper
-
mk1coopers

- 1275 Cooper S
- Posts: 2005
- Joined: Thu Jun 24, 2010 2:14 pm
- Has thanked: 2 times
- Been thanked: 1 time
-
Callum
- 998 Cooper
- Posts: 469
- Joined: Thu Sep 25, 2014 9:01 pm
Re: Mk2 Cooper
Daz1968 wrote:Looking good now comes the more enjoyable bit of putting it all back together
Thanks. Yeah just got the roof to paint then I can start building it up. Just hope I dont scratch the bloody thing!mk1 wrote:It's always nice when you have a pristine shell just waiting to have all its bits put back on. Like a rebirth
-
Callum
- 998 Cooper
- Posts: 469
- Joined: Thu Sep 25, 2014 9:01 pm
Re: Mk2 Cooper
Yes as Nidge says the mkII script. Unfortunately its a cooper not an S!mk1coopers wrote:Oh yes, forgot about those on the 998 Cooper, new fangled MK2's
-
WMU 211G

- 1275 Cooper S
- Posts: 1901
- Joined: Tue Jan 07, 2014 4:03 pm
- Location: Warwickshire
- Has thanked: 16 times
- Been thanked: 18 times
Re: Mk2 Cooper
When my Mk2 was repainted we thought it'd take about a week to put it all back together, it took nigh on three months!
The pristine Snowberry White looks wonderful Callum
The pristine Snowberry White looks wonderful Callum
Nidge
1968 Mk2 Morris Cooper
1968 Mk2 Morris Cooper S
1992 Maserati Biturbo 430 2.8 litre V6
2014 Fiat Abarth 595 Anniversario
1968 Mk2 Morris Cooper
1968 Mk2 Morris Cooper S
1992 Maserati Biturbo 430 2.8 litre V6
2014 Fiat Abarth 595 Anniversario
-
seandoyle
- 998 Cooper
- Posts: 319
- Joined: Sat May 24, 2014 9:37 am
- Location: Epsom
Re: Mk2 Cooper
Drilling those 4 small holes was a real test of patience. I really wanted to give up the idea of fitting them as it was ####k of a job. It left me wondering if I would ever be able to finish the car as I struggled to fit a bloody boot badge.
-
Callum
- 998 Cooper
- Posts: 469
- Joined: Thu Sep 25, 2014 9:01 pm
Re: Mk2 Cooper
Thanks. I think it will take me a couple of months, but I said I would have it all finished by summer last year. So in reality it will probably take me another 6 monthsWMU 211G wrote:When my Mk2 was repainted we thought it'd take about a week to put it all back together, it took nigh on three months!
The pristine Snowberry White looks wonderful Callum
-
Callum
- 998 Cooper
- Posts: 469
- Joined: Thu Sep 25, 2014 9:01 pm
Re: Mk2 Cooper
seandoyle wrote:Drilling those 4 small holes was a real test of patience. I really wanted to give up the idea of fitting them as it was ####k of a job. It left me wondering if I would ever be able to finish the car as I struggled to fit a bloody boot badge.
-
Nick W

- 1275 Cooper S
- Posts: 2892
- Joined: Sat Jan 17, 2015 8:59 pm
- Location: sheffield
- Has thanked: 1 time
- Been thanked: 8 times
Re: Mk2 Cooper
Looks an excellent job
Wish I'd drilled mine before I painted it
Wish I'd drilled mine before I painted it
Up North in Sheffield
-
Callum
- 998 Cooper
- Posts: 469
- Joined: Thu Sep 25, 2014 9:01 pm


-
Daz1968
- 1275 Cooper S
- Posts: 1440
- Joined: Sat Dec 27, 2014 1:41 pm
- Location: Oldbury west midlands
-
Andrew1967

- 1275 Cooper S
- Posts: 7911
- Joined: Thu Jun 24, 2010 6:35 pm
- Location: Usually in my garage on the east coast of Norfolk, UK
- Been thanked: 5 times
-
JC T ONE
- 1275 Cooper S
- Posts: 3180
- Joined: Fri Aug 13, 2010 5:25 am
- Location: Denmark
-
Callum
- 998 Cooper
- Posts: 469
- Joined: Thu Sep 25, 2014 9:01 pm
Re: Mk2 Cooper
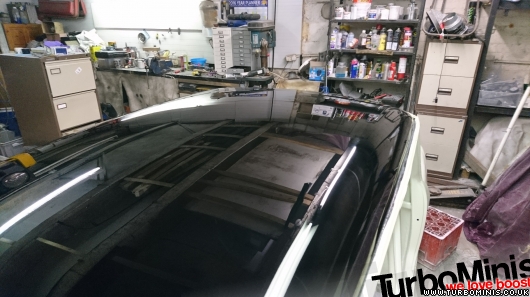
Thanks lads, here you go JC a few more for you. Flatted the roof last night and gave it a good compounding tonight, needs a bit more in a few areas.

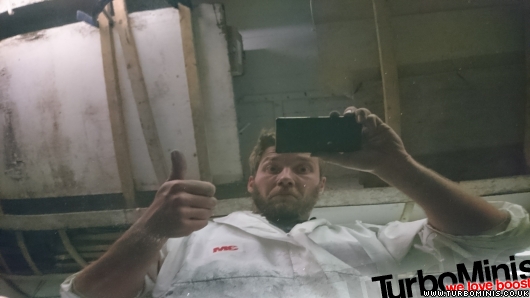
Thought now was a good time to join in with all the bell ends on social media with a selfie
Thought now was a good time to join in with all the bell ends on social media with a selfie
Last edited by Callum on Sun Jul 09, 2017 9:47 pm, edited 1 time in total.
-
Nick W
- 1275 Cooper S
- Posts: 2892
- Joined: Sat Jan 17, 2015 8:59 pm
- Location: sheffield
- Has thanked: 1 time
- Been thanked: 8 times
Re: Mk2 Cooper
looks faultless!
black is the one colour I dont like machine buffing , as the swerls and holograms always seem to show in sun light.
after nib and polish with 2000 and g6 farecla ,we then use 3m final glaze followed by slow machine polishing with polishing head and topaz polish, this seems to have the best results for us.
Up North in Sheffield
-
Callum
- 998 Cooper
- Posts: 469
- Joined: Thu Sep 25, 2014 9:01 pm
Re: Mk2 Cooper
Thanks Nick. I have got 3m finese it, if that doesn't do the trick I will copy youNick W wrote:looks faultless!
black is the one colour I dont like machine buffing , as the swerls and holograms always seem to show in sun light.
after nib and polish with 2000 and g6 farecla ,we then use 3m final glaze followed by slow machine polishing with polishing head and topaz polish, this seems to have the best results for us.
-
Callum
- 998 Cooper
- Posts: 469
- Joined: Thu Sep 25, 2014 9:01 pm
Re: Mk2 Cooper
Thanks Mark!mk1 wrote:SUPERB!
Unfortunately Photobucket have changed their fucking terms of use. To make the pictures visable again it will cost me (and many others that use PB) $399 a year! Bastards!
-
docka
- 998 Cooper
- Posts: 736
- Joined: Wed Aug 07, 2013 1:18 am
- Location: Cumbria
Re: Mk2 Cooper
the bastards!Callum wrote:Thanks Mark!mk1 wrote:SUPERB!
Unfortunately Photobucket have changed their fucking terms of use. To make the pictures visable again it will cost me (and many others that use PB) $399 a year! Bastards!
your work in this thread is a really good reference!
any workarounds?
-
Callum
- 998 Cooper
- Posts: 469
- Joined: Thu Sep 25, 2014 9:01 pm
Re: Mk2 Cooper
Thanks docka. Not really an easy fix as far as I know. I think the only way would be to host the pictures with another site then go back through each post and edit the url's for each picturedocka wrote:
the bastards!
your work in this thread is a really good reference!
any workarounds?
-
Callum
- 998 Cooper
- Posts: 469
- Joined: Thu Sep 25, 2014 9:01 pm
Re: Mk2 Cooper
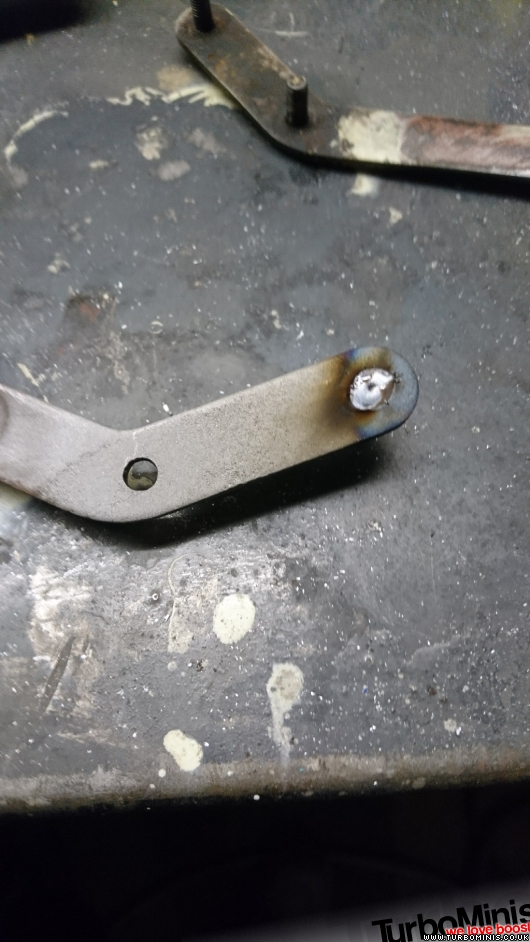
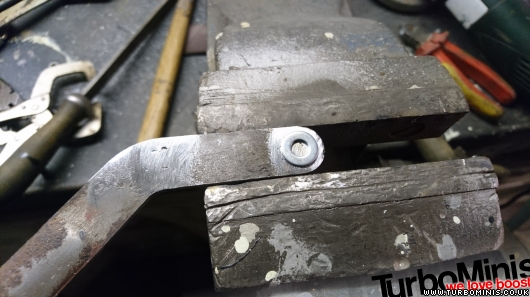
Just a small boring update. Been working on all the small parts that need painting, hinges, brackets, screws etc. The original bonnet hinges had damaged/snapped weld studs so went about replacing them. I couldn't find any suitable to buy so first off welded a stud into the hole
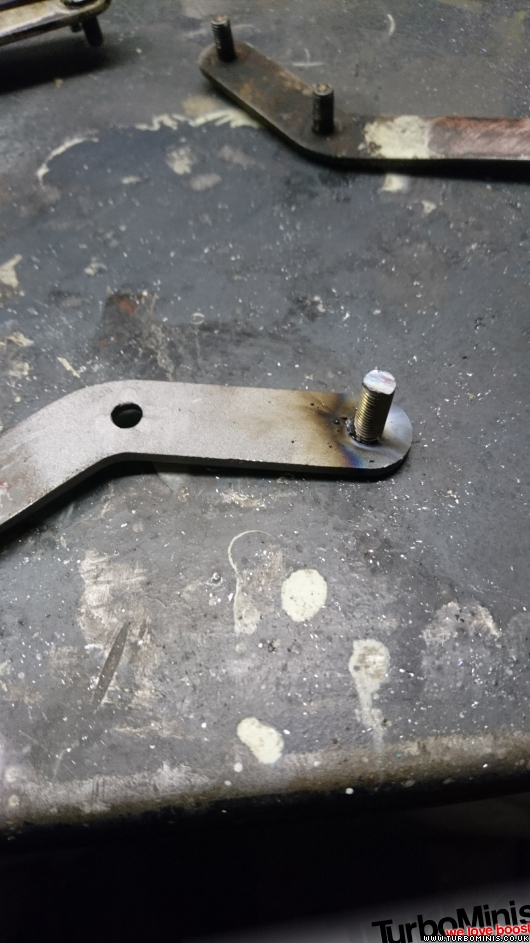
Then a 6mm washer was very close in size to the original weld stud so two of these got welded on the reverse

Then sand blasted and primered
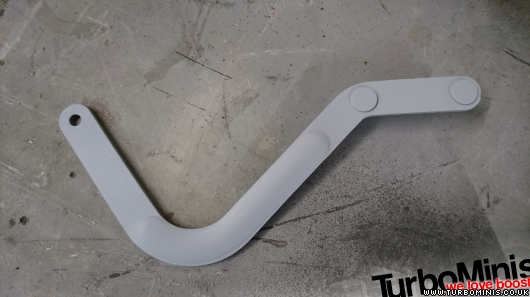
As i said, a pretty boring update!
Then a 6mm washer was very close in size to the original weld stud so two of these got welded on the reverse
Then sand blasted and primered
As i said, a pretty boring update!