Page 2 of 7
Re: 1964 Rust project
Posted: Thu May 04, 2017 1:34 pm
by Frogeye61
By the last week in March it had been installed.
It's a Mk3 frame so it didn't quite fit right at the top (taller doors) and two of the wiper holes had to be filled.
 IMG_20170325_101735
 by
frogeye61, on Flickr
But in general the fit was quite fine. I used a spot welder so it wouldn't deform things. The firewall repair can also be seen here.
 IMG_20170326_140206
 by
frogeye61, on Flickr
Re: 1964 Rust project
Posted: Thu May 04, 2017 2:04 pm
by rich@minispares.com
some panel action going on there!
Re: 1964 Rust project
Posted: Thu May 04, 2017 4:41 pm
by Andrew1967
rolesyboy wrote:With luck????

I can understand your reaction
Re: 1964 Rust project
Posted: Fri May 05, 2017 8:05 am
by Frogeye61
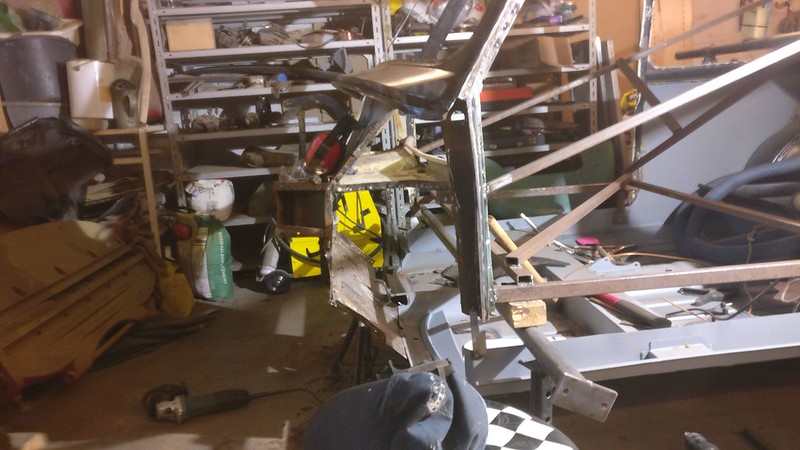
It became very difficult to mount the rear subframe. This due to not-exact alignment of the heel board mounting fixtures. We suspected something was very wrong with the new floor pan so we pulled it out. The floor pan had never been welded to any part of the body, merely clamped to the boot floor, so out it came.
 IMG_20170404_200908
 by
frogeye61, on Flickr
Then the subframe was mounted to the heelboard
 IMG_20170404_201328
 by
frogeye61, on Flickr
and the whole assembly positioned
 IMG_20170404_202232
 by
frogeye61, on Flickr
by the rear subframe to boot floor bolts
 IMG_20170405_071153
 by
frogeye61, on Flickr
and the front subframe to footboard bolts.
 IMG_20170404_210736
 by
frogeye61, on Flickr
 IMG_20170411_183500
 by
frogeye61, on Flickr
Re: 1964 Rust project
Posted: Fri May 05, 2017 9:52 am
by Frogeye61
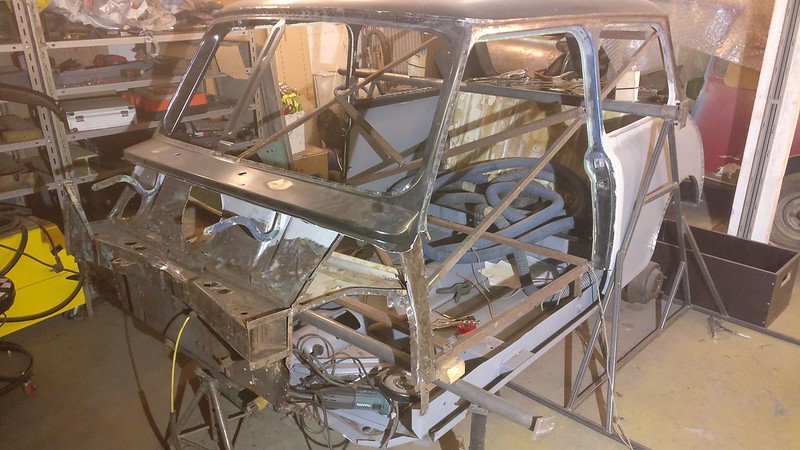
the observant browser will notice the roof missing in the last photo. This is because immediately after welding the windscreen surround on, and therefore stiffening up the upper shell, we simply cut around the edges of the roof, separating it from the remainder of the window surrounds. It was already loosened from both the front and rear window panels so only the sides needed cutting loose.
 IMG_20170411_185536
 by
frogeye61, on Flickr
 IMG_20170411_185541
 by
frogeye61, on Flickr
The old roof edge, the one that was roll-welded, was simply cut back as far as possible toward the rain gutter.
 IMG_20170411_185556
 by
frogeye61, on Flickr
and polished to produce a completely clean metal surface
 IMG_20170411_190254
 by
frogeye61, on Flickr
The drip rails were removed for later installation of reproduction parts.
 IMG_20170411_202425
 by
frogeye61, on Flickr
Repairs were of course performed on the considerably rusty rain gutters, though surprisingly the original roof edge was ok. All four corners needed larger repairs.
Re: 1964 Rust project
Posted: Fri May 05, 2017 10:00 am
by Frogeye61
Mounting of the new roof is tested, and determined to not fit well. Actually the roof fits, but the rain gutter needed to be nudged out enough to allow the new roof to come in.
 IMG_20170425_193315
 by
frogeye61, on Flickr
After considerable "weaseling" it fit in.
 IMG_20170501_154903
 by
frogeye61, on Flickr
The roof is removed and edges cleaned
 IMG_20170501_174045
 by
frogeye61, on Flickr
Inside the body structure is cleaned and painted with epoxy...
 IMG_20170502_071942
 by
frogeye61, on Flickr
as is the hidden part of the roof section.
 IMG_20170502_071951
 by
frogeye61, on Flickr
Then the roof is clamped in place.
 IMG_20170502_185602
 by
frogeye61, on Flickr
This was NOT just an afternoon's work, rather a couple weeks, though as usual working only Tuesday evenings and a bit on the weekends.
Re: 1964 Rust project
Posted: Fri May 05, 2017 10:24 am
by Frogeye61
The roof was then, ok most of the roof, was spot welded in place. Turned out that quite a bit of the sides, under the drip rail, was not completely clean. But front and back were just fine. 2mm thick front and rear, 3mm thick on sides due to the old roof edges.
 IMG_20170502_201240
 by
frogeye61, on Flickr
Video:
 VID_20170502_202535
 by
frogeye61, on Flickr
 IMG_20170502_201259
 by
frogeye61, on Flickr
Re: 1964 Rust project
Posted: Fri May 05, 2017 5:19 pm
by 2311Jethro
WOW and I envy your clamp collection. Nice work.
Re: 1964 Rust project
Posted: Fri May 05, 2017 5:20 pm
by rich@minispares.com
2311Jethro wrote:WOW and I envy your clamp collection. Nice work.
I find that you can never, ever have enough welding clamps!
Re: 1964 Rust project
Posted: Sat May 06, 2017 5:59 pm
by Craig
Thats a great job you lads are doing !!!

Not much of the original shell left , must have been VERY Rusty !!
Craig
Re: 1964 Rust project
Posted: Tue May 09, 2017 2:27 pm
by Frogeye61
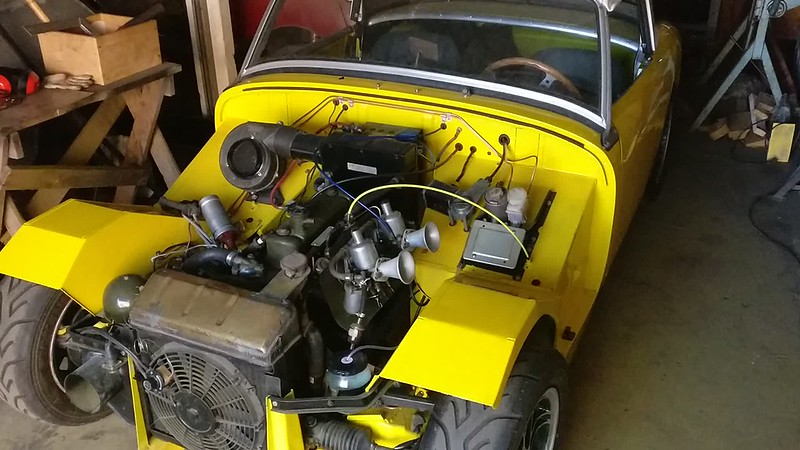
We didn't do much on the Mini this weekend. Received some parts from Mini Spares and ordered some other parts for my own 64 Mini, mostly for the engine, and got my Sprite running well - until I found a very large oil leak coming from the back of the engine.
Today is Tuesday, and as usual we will be working on Peter's 64 Mini tonight. Until then, a video of the Sprite.
 VID_20170508_200922
 by
frogeye61, on Flickr
Re: 1964 Rust project
Posted: Tue May 09, 2017 3:53 pm
by rich@minispares.com
ive got a fibreglass front for a frog if you need one!
Re: 1964 Rust project
Posted: Wed May 10, 2017 8:28 am
by Frogeye61
rich@minispares.com wrote:ive got a fibreglass front for a frog if you need one!
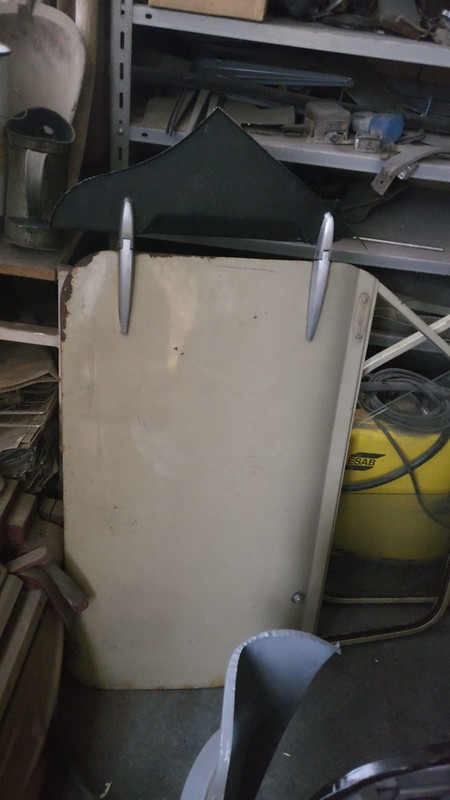
Of course one would ask the question of the quality of the front.
I have both the very rusty metal front, and a fiberglass I got when I was at Gaydon in 08 from Jayne at frogeyespares. Unfortunately it didn't fit very well and I did a lot of modifications to get it to the condition it's in now which includes reshaping both side panels and all internal structure taken from the original bonnet. The headlight mounting surfaces still point up too far. I would at one point like to purchase all replacement inner structure and a front lower valence for rebuilding the original (which isn't original, but the 3rd bonnet this car has had).
 IMG_20161008_144939
 by
frogeye61, on Flickr
Re: 1964 Rust project
Posted: Wed May 10, 2017 8:45 am
by Frogeye61
I didn't mean to hijack my own thread. This is about the Mini.
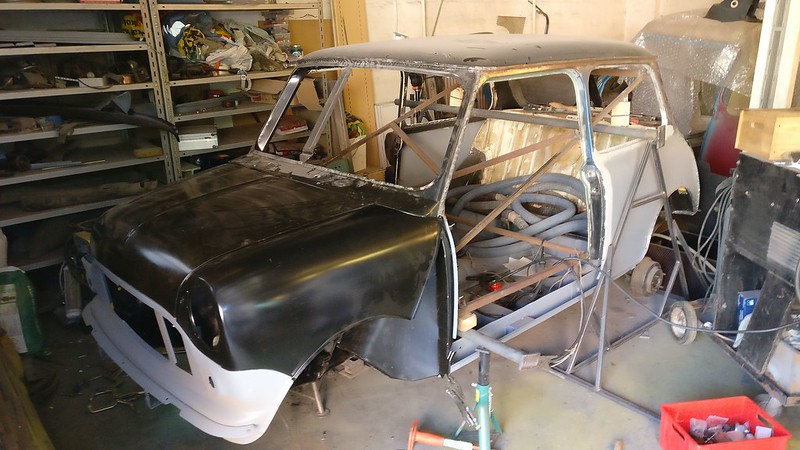
Last night we finished up nearly all of the roof spot welds. Just missing an area where the original gutter is gone but the old roof edge is still there. I will put a replacement segment in and weld it up. Tim isn't confident enough to do this properly.
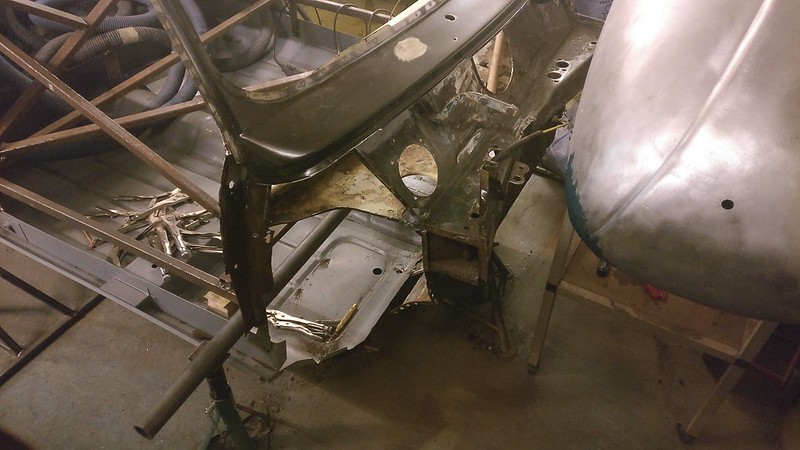
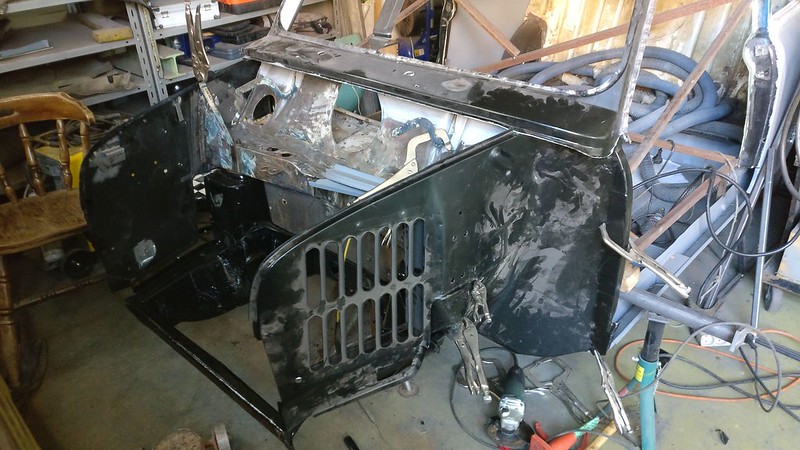
Meanwhile Peter did a very respectable job of removing the right side inner fender
 IMG_20170509_213556
 by
frogeye61, on Flickr
 IMG_20170509_213611
 by
frogeye61, on Flickr
 IMG_20170509_213711
 by
frogeye61, on Flickr
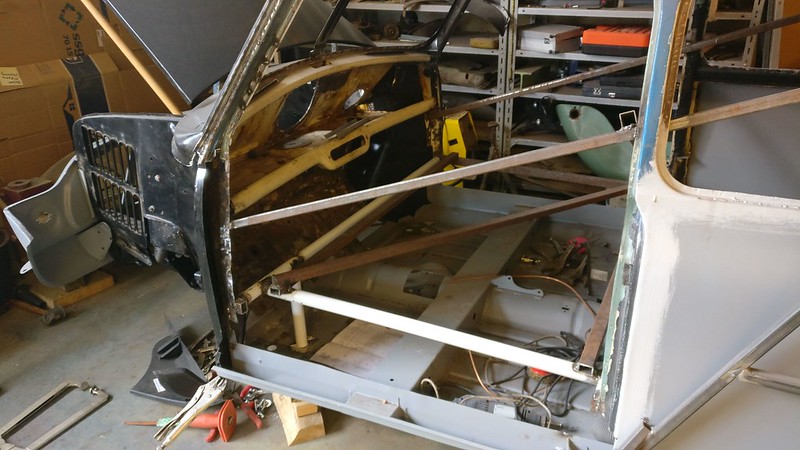
Some work will be needed on the A-post before the new can be installed. To facilitate installation of the front inner fenders, a replacement segment of the top rear was previously welded into the windshield surround when the surround was installed. We will just clip off the top of the inner fender and weld to the replacement instead of the normal method of removing the scuttle end. I hope this makes sense.
Re: 1964 Rust project
Posted: Wed May 17, 2017 9:08 am
by Frogeye61
It seems like it's been forever since last post. House work, friend's confirmation, My own Mini and Frogeye, so we managed to get a bit done last night on Peter's Mini (and a '53 motorcycle sidecar).
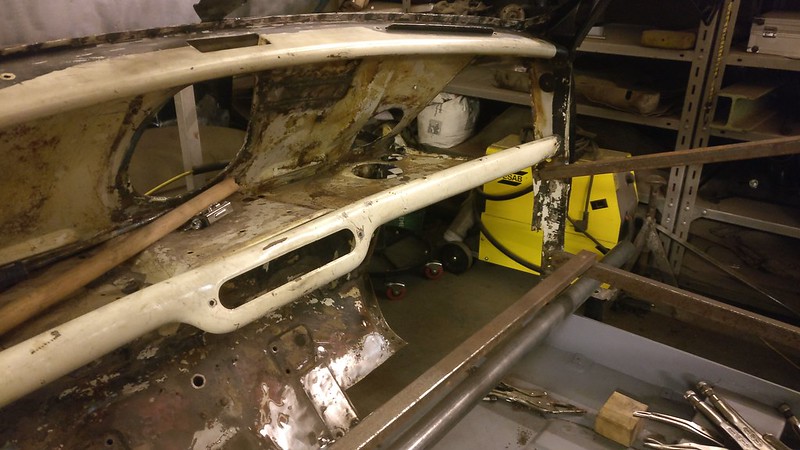
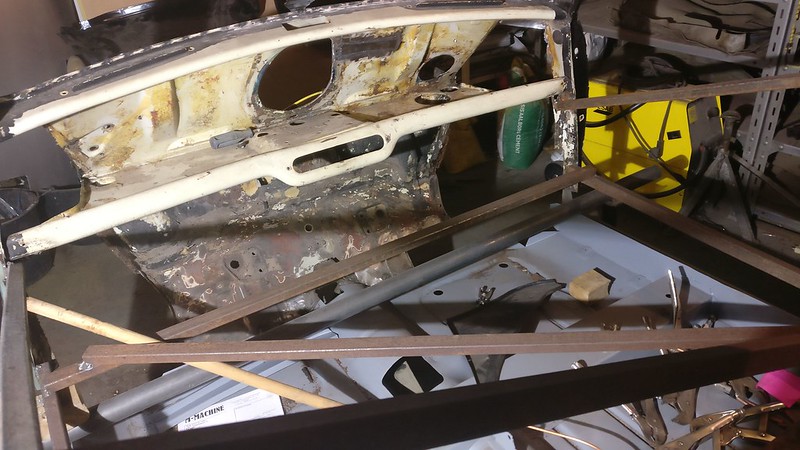
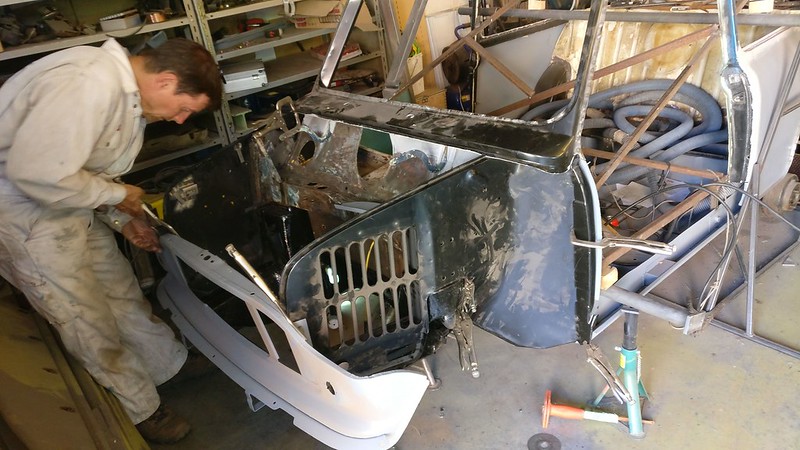
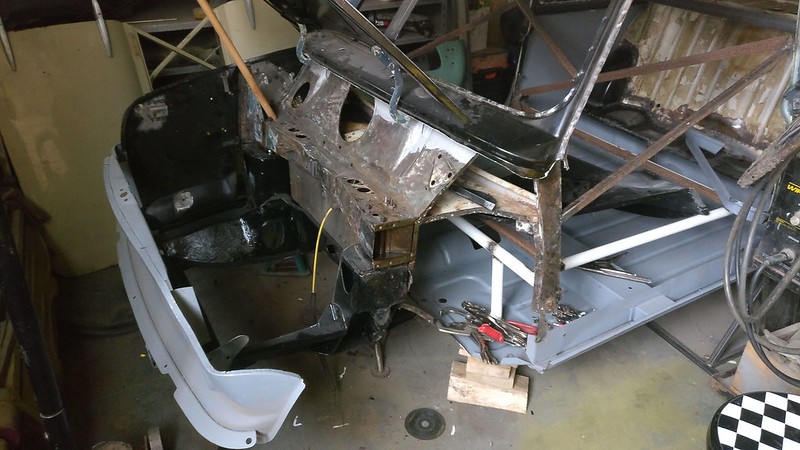
Peter carefully cut all the spotwelds for the left inner fender, removed it and cleaned up all the edges readying it for the new part. Now all it needs is to install the entire front, and A-panels, and front door jams. OK, I suppose it needs the front subframe installed to be sure everything fits. But maybe then we can begin to weld... of course after we fit everything with mole grips and triple check it all.
 IMG_20170516_201009s
 by
frogeye61, on Flickr
 IMG_20170516_200957s
 by
frogeye61, on Flickr
 IMG_20170516_213224s
 by
frogeye61, on Flickr
Re: 1964 Rust project
Posted: Sat May 27, 2017 9:38 am
by Frogeye61
I was unfortunately not able to work my usual Tuesday evening last week because of an agreed engagement with the amateur theater. The weekend was taken up with a trip to the summer house for my birthday.
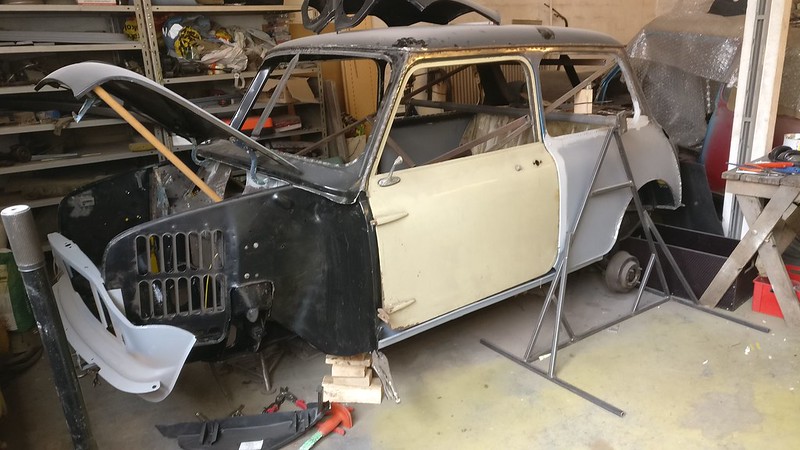
Now having a four day weekend this week, I did some work first then got Peter over to do more. I have been preparing the inner fenders for mounting onto the body, then we tested and adjusted the fit of all other front end pieces, though not the a-panels yet.
 IMG_20170525_182436s
 by
frogeye61, on Flickr
 IMG_20170526_165514s
 by
frogeye61, on Flickr
 IMG_20170526_182258s
 by
frogeye61, on Flickr
 IMG_20170526_183843s
 by
frogeye61, on Flickr
Re: 1964 Rust project
Posted: Tue Jun 06, 2017 2:00 pm
by Frogeye61
The weekend was brutal, with my tenant moving, new moving in, logistical problems, internet setup, and then a day off to see the car show in Græsted. It rained cats and dogs. I stepped in a poodle.
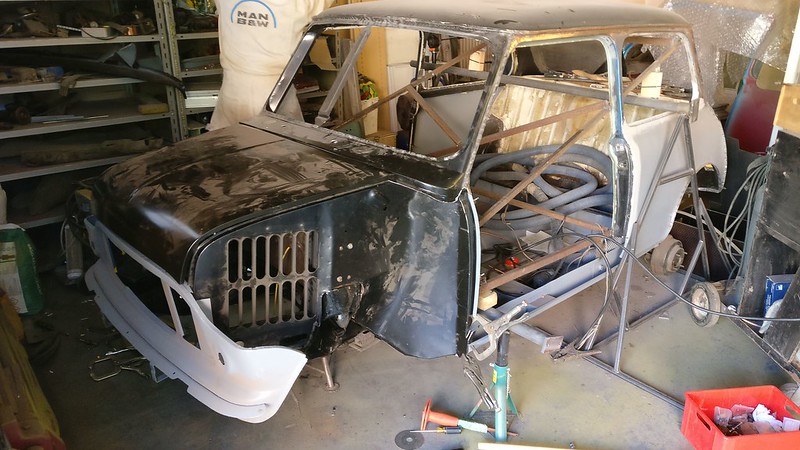
However I did get a chance to modify the support framing for the Mini. The doors must be tested before anything is fit permanently onto the front end.
Modified framing. The vertical post is for lifting purposes.
 IMG_20170605_141607s
 by
frogeye61, on Flickr
Left door first fit.
 IMG_20170605_140529s
 by
frogeye61, on Flickr
Right door first fit.
 IMG_20170605_152846s
 by
frogeye61, on Flickr
 IMG_20170605_151204s
 by
frogeye61, on Flickr
Re: 1964 Rust project
Posted: Wed Jun 07, 2017 9:47 am
by rich@minispares.com
Frogeye61 wrote:. It rained cats and dogs. I stepped in a poodle.
very good..........
Re: 1964 Rust project
Posted: Wed Jun 07, 2017 11:44 am
by Frogeye61
We have now fitted new hinges to the doors and mounted them to the A panels. After a bit (lot) of fettering, the door and A panel both fit onto the A post and inner fender with reasonable gaps around the door. This includes the sill top, front door opening panel, angled side seam, front fender etc.
 IMG_20170607_073652s
 by
frogeye61, on Flickr
So then after marking, we pulled off the inner fender, cleaned and sanded, readying for the spot welder (and some plug welds), also rust protection inside the bulkhead crossmember. First job is that I need to finish the "Stiffener/Box Plate 11.36.03.03", which I'm not replacing, just repairing.
 IMG_20170607_073622s
 by
frogeye61, on Flickr
Re: 1964 Rust project
Posted: Thu Jun 08, 2017 4:32 pm
by llmikeyj
Just a thought, have you refitted your door seals when testing the door fit? Mine were fine until I put the rubbers in. Nightmare thereafter...
Mike