Page 8 of 15
Re: 1960s Cox GTM resto project
Posted: Mon Nov 13, 2017 9:54 am
by AndyB72
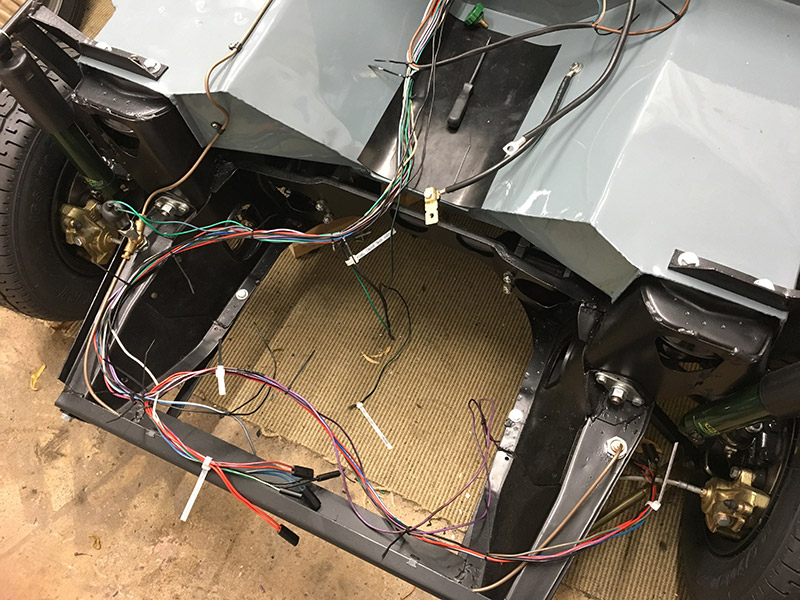
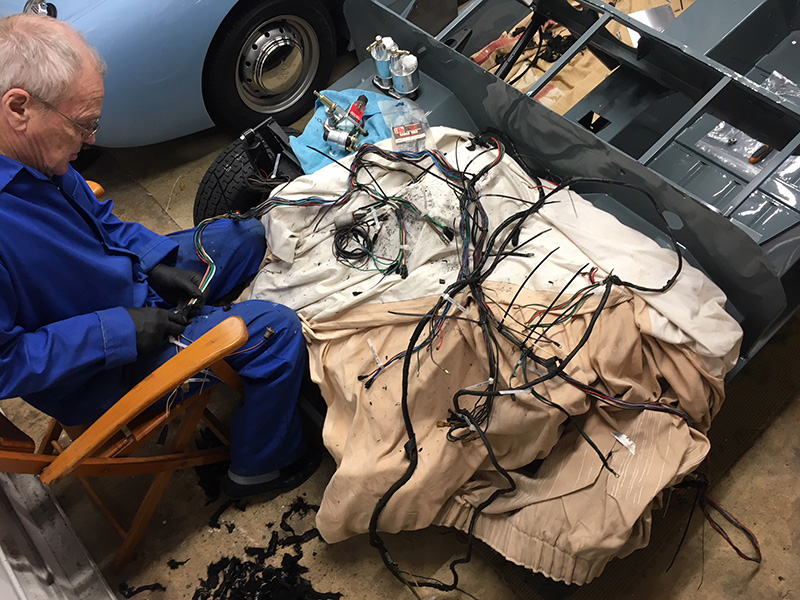
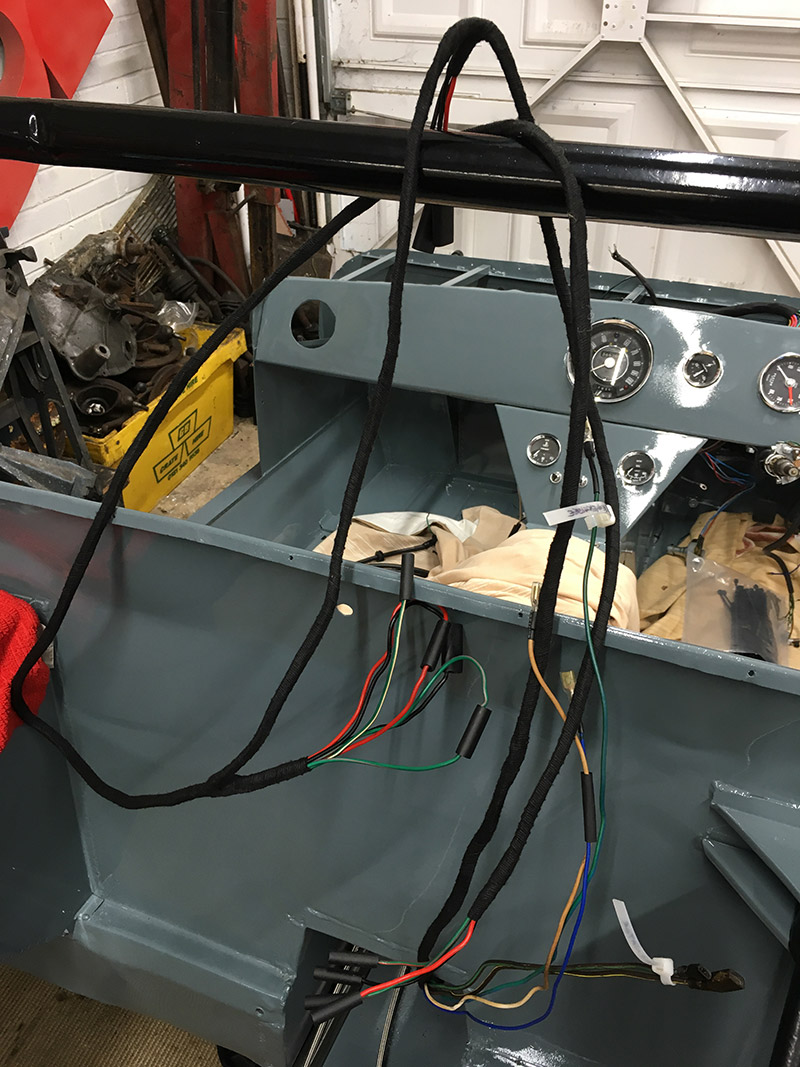
Been waiting for some Aeroquip brake hose bits to arrive so turned our attention to the loom. I think this may have originally been supplied with the kit back in '67 rather than extended by the original owner. Half is covered in material and the rest in tape. So we can check the condition and add in extra wires for the electric fan, rev counter etc we're completely stripping the outer and recovering it, very messy job...
Re: 1960s Cox GTM resto project
Posted: Sun Nov 19, 2017 6:51 pm
by Leadfoot1
Can someone give him a nudge, I think he's nodded off.
Re: 1960s Cox GTM resto project
Posted: Thu Jan 04, 2018 5:13 pm
by AndyB72
Re: 1960s Cox GTM resto project
Posted: Thu Jan 04, 2018 5:18 pm
by rich@minispares.com
looking good
I learnt to my cost that its a lot easier to do the loom on a cox BEFORE you fit the screen!
the amount of times I smacked my head after I fitted the screen!
Re: 1960s Cox GTM resto project
Posted: Thu Jan 04, 2018 5:23 pm
by AndyB72
Its such a joy to work on at the minute with the engine pulled back and the body off. But don't worry the swearing will start soon when we trial fit the engine/body to fit the radiator and pipes.
Re: 1960s Cox GTM resto project
Posted: Thu Jan 04, 2018 5:39 pm
by Pandora
All those wires give me the heeby-geebies. I think i might be OCD

Al
Re: 1960s Cox GTM resto project
Posted: Thu Jan 11, 2018 2:40 pm
by AndyB72
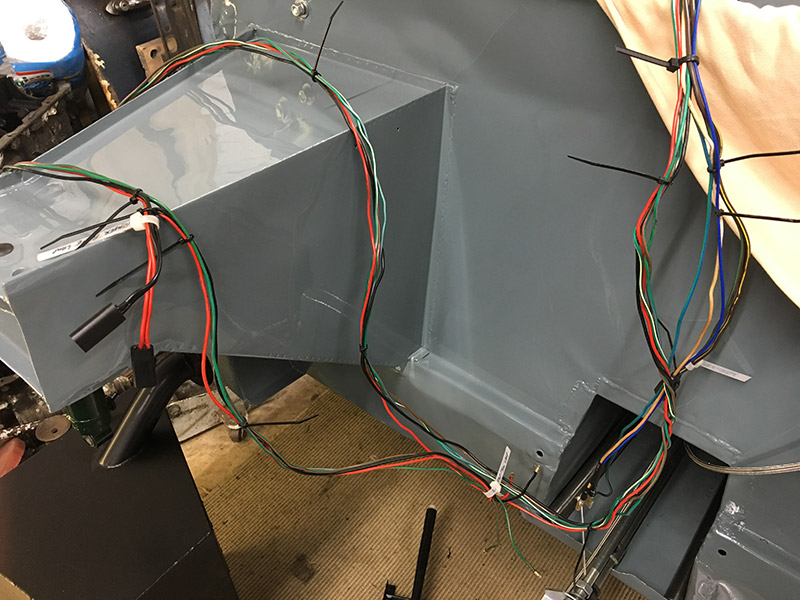
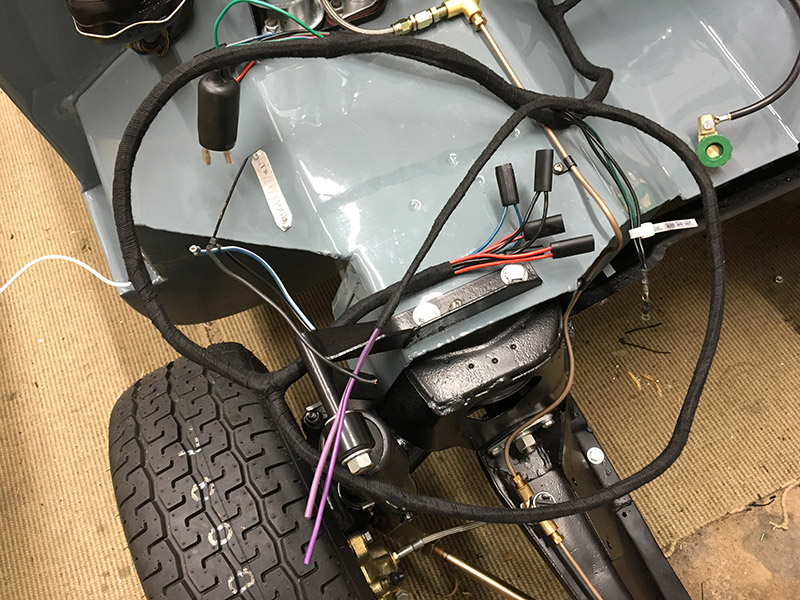
A bit of a photo updated all the electrics work and wrapped up, only a few wires to sort behind the dash and I'll take another snap. Next week we start on the cooling system...
Re: 1960s Cox GTM resto project
Posted: Thu Jan 11, 2018 2:43 pm
by mk1
Stunning Work as always Andy!
Re: 1960s Cox GTM resto project
Posted: Thu Jan 25, 2018 2:21 pm
by tedmcedd
This just looks fantastic!
Can't wait to see it!
Re: 1960s Cox GTM resto project
Posted: Tue May 08, 2018 11:29 am
by AndyB72
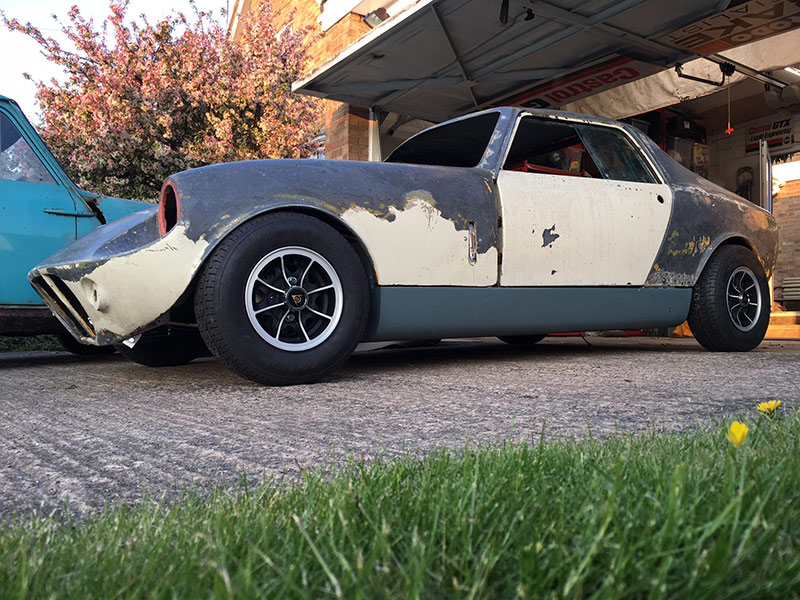
Well it has been a while so thought I'd better update the thread. Since the last update we've been fighting the bodywork trying to make everything fit as best we can, the passenger door has been the worst and just didn't want to go back as it was when we stripped it.
Next job is to get the suspension setup, as you can see from the photo the tyre is very close to the front of the body.
Re: 1960s Cox GTM resto project
Posted: Thu Nov 01, 2018 7:33 am
by turbocox
Morning Andy,
Do you have a project update.

It’s been a while

I need something to get my enthusiasm back.
I’m currently bored out of my mind, recovering from a operation on my hip.

Oh woe is me..
Re: 1960s Cox GTM resto project
Posted: Thu Nov 01, 2018 8:06 am
by mk1
I’m currently bored out of my mind, recovering from a operation on my hip.
Ha, ha, now if that isn't a comment on the demographic that most of us are in now! A few years ago it was football injuries & VD, now it's hip operations
Hope you get better soon Stu.
Re: 1960s Cox GTM resto project
Posted: Thu Nov 01, 2018 8:28 am
by turbocox
Thanks Mark,
I’ve only just turned 42.
I didn’t expect to be this broken at my age, feels like I only left school last week.
Re: 1960s Cox GTM resto project
Posted: Thu Nov 01, 2018 8:32 am
by mk1
I hope that your op does the trick!
Re: 1960s Cox GTM resto project
Posted: Thu Nov 01, 2018 9:38 am
by AndyB72
I've not posted any progress pic recently as all we've been doing recently is filling/glassing/sanding... repeat....
Having said that I've had the suspension geo setup to find out where the wheels sit in the arches. The front is a nightmare, we've had to move the bonnet forward about an inch so the tyres clear at the front. We've also been messing with the door hinges to try and change the angle so when the doors open they don't catch the bonnet, the photo below is before we created a bigger gap.
The car and garage is currently covered in filler/glass dust and not a pretty picture.


Just for you Stu this is what they used to strengthen the bonnet...


Re: 1960s Cox GTM resto project
Posted: Thu Nov 01, 2018 1:34 pm
by turbocox
It looks like your right amongst the worst part of this build
With regards to the strengthening, effectively all its there for is to form a shape around.
The shape of what’s been laid over is what gives you the strength. So as long as it doesn’t absorb water once it’s covered it doesn’t really matter what you use. When choosing what to use think of it more as a void filler/former.
Mine has garden hose in it.
Re: 1960s Cox GTM resto project
Posted: Thu Nov 01, 2018 4:28 pm
by nimbusprint
[
Mine has garden hose in it.[/quote]
Also an excellent conduit for cable,
Ian
Re: 1960s Cox GTM resto project
Posted: Wed Nov 07, 2018 11:24 am
by GTM71
I feel your pain Andy.....
I'm nearly at the end of filling my workshop with dust, awaiting my brand new lightweight bonnet and engine cover before paint.

New bonnet uses aluminium strip, should be 15kg, usually they are 25kg!


Re: 1960s Cox GTM resto project
Posted: Wed Nov 07, 2018 12:10 pm
by Pandora
turbocox wrote:
Mine has garden hose in it.
Garden hose was the first thing that came to my mind, quite a few folk used it, including TVR, I think.
Porsche used balsa wood.
Al
Re: 1960s Cox GTM resto project
Posted: Wed Nov 07, 2018 1:57 pm
by mk1
I used garden hose under my racer bonnet as it kept kinking up at speed.