Page 6 of 7
Re: 1964 Rust project
Posted: Wed Nov 15, 2017 2:38 pm
by Frogeye61
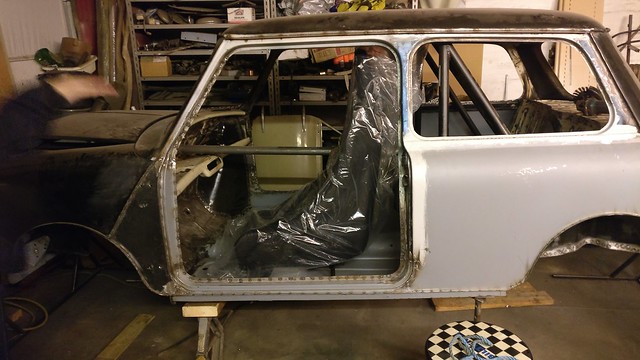
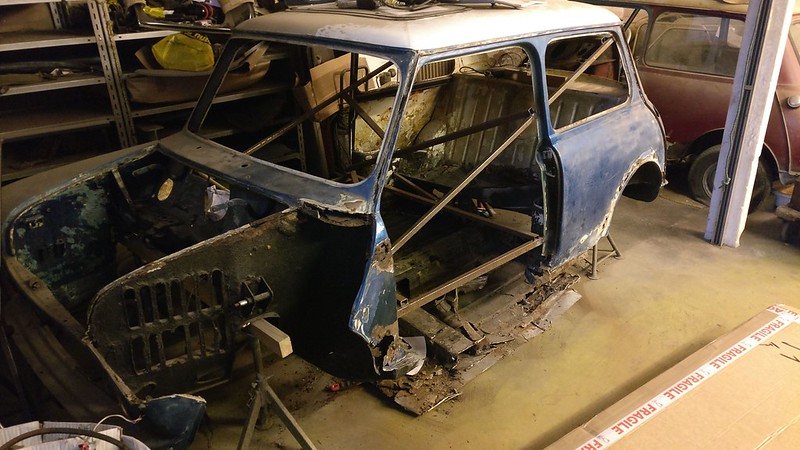
Another Tuesday and more group work on the blue 64 Mini.
Peter got some seats a while ago and we test fitted the general position. I think I have a plan for properly mounting them now. More on that when the time comes.
 IMG_20171114_180646
 by
frogeye61, on Flickr
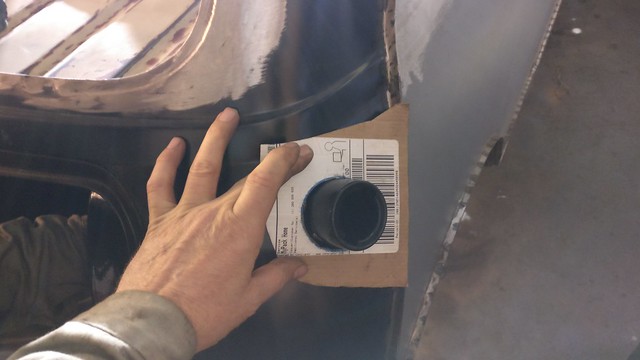
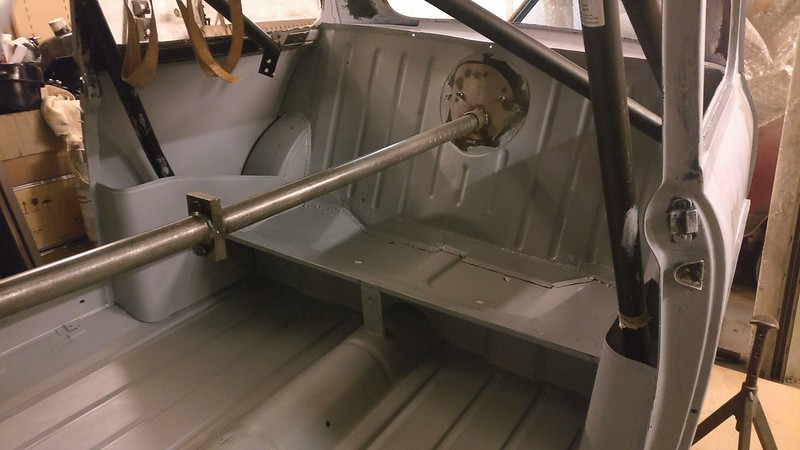
I made a template of the left side petrol tank opening, then using that Peter cut a hole in the right side.
 IMG_20171114_191750
 by
frogeye61, on Flickr
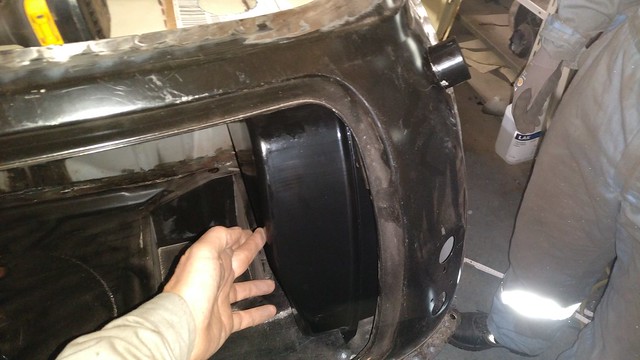
The fit is quite good when the tank is properly in place.
 IMG_20171114_191839
 by
frogeye61, on Flickr
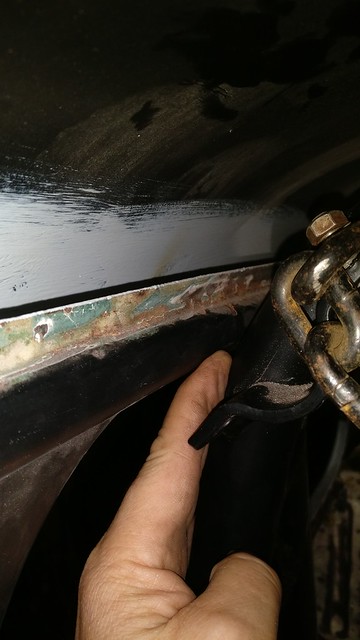
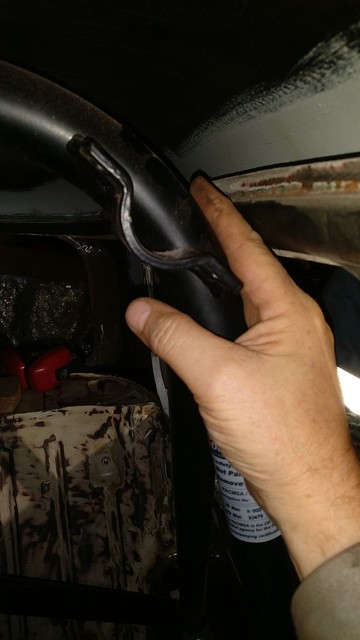
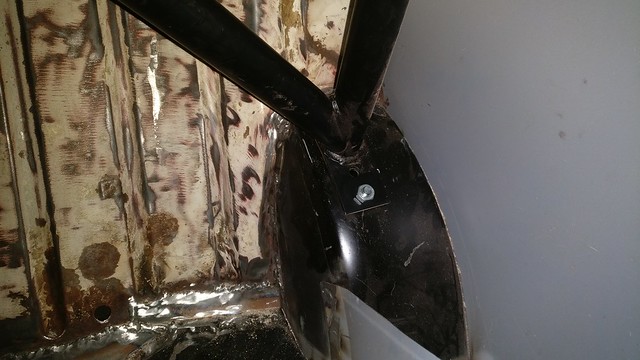
Stationary mounting of the roll bar implied tweaking a bit. The top corners aren't exactly the same side to side
 IMG_20171114_192625
 by
frogeye61, on Flickr
 IMG_20171114_192634
 by
frogeye61, on Flickr
Half cm on right and 1.5 cm on left. And this was after compressing the legs trying to install it.
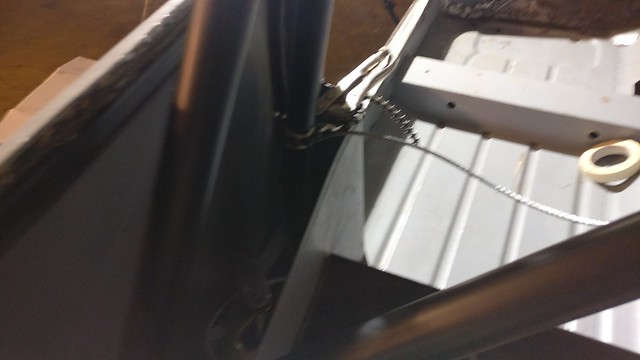
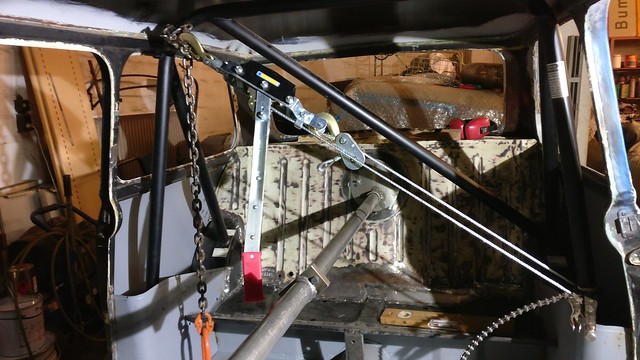
No problem! Just a bit of cable pull. Mounted chain grips to the main bar on the left side to keep the cable in place;
 IMG_20171114_191736
 by
frogeye61, on Flickr
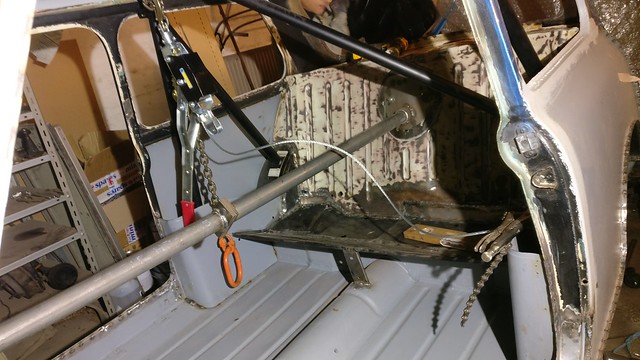
and put a chain holder on the top right side.
 IMG_20171114_191728
 by
frogeye61, on Flickr
I tweaked it a bit by pulling - hard, a bit more, and again a bit more.
 IMG_20171114_192727
 by
frogeye61, on Flickr
In the end it was "much" better, that is to mean nearly the same distance on both sides. I had to take it out to bend the right side main bar a bit outward, just to relieve static stress.
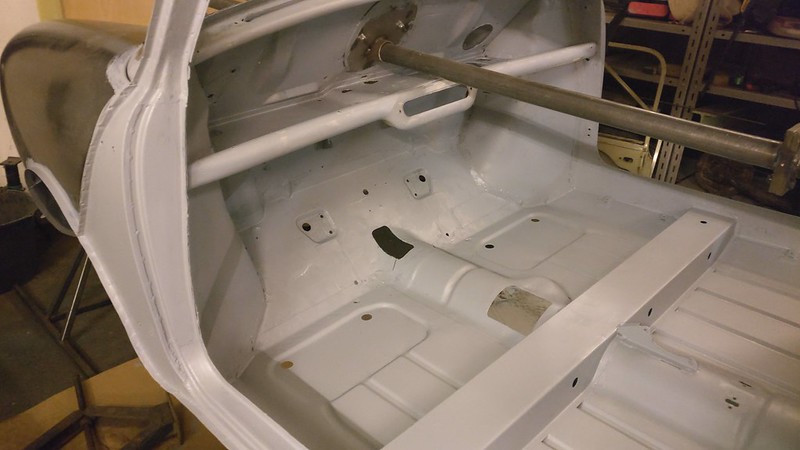
Actual positioning of the main hoop is primarily done by placement of the rear left foot. It is the one with the diagonal (triangulation), which generally can't be tweaked.
 IMG_20171114_214341
 by
frogeye61, on Flickr
Positioning of the main hoop (front) feet is done by tweaking the main hoop.
Despite what I wrote before, it will come out for painting.
Re: 1964 Rust project
Posted: Wed Nov 15, 2017 6:19 pm
by Andrew1967
Just started re-reading the thread and studying the pictures carefully.
Giving me ideas and solutions to problems that I am coming up against with HOY's shell and also making me realise that it IS feasible.
Fantastic thread

I know I've said that before......and I will say it again I'm sure


Re: 1964 Rust project
Posted: Thu Nov 16, 2017 10:50 am
by Frogeye61
There are lots more pictures on the flickr site.
Re: 1964 Rust project
Posted: Thu Nov 16, 2017 12:58 pm
by Andrew1967
Frogeye61 wrote:There are lots more pictures on the flickr site.
Brilliant
Re: 1964 Rust project
Posted: Fri Nov 17, 2017 9:48 am
by Frogeye61
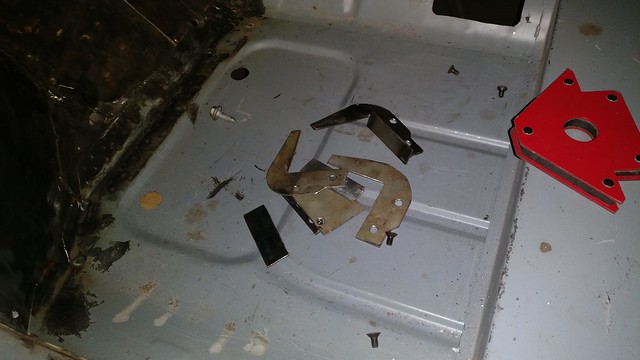
Well, last night I decided to do something about the seat mount. Tim who will drive the car daily is a bit taller than I am and quite a bit taller than his father Peter, who initiated this build. The seat needs to be adjustable!
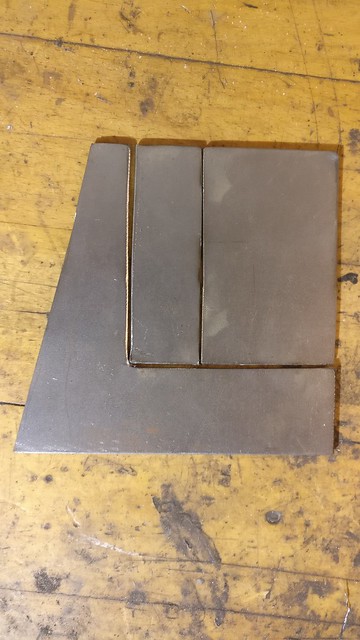
I suppose I could have started off with the standard front seat mounts, which are a very cost effective solution, but we really wanted something that would mount the seat adjuster a bit further back and since I would have to modify it anyway, I decided to just make some myself.
 IMG_20171116_175252
 by
frogeye61, on Flickr
They came out quite well but way too long time. I won't do that for my own car. So far only one bolt hole along the length.
 IMG_20171116_195107
 by
frogeye61, on Flickr
As can be seen above, there is only one mounting bolt on the seat bottom. I had cut off the other two height adjusters which all would have mounted the seat much too high. I'm considering cutting down the back legs.

Now there are only questions of: F / R adjustment. Height adjustment. Angle adjustment. I will have to get Tim here to test it.
Both supporting the rear seat legs at the bottom, and latching the seat down in the back are also considerations.
As it is, it does slide;
 IMG_20171116_195232
 by
frogeye61, on Flickr
and tilt, which gives a very limited access to the back seat area (for not much more than small things).
 IMG_20171117_080258
 by
frogeye61, on Flickr
Re: 1964 Rust project
Posted: Wed Nov 22, 2017 7:54 am
by Frogeye61
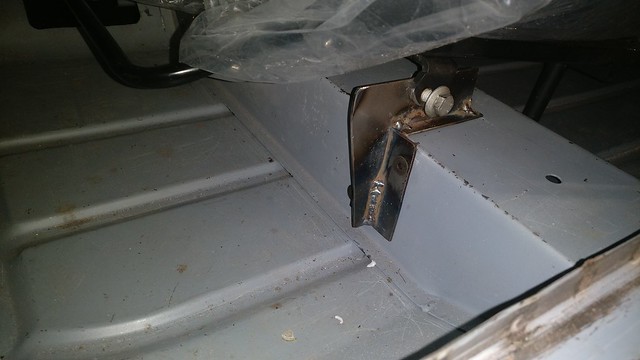
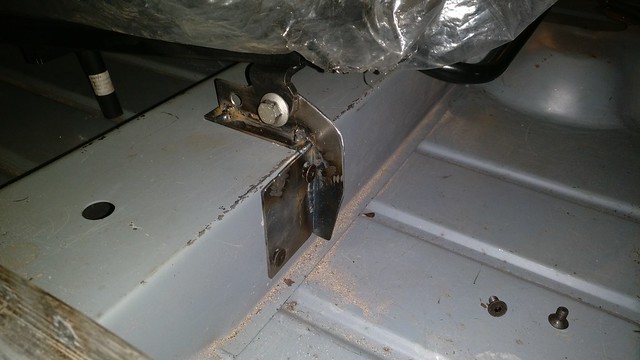
A very rainy Tuesday and we didn't get much done on the Mini. Mostly the seat mounts. Aside from adjusting the seats for Tim, who didn't come to help, both in front height, rear height (for angle), we found that they were too close to the B-post. Again modifying the existing seat mounts by offsetting to the inside,
 IMG_20171122_073557
 by
frogeye61, on Flickr
and making two more for the other side.
 IMG_20171122_073653
 by
frogeye61, on Flickr
The seat now appears to not conflict with the B-post and slides front and rear with no problem. It also still tilts.
 IMG_20171121_214657
 by
frogeye61, on Flickr
Re: 1964 Rust project
Posted: Wed Nov 29, 2017 10:46 am
by Frogeye61
Few images from Tuesday evening, though quite a bit of work done.
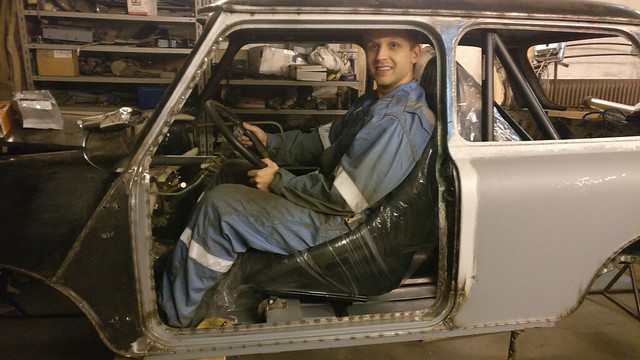
Final adjustment of the seat
with Tim the final operator - and steering wheel in place. The picture is not the final fit!
Welded force-distribution-plates onto the back legs. Otherwise the seat legs will put dents in the floor.
 IMG_20171128_175913
 by
frogeye61, on Flickr
Made hold-down straps for both the right side tank in Peter's Mini and also for my own 64 Mini left tank, just because I didn't have one.
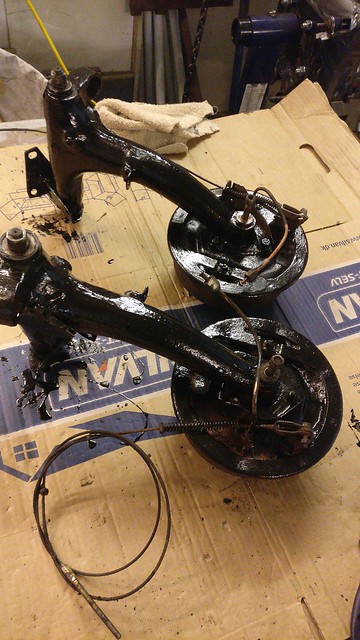
Cleaned rear trumpets including removing the completely rusted-on rubber cones. Had to use a Wood saw, lubricated with WD40. It worked a charm to peel the rubber back. Then used a grinder to relieve the rust-fit onto the cone. Then just a bit of clean-up and they're fine. Also cleaned and readied for paint at least one rear suspension arm. The brakes are already new so it's only paint.
More cleaning on the fuzz glued all over the back seat and parcel shelf, and all ready for prepping for epoxy primer which will happen next Tuesday.
Re: 1964 Rust project
Posted: Sun Dec 10, 2017 5:40 pm
by Frogeye61
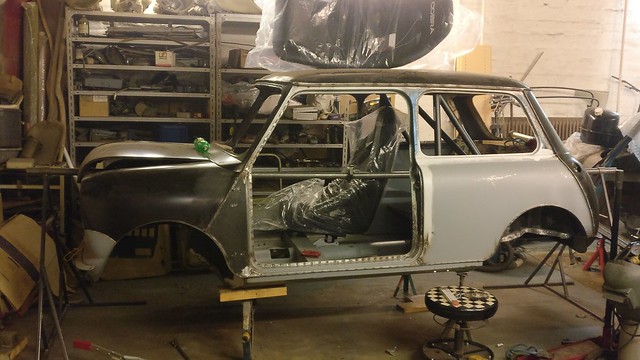
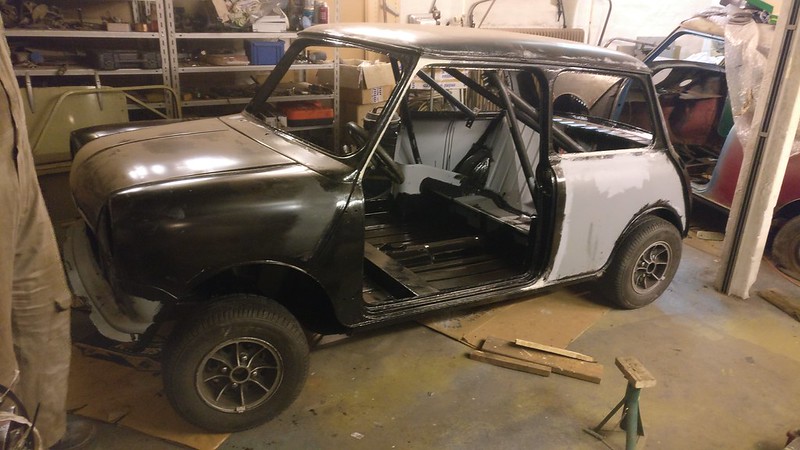
Well, after all this cleanup it's starting to look good.
Firstly, cleaning up the trumpets didn't do a lot of good since I asked Peter why he didn't just get some hi-los. So he pulled a set out of a box laying around. OK, enough for that!
After huge amounts of sanding and smoothing of the body, this Saturday was primer day. This is the first coat of epoxy, thinned well enough to go on with a "roller". I didn't think too much of the idea, but it worked a charm. A second coat, and a first coat where it isn't done yet, will happen after the holidays.
 IMG_20171210_160329
 by
frogeye61, on Flickr
 IMG_20171210_160345
 by
frogeye61, on Flickr
 IMG_20171210_160337
 by
frogeye61, on Flickr
 IMG_20171210_160359
 by
frogeye61, on Flickr
 IMG_20171210_160605
 by
frogeye61, on Flickr
Re: 1964 Rust project
Posted: Wed Dec 13, 2017 3:43 pm
by Frogeye61
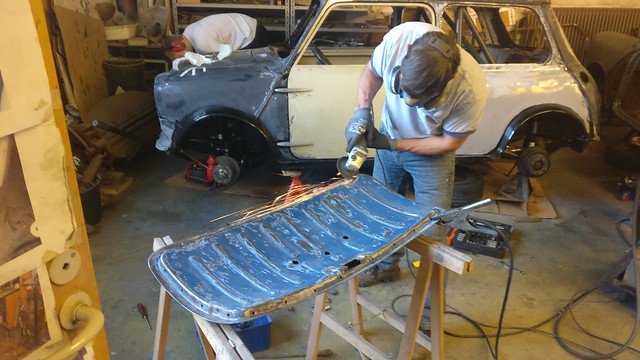
Yesterday Tim started with seam sealing the bottom...
 IMG_20171212_191031
 by
frogeye61, on Flickr
while Peter prepared the suspension components for epoxy black.
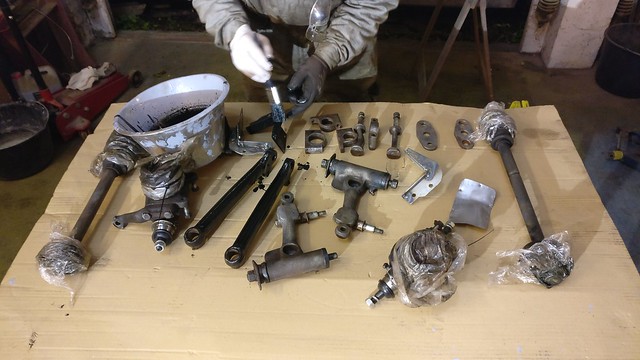 IMG_20171212_192858
 by
frogeye61, on Flickr
Once the suspension components were covered...
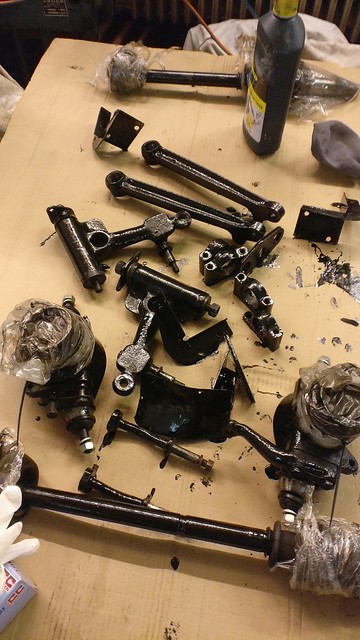 IMG_20171212_203546
 by
frogeye61, on Flickr
 IMG_20171212_203549
 by
frogeye61, on Flickr
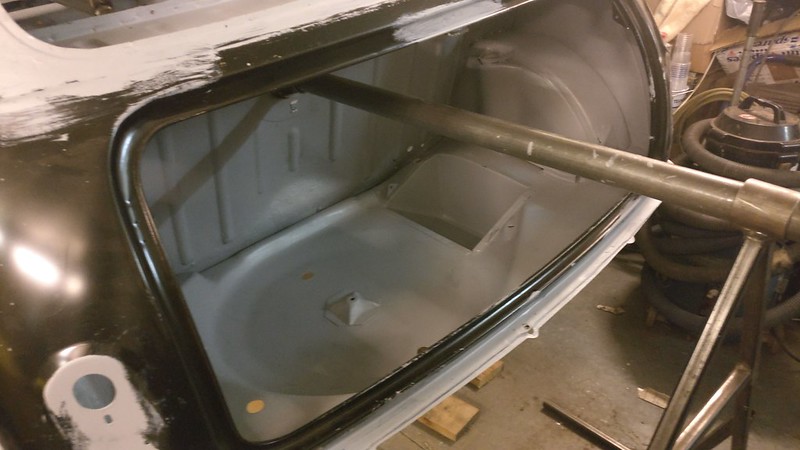
there was some epoxy paint left over.
Rather than it going to waste, Peter applied it to the bottom of the car, just not where the seam sealer is. The intention is that the bottom and engine compartment is black epoxy anyway, so one more coat should be fine.
 IMG_20171213_080210
 by
frogeye61, on Flickr
We have slightly different road conditions here than the chaps in America with lots of salt in the winter. Since this isn't a trailer queen car, and intended to drive in the winter, it gets epoxy everywhere necessary and other rust prevention methods.
Re: 1964 Rust project
Posted: Wed Jan 10, 2018 8:32 pm
by Frogeye61
Well, holidays were long enough and with family visits I haven't had much time to work on the projects, but here is what we have gotten done.
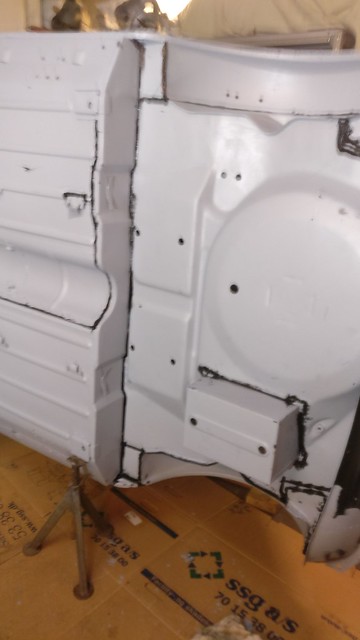
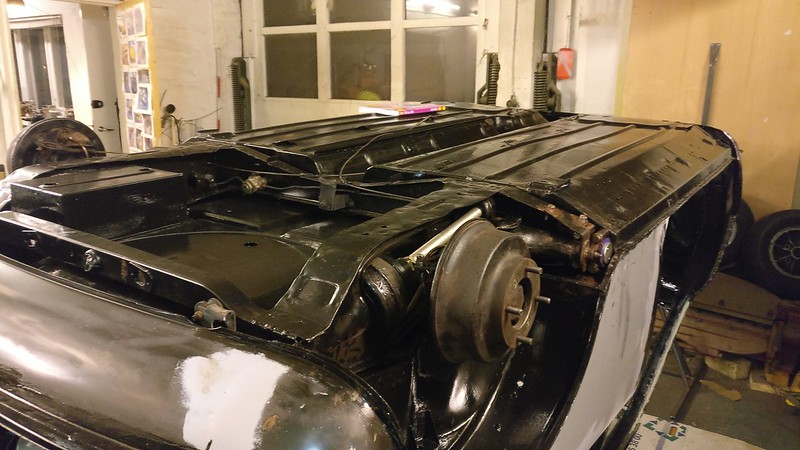
Bottom of car completely sealed and epoxy'ed
 IMG_20180107_155208
 by
frogeye61, on Flickr
 IMG_20180107_155157
 by
frogeye61, on Flickr
All external seams
 IMG_20180107_154957
 by
frogeye61, on Flickr
Boot floor, main floor
 IMG_20180107_155013
 by
frogeye61, on Flickr
 IMG_20180107_155005
 by
frogeye61, on Flickr
Engine room
 IMG_20180107_155022
 by
frogeye61, on Flickr
Rear subframe powder coated, suspension parts epoxy'ed and all assembled
 IMG_20180102_211710
 by
frogeye61, on Flickr
And we dug out the wheels so once the suspension is mounted we will be able to roll it around, like for example to the paint shop
 IMG_20180106_122828
 by
frogeye61, on Flickr
Re: 1964 Rust project
Posted: Thu Jan 11, 2018 8:12 am
by mk1
Thanks for the update!
Some great work there.
Re: 1964 Rust project
Posted: Wed Mar 21, 2018 9:58 am
by Frogeye61
So, it's been a while. What with Christmas and a visit from my son who lives near Virginia/W.Virginia border, My trip to America for the Grand National Roadster Show in Pomona Ca, A trip to India for electronic hardware configuration on a test facility, and of course a little bit of work on the old-rusty 64 Mini.
Between all that, Peter and I managed to get the rear suspension assembled with many new parts, bushings, Hi-Los, brake pipes, shoes etc. Notably with liberal amounts of copper grease, apparently to help prevent future rusting of the fasteners.
 IMG_20180213_211346
 by
frogeye61, on Flickr
We then found time to assemble the front suspension.
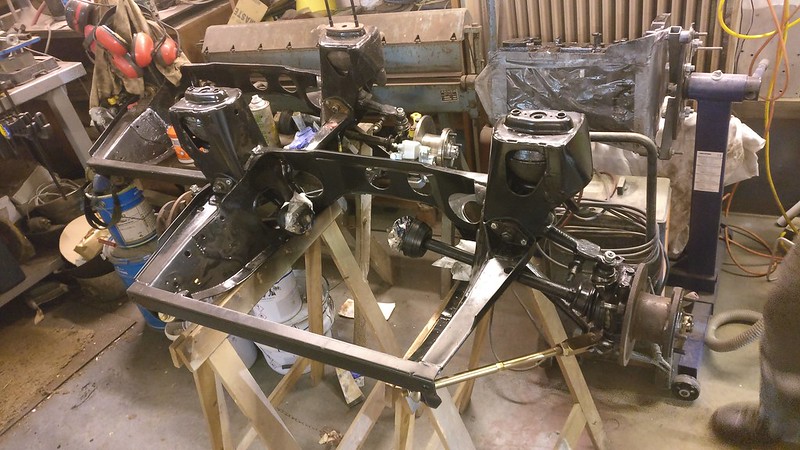 IMG_20180220_211711
 by
frogeye61, on Flickr
The one in the back is for my own car painted with epoxy paint, while Peter's subframes are done with power-coat.
Peter had not been at our Tuesday work evening for several weeks. While he was away in Greece one time, I mounted the steering rack.
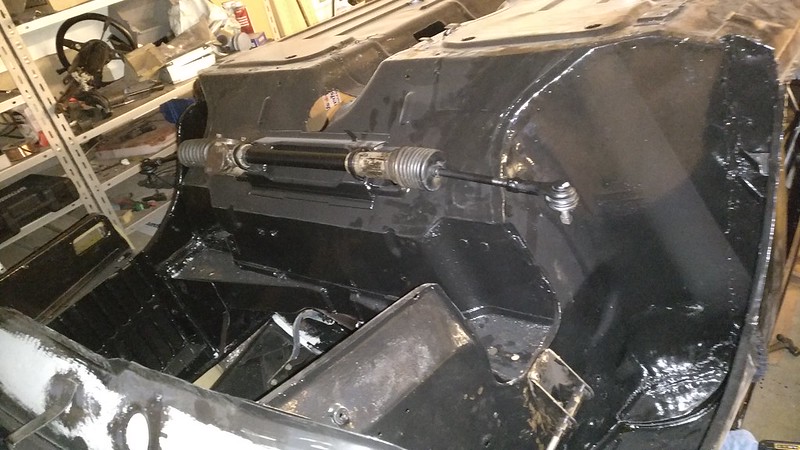 IMG_20180309_175739
 by
frogeye61, on Flickr
The next week I got another friend to help put the subframe in place then take the car down and set it on it's own four.
 IMG_20180313_193448
 by
frogeye61, on Flickr
 IMG_20180313_205108
 by
frogeye61, on Flickr
With steering mounted I didn't have the key, so by the next week Peter had emailed me the location of the key so I could actually turn the steering wheel. (sorry purists, no original steering shaft on this one)
Peter has since been back and mounted the front subframe top bolts while he delivered the engine/gearbox for some work.
I apologize for the lack of updates, but frankly we haven't gotten much done due to work considerations and the Beast from the East, not to mention the wife decided that a bit of domestic work is necessary (rebuild stairs in home and tile floor in summer house, neither of which are completely finished)
Re: 1964 Rust project
Posted: Fri Mar 23, 2018 9:31 am
by baptiste
you ve done so much work since that
it's not the same car anymore , well done
Re: 1964 Rust project
Posted: Wed Jun 06, 2018 9:32 am
by Frogeye61
It's been a while now. I've been on vacation to Florida, round birthday celebrated in Juelsminde, confirmations, and other social stuff had been getting in the way of the real interests.
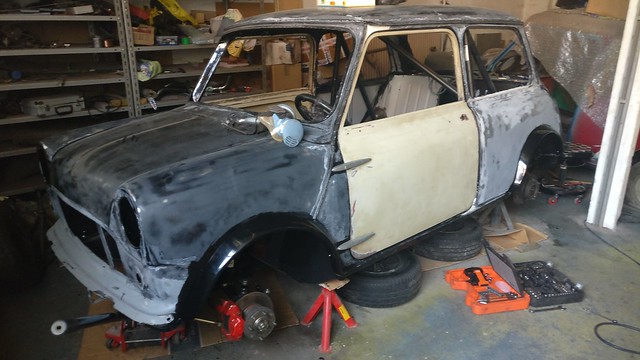
So since the Mini has wider wheels than standard, and there are laws about covering the tires, we had to add wing extensions. A cheap set, difficult to install
 IMG_20180521_195229
 by
frogeye61, on Flickr
We made a few repairs to the non-new replacement parts, meaning doors and boot lid.
 IMG_20180521_202017
 by
frogeye61, on Flickr
The wings were GRP bonded to the wings.
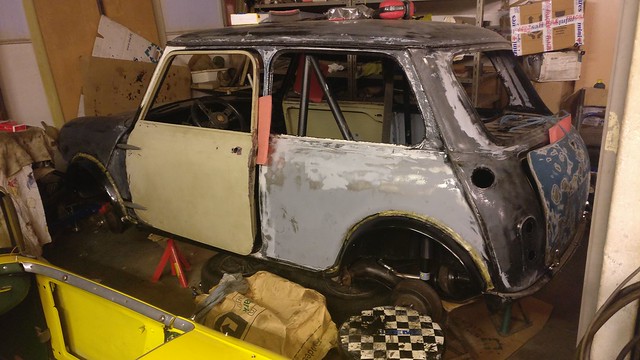 IMG_20180521_220150
 by
frogeye61, on Flickr
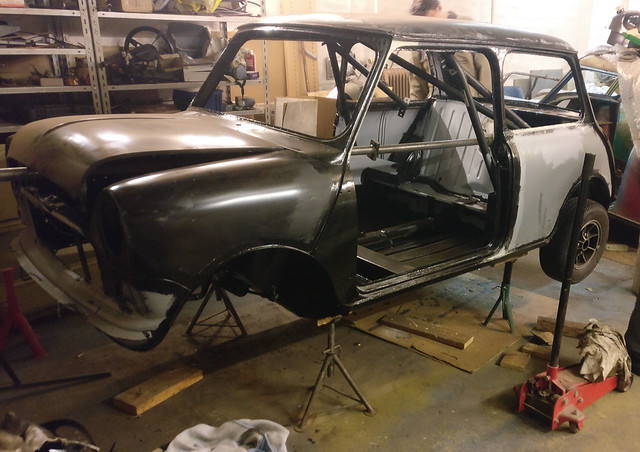
With a set of wheels, it's looking OK. This includes the set of long steering arm joints so the wheels point straight.
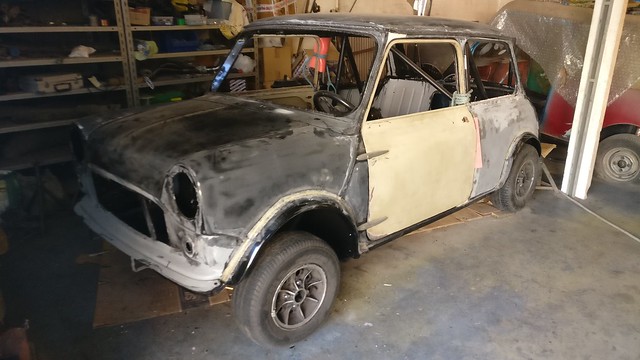 IMG_20180605_191446
 by
frogeye61, on Flickr
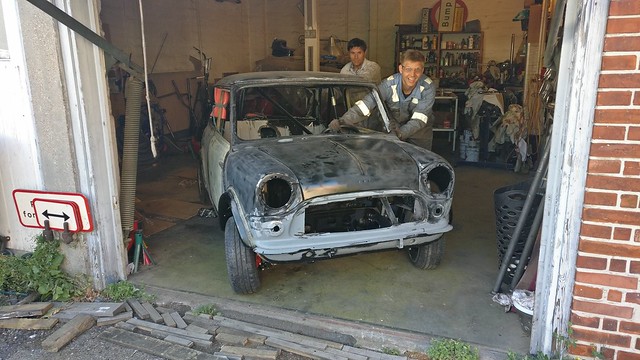
The car now rolls for the first time out of the garage in about 21 months.
 IMG_20180605_192112
 by
frogeye61, on Flickr
It is on it's way to the paint shop as I don't think I can do it justice in my little garage, and I don't want to get paint all over everything.
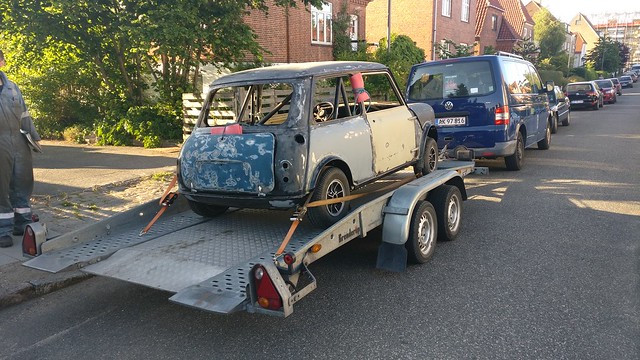 IMG_20180605_194335
 by
frogeye61, on Flickr
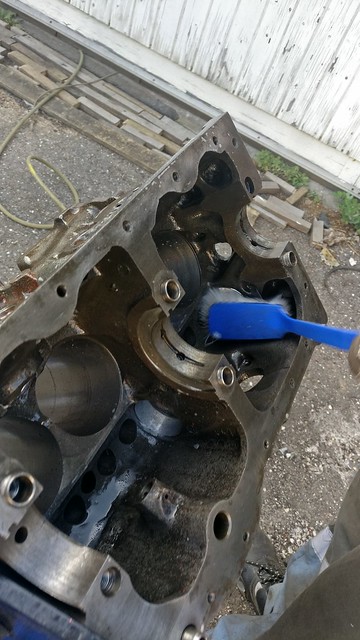
I had been fitting new cam bearings in the engine
 IMG_20180524_203026
 by
frogeye61, on Flickr
for a MD266 cam.
 IMG_20180518_061017
 by
frogeye61, on Flickr
So on Constitution day here in Denmark, while Peter drove the car to the paint shop, Tim and I cleaned the engine thoroughly both inside and outside
 IMG_20180605_183438
 by
frogeye61, on Flickr
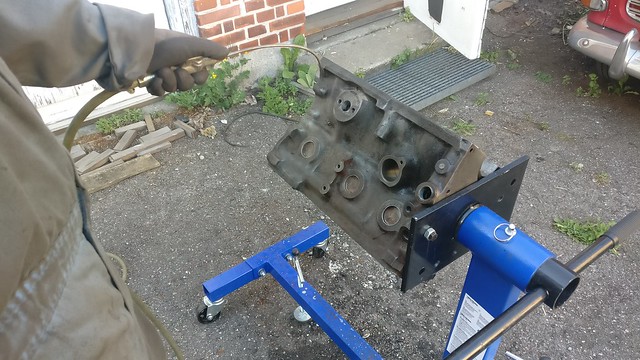 IMG_20180605_185103
 by
frogeye61, on Flickr
Then I taped it up and painted it.
 IMG_20180605_212654
 by
frogeye61, on Flickr
In the meantime, Tim cleaned up the starter and generator so I could paint them too.
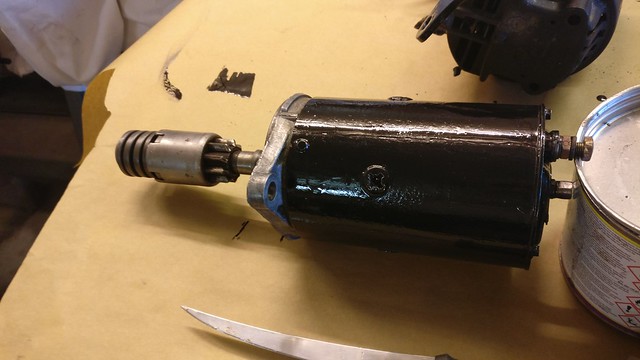 IMG_20180605_212716
 by
frogeye61, on Flickr
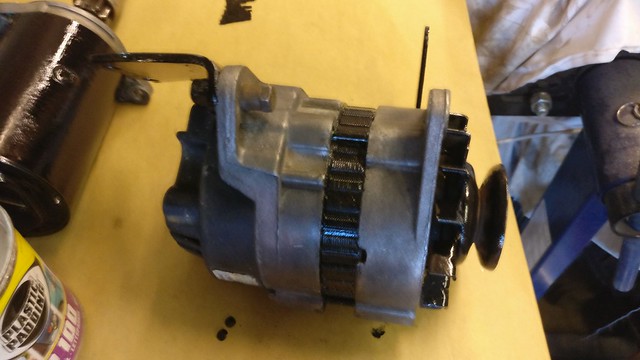 IMG_20180605_212721
 by
frogeye61, on Flickr
Re: 1964 Rust project
Posted: Thu Jun 07, 2018 2:35 pm
by trevorhp
Great progress

Re: 1964 Rust project
Posted: Fri Jun 08, 2018 8:51 am
by Frogeye61
Thanks, but it still seems very slow. But as long as it's progressing I think we're ok.
Re: 1964 Rust project
Posted: Wed Jun 13, 2018 2:12 pm
by Frogeye61
I HAVE MOVED THESE LAST TWO POSTS TO ANOTHER THREAD.
Re: 1964 Rust project
Posted: Thu Jun 14, 2018 11:56 am
by Frogeye61
I HAVE MOVED THESE LAST TWO POSTS TO ANOTHER THREAD
Re: 1964 Rust project
Posted: Wed Jul 04, 2018 3:18 pm
by Frogeye61
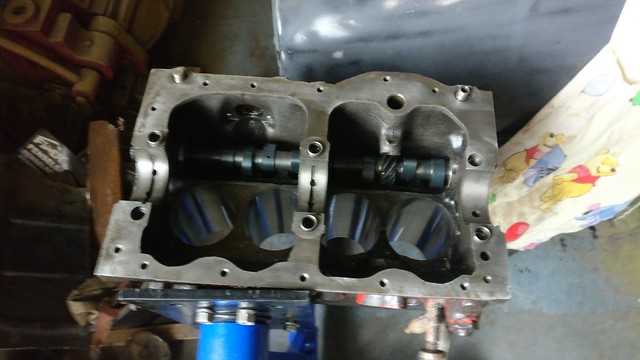
We finally got around to assembling the motor
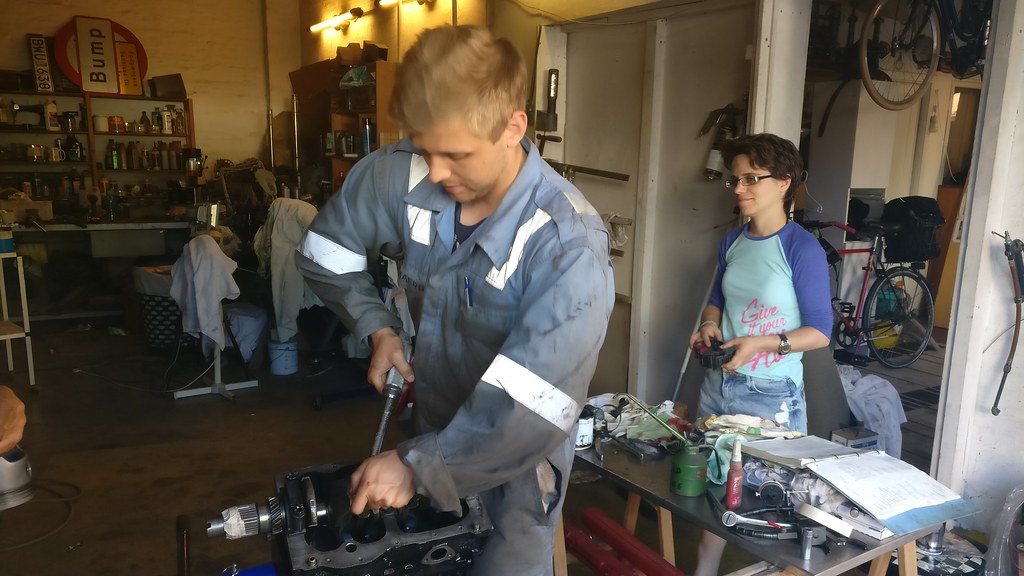 IMG_20180703_194510
 by
frogeye61, on Flickr
It should all be ok, but everything is tested anyway. A couple marginal clearances cleaned up and the short block is done
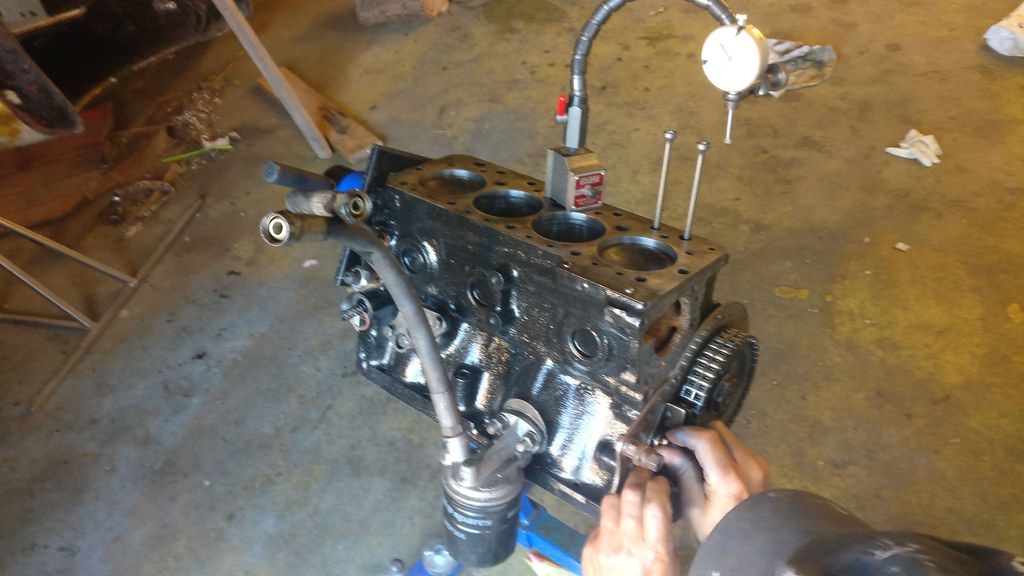 IMG_20180703_211525
 by
frogeye61, on Flickr
Re: 1964 Rust project
Posted: Wed Jul 11, 2018 12:54 pm
by Frogeye61
Not too much this week. Finally got a correct transfer gear so put these two major components together. Also fiddled with the speedo drive and bearings.
 IMG_20180710_202656
 by
frogeye61, on Flickr
Then cleaned up the third major component and installed it also.
 IMG_20180710_211554
 by
frogeye61, on Flickr
It's not the final valve cover.