My Austin Countryman Project
-
atm92484
- 850 Super
- Posts: 155
- Joined: Tue Feb 17, 2015 4:47 am
- Location: Pittsburgh, PA USA
-
mk1
- Site Admin
- Posts: 19835
- Joined: Thu Jun 24, 2010 11:30 am
- Location: Away with the Faries
- Has thanked: 3 times
- Been thanked: 10 times
Re: My Austin Countryman Project
Excellent work!
Just one query. Have you tried them with Door Rubbers in place? If you haven't, please do. I have seen the fitting of door rubbers bugger up lovely door gaps too often.
Just one query. Have you tried them with Door Rubbers in place? If you haven't, please do. I have seen the fitting of door rubbers bugger up lovely door gaps too often.
- swindrum
- 998 Cooper
- Posts: 500
- Joined: Wed Dec 05, 2012 5:21 pm
- Location: Victoria BC Canada
Re: My Austin Countryman Project
I have yet to try them with the rubbers in place, but I intend to, honest... 
I have a couple sets of seals, an original set that I fear is too damaged to use, and a set I bought somewhere along the line, which I fear will be too fat, based on things I have read about aftermarket seals... There is rumoured to be a new version of the thin seals I may have to purchase before paint goes on...
I have a couple sets of seals, an original set that I fear is too damaged to use, and a set I bought somewhere along the line, which I fear will be too fat, based on things I have read about aftermarket seals... There is rumoured to be a new version of the thin seals I may have to purchase before paint goes on...
-
mk1
- Site Admin
- Posts: 19835
- Joined: Thu Jun 24, 2010 11:30 am
- Location: Away with the Faries
- Has thanked: 3 times
- Been thanked: 10 times
Re: My Austin Countryman Project
I find the best ones are the newish Minispares MK1 seals.
Whatever you do, DO try them along with the door catches BEFORE you finish welding.
Whatever you do, DO try them along with the door catches BEFORE you finish welding.
-
NicholasUpton
- 998 Cooper
- Posts: 308
- Joined: Wed Nov 14, 2012 4:02 pm
- Location: Woodland, California USA
- Been thanked: 1 time
- Contact:
Re: My Austin Countryman Project
Just what I was going to say, we keeps them in them on the car through the whole bodywork process.mk1 wrote:Excellent work!
Just one query. Have you tried them with Door Rubbers in place? If you haven't, please do. I have seen the fitting of door rubbers bugger up lovely door gaps too often.
- swindrum
- 998 Cooper
- Posts: 500
- Joined: Wed Dec 05, 2012 5:21 pm
- Location: Victoria BC Canada
Re: My Austin Countryman Project
NOW you tell me...NicholasUpton wrote:Just what I was going to say, we keeps them in them on the car through the whole bodywork process.mk1 wrote:Excellent work!
Just one query. Have you tried them with Door Rubbers in place? If you haven't, please do. I have seen the fitting of door rubbers bugger up lovely door gaps too often.
I will dig them out and see where I stand
- swindrum
- 998 Cooper
- Posts: 500
- Joined: Wed Dec 05, 2012 5:21 pm
- Location: Victoria BC Canada
Re: My Austin Countryman Project
Picked up a set of the minispares thin rubbers and fitted them to the passenger door, the bottom corner of the door sticks out a little bit, but I am confident that I can gently massage the lip that the weatherstrip clip to and have a good fit. The rest of the door is very good.
- swindrum
- 998 Cooper
- Posts: 500
- Joined: Wed Dec 05, 2012 5:21 pm
- Location: Victoria BC Canada
Re: My Austin Countryman Project
Took a bit of a break from fettling the body and gave the shop a much needed tidying. Also spent a bunch of time at the bead blasting cabinet preparing another load of bits for painting.
A good friend who is a gearbox guru has offered assistance with rebuilding the gearbox, so I jumped at that chance and tore the 'box down.
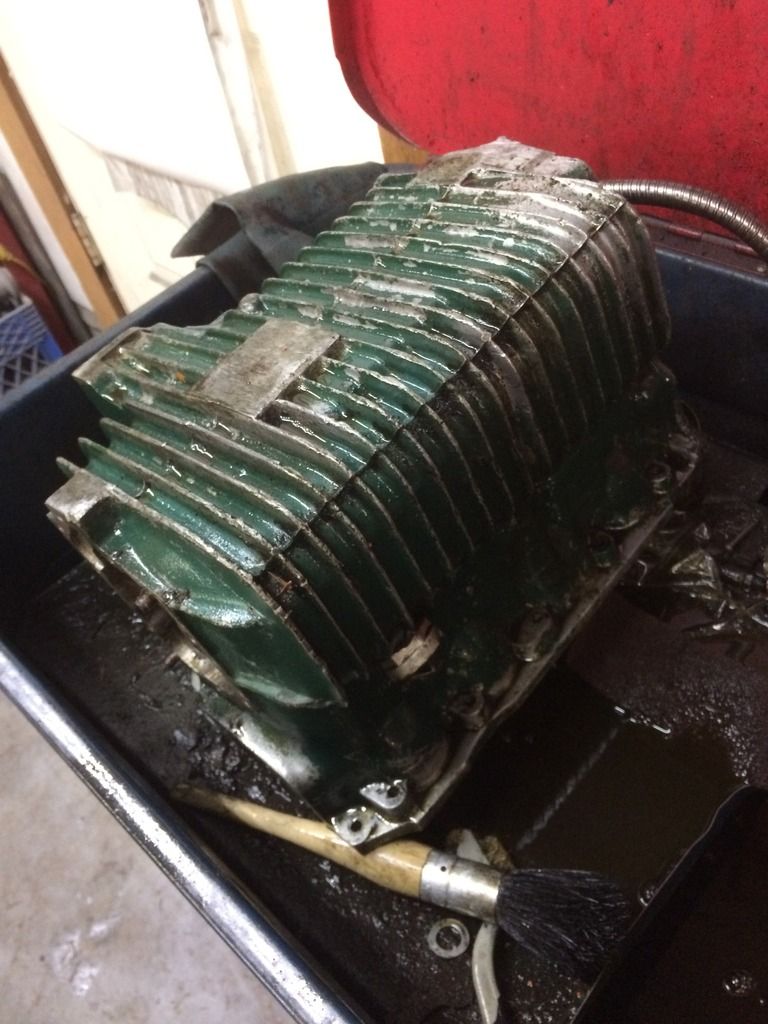
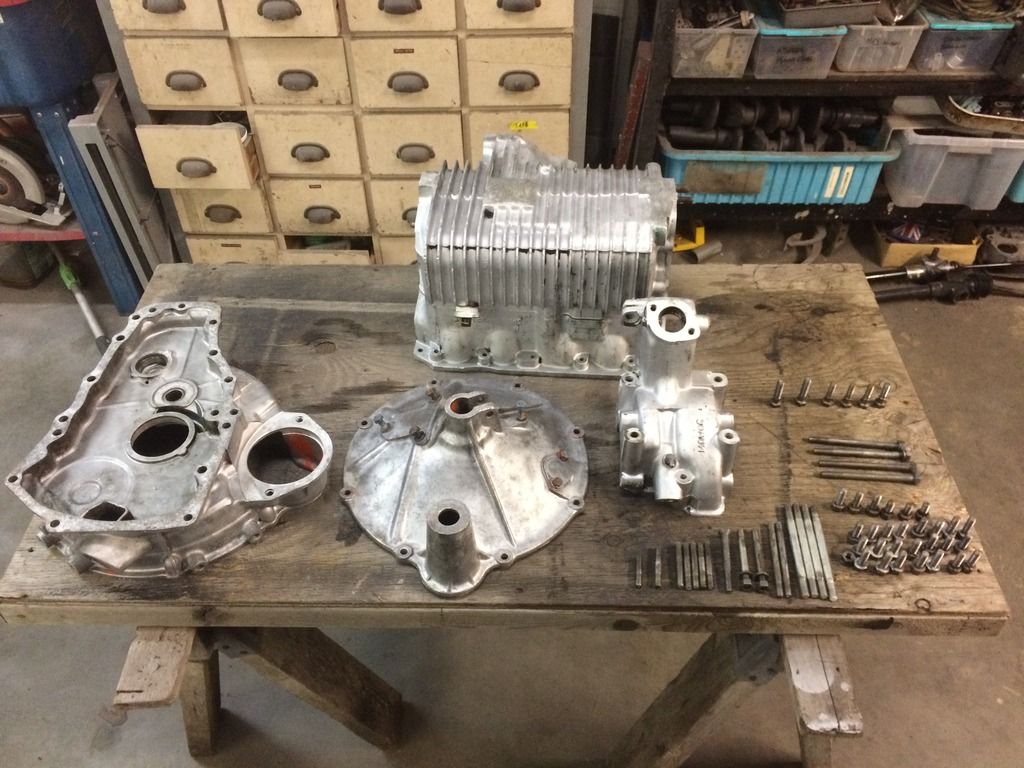
I swapped the glass beads for baking soda in the blast cabinet, and after a good scrubbing in the solvent tank, I set to getting the gearbox case nice and clean. I really like using the soda for aluminium castings. It doesn't touch the substrate and is water soluble, so I can wash the case in warm soapy water without having to worry if there is some residual grit laying in wait to attack delicate parts later. We are using an 1128 case with a magic wand housing. This way we have a 4 sync magic wand box.
Before:
After:
A good friend who is a gearbox guru has offered assistance with rebuilding the gearbox, so I jumped at that chance and tore the 'box down.
I swapped the glass beads for baking soda in the blast cabinet, and after a good scrubbing in the solvent tank, I set to getting the gearbox case nice and clean. I really like using the soda for aluminium castings. It doesn't touch the substrate and is water soluble, so I can wash the case in warm soapy water without having to worry if there is some residual grit laying in wait to attack delicate parts later. We are using an 1128 case with a magic wand housing. This way we have a 4 sync magic wand box.
Before:

After:

- swindrum
- 998 Cooper
- Posts: 500
- Joined: Wed Dec 05, 2012 5:21 pm
- Location: Victoria BC Canada
Re: My Austin Countryman Project
Interestingly, I have my suspicions that this gearbox could "see dead people", as I found this in the sump:
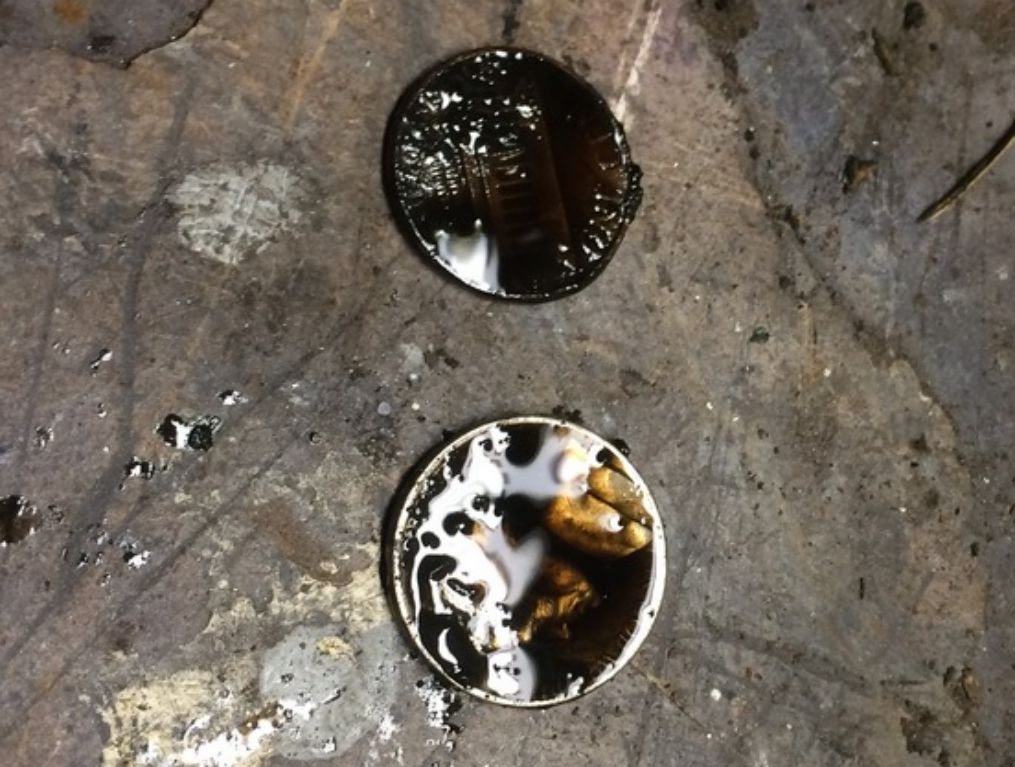
Get it? It's six cents! Hahahahahaha!
I'll get my coat....

Get it? It's six cents! Hahahahahaha!
I'll get my coat....
- swindrum
- 998 Cooper
- Posts: 500
- Joined: Wed Dec 05, 2012 5:21 pm
- Location: Victoria BC Canada
Re: My Austin Countryman Project
Nothing too interesting to report, used the DA sander on the body and got the metal all smooth and shiny in preparation for the bodywork. Started the bodywork yesterday, lots of sanding dust... No photos, because well, everything looks the same.
- swindrum
- 998 Cooper
- Posts: 500
- Joined: Wed Dec 05, 2012 5:21 pm
- Location: Victoria BC Canada
Re: My Austin Countryman Project
Finally something of note, Sanding was, well, dusty... but mostly straight now.
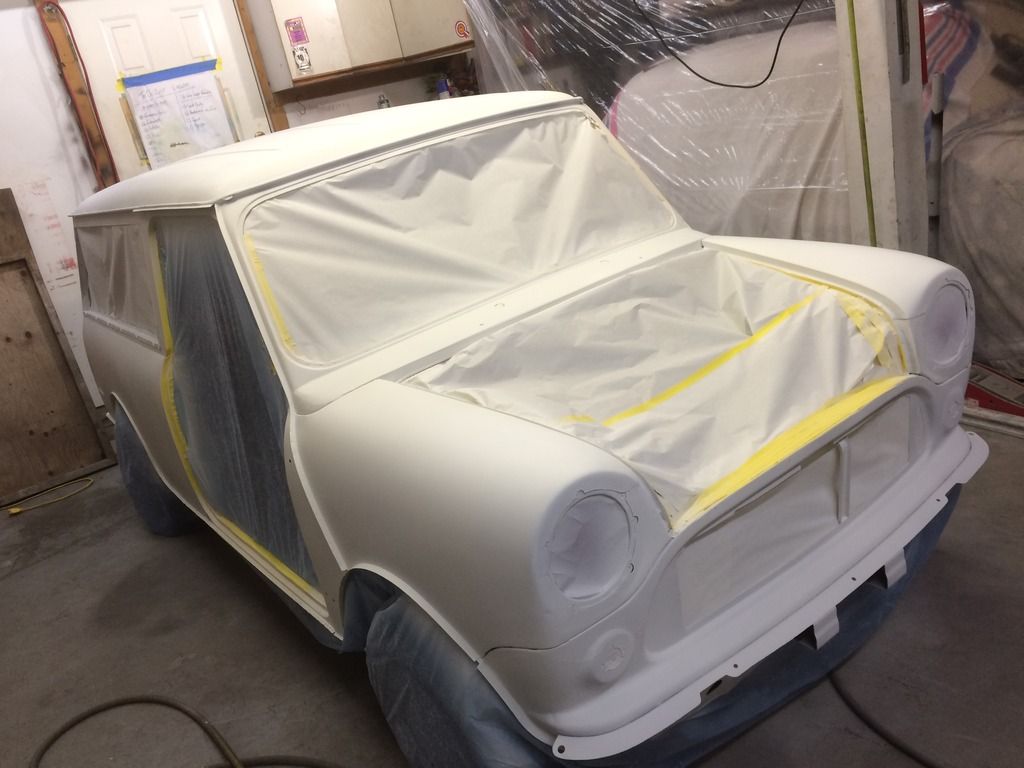
Hit it with some epoxy primer sealer in anticipation of a few coats of high build primer later in the week. I have been hoping for temperatures to improve, but instead ran a bunch of heaters in the shop instead.
Got the temperature up nice and warm, then plugged in the exhaust fan, and promptly sucked all the lovely heat out. As soon as the primer was on, I killed the fan and fired up all the heaters again.
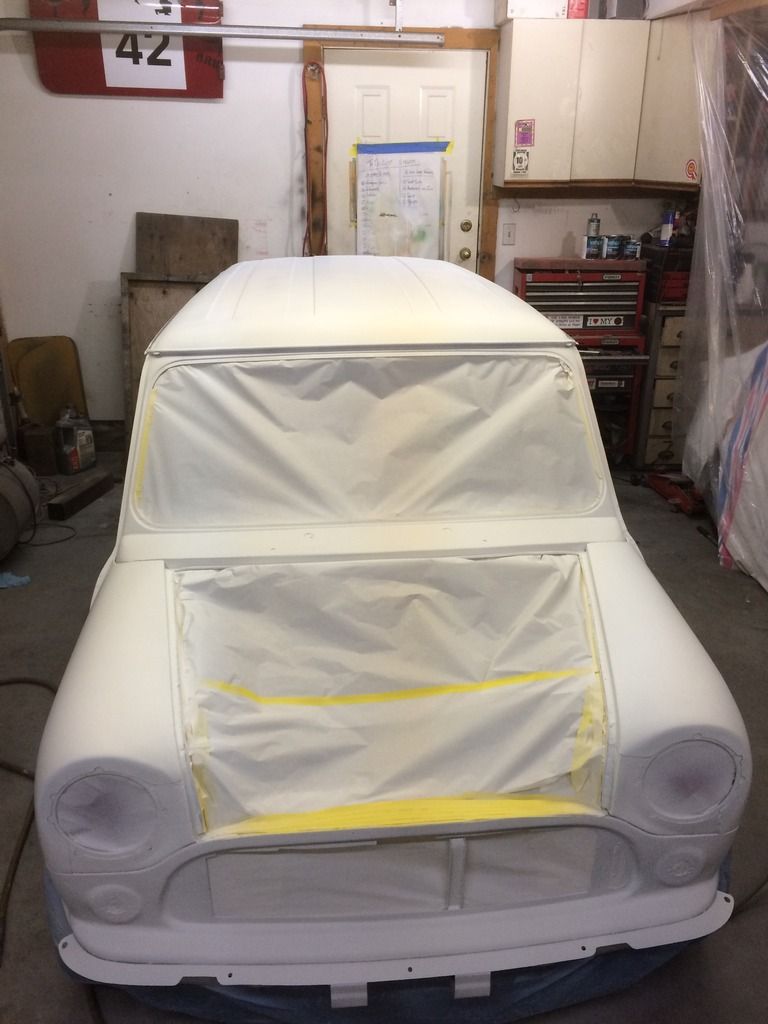
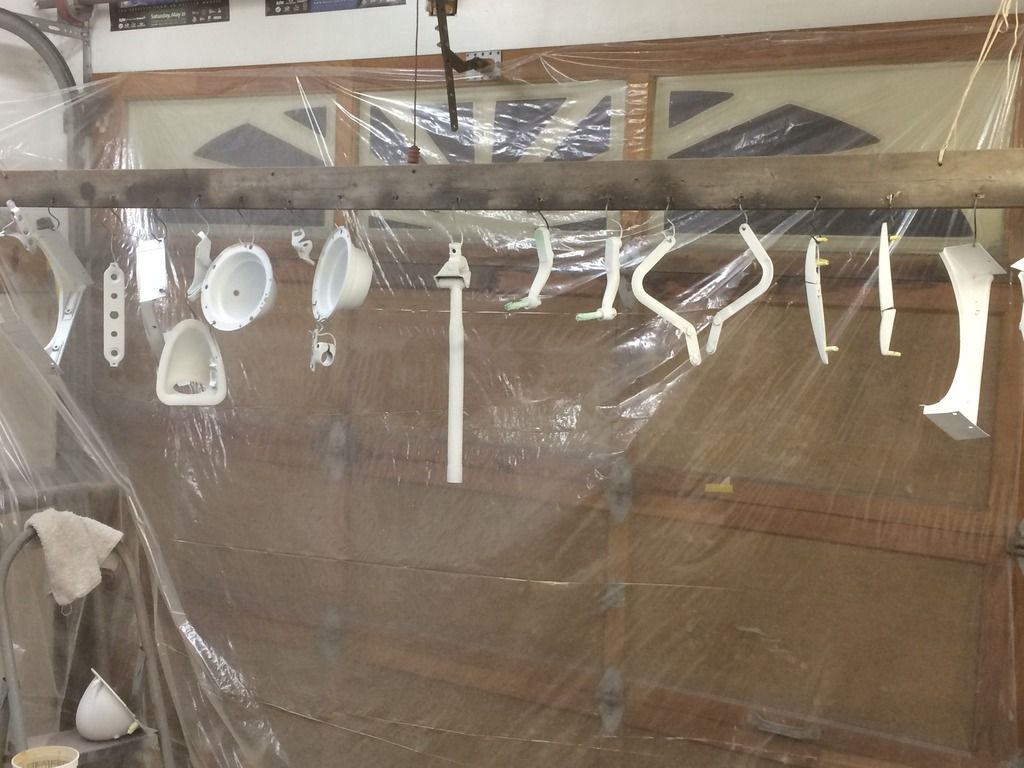


-
docka
- 998 Cooper
- Posts: 736
- Joined: Wed Aug 07, 2013 1:18 am
- Location: Cumbria
-
dbo
- Basic 850
- Posts: 25
- Joined: Thu Jun 24, 2010 2:59 pm
- Location: British Columbia, Canada
Re: My Austin Countryman Project
Hey, I see some pieces hanging there that don't belong on that car.
Cheers
Dennis
Cheers
Dennis
- swindrum
- 998 Cooper
- Posts: 500
- Joined: Wed Dec 05, 2012 5:21 pm
- Location: Victoria BC Canada
Re: My Austin Countryman Project
I thought you might recognize some of those bits....
Hopefully back to you by the weekend!
Hopefully back to you by the weekend!
- swindrum
- 998 Cooper
- Posts: 500
- Joined: Wed Dec 05, 2012 5:21 pm
- Location: Victoria BC Canada
Re: My Austin Countryman Project
Priming continues, the white coat was a direct to metal epoxy, and now comes a few coats of hi-build
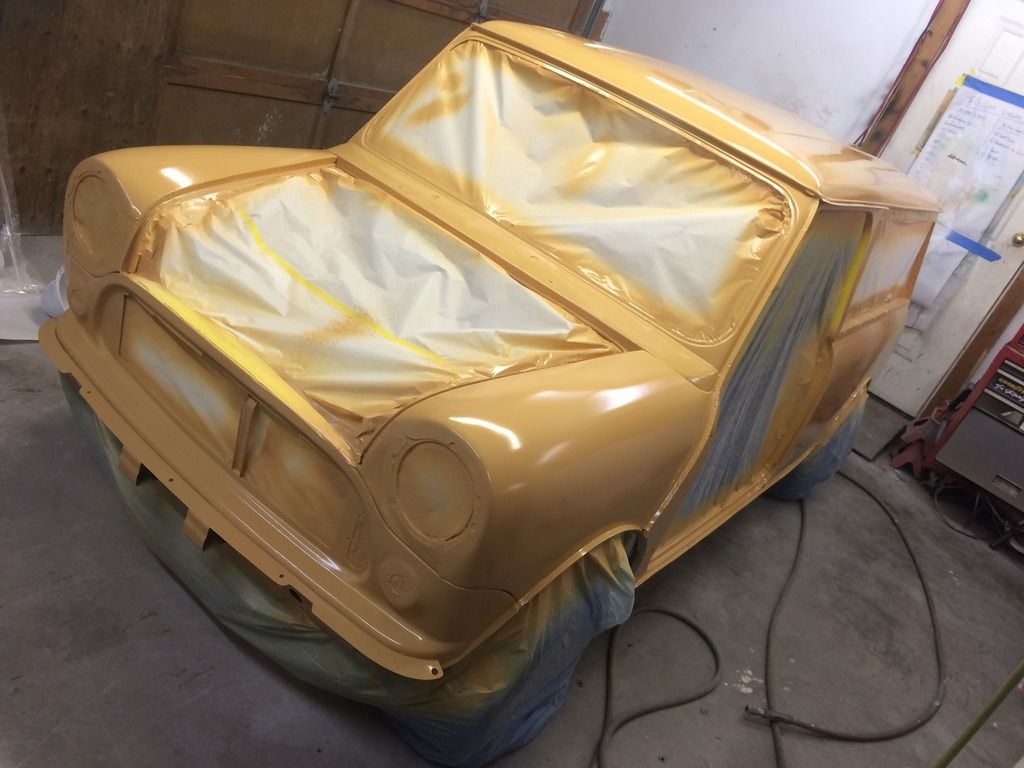
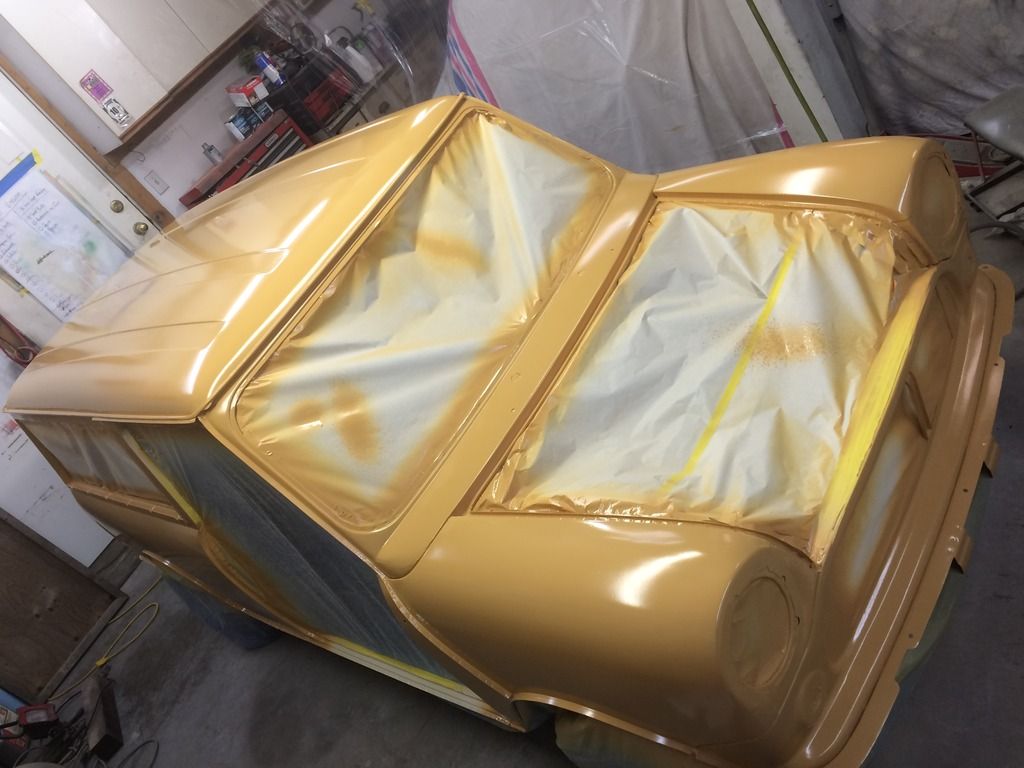
This will be sanded with 320, looking for, and fixing, imperfections, then hit again with a couple more coats of hi-build


This will be sanded with 320, looking for, and fixing, imperfections, then hit again with a couple more coats of hi-build
-
Tagus
- Basic 850
- Posts: 86
- Joined: Wed Feb 01, 2012 4:58 am
- Location: British Columbia Canada
Re: My Austin Countryman Project
Wow Sean! It must feel great to get to this point in the build! Looking great..
Ron
Ron
- swindrum
- 998 Cooper
- Posts: 500
- Joined: Wed Dec 05, 2012 5:21 pm
- Location: Victoria BC Canada
Re: My Austin Countryman Project
Thanks Ron, it is definitely a milestone, it feels good to have finally gotten here.
-
Tagus
- Basic 850
- Posts: 86
- Joined: Wed Feb 01, 2012 4:58 am
- Location: British Columbia Canada
- swindrum
- 998 Cooper
- Posts: 500
- Joined: Wed Dec 05, 2012 5:21 pm
- Location: Victoria BC Canada
Re: My Austin Countryman Project
I have nothing but good things to say about the Valspar stuff. It is easy to use and is reasonably priced.
I also like that the majority of the products use the same activator and reducer, so you don't need to buy those every time you get a different product.
I also like that the majority of the products use the same activator and reducer, so you don't need to buy those every time you get a different product.