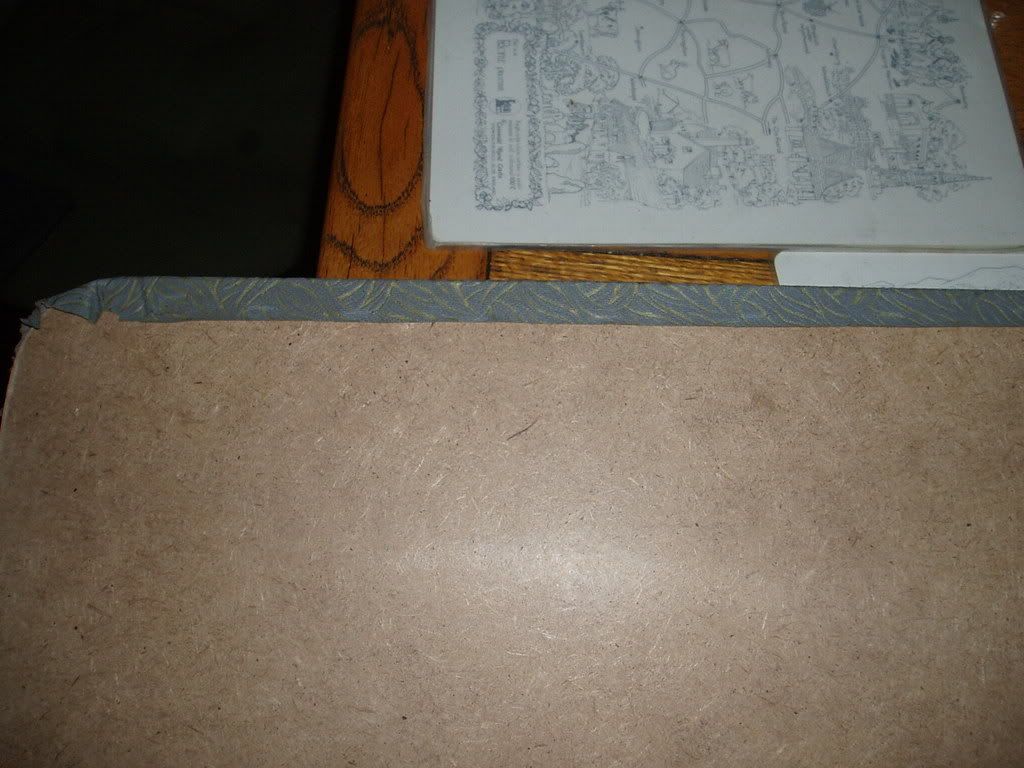
This door card I bought years ago when people were not worried about originality so cost only a couple of £. It was all matt black and the backing card badly water damaged.
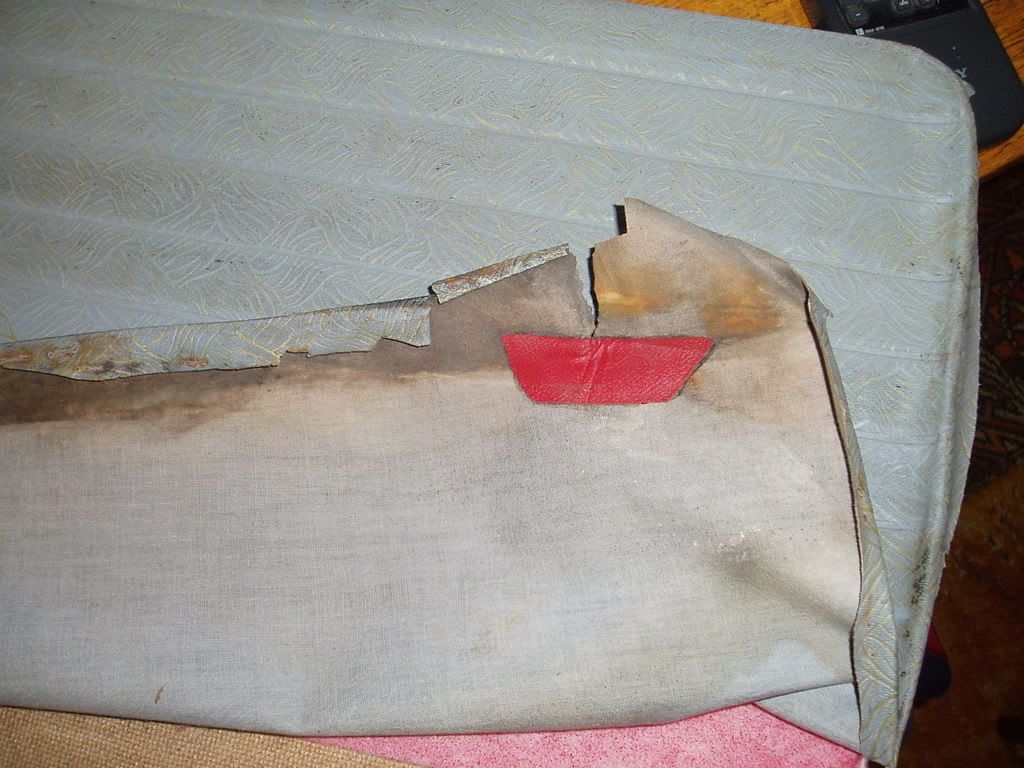
The bottom edge of the brocade was not attached as all the staples and backing had long since disintegrated, with a few rips and splits to the brocade.
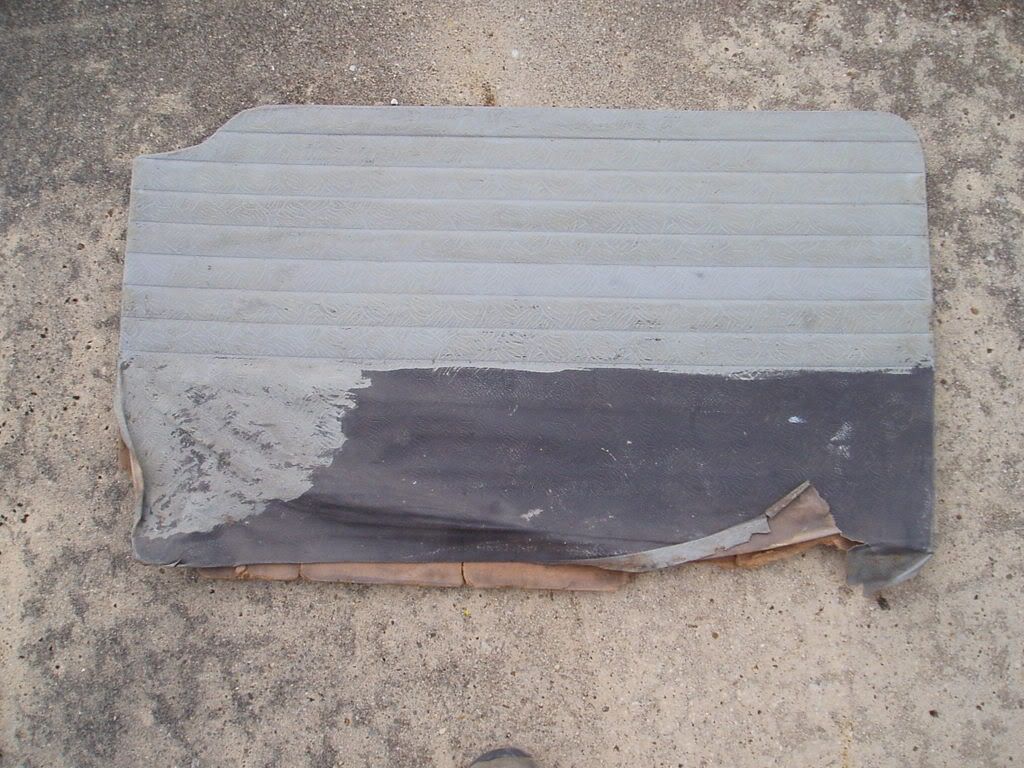
In the first picture I have already removed some of the black paint but decided that it was first necessary to stabilize the brocade on a new back board.
Firstly remove the remaining staples from the remaining edges then using a scaple very carefully cut away the brocade from the backboard, this is held where it is sealed to the back board along the lines of the pleats.
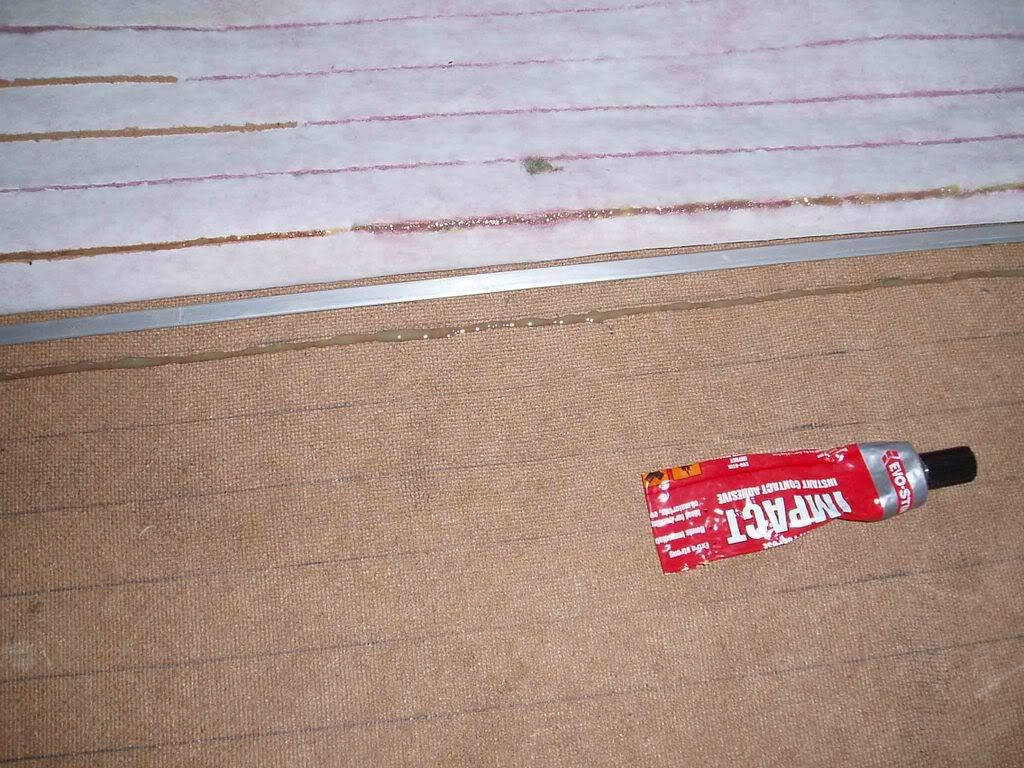
If your trim has any small nicks or tears you can glue these up from behind, using duct tape stuck to the front of the vinyl holding the two edges of the tear together stick a patch of spare vinyl over the hole using evostick contact adhesive use on both surfaces and leave until touch dry before sticking down.
When removed from the board trace around the old board onto a new piece of hardboard, this is available from any diy store where the bottom was damaged I used another card that was intact as reference but left an extra few mm for safety.
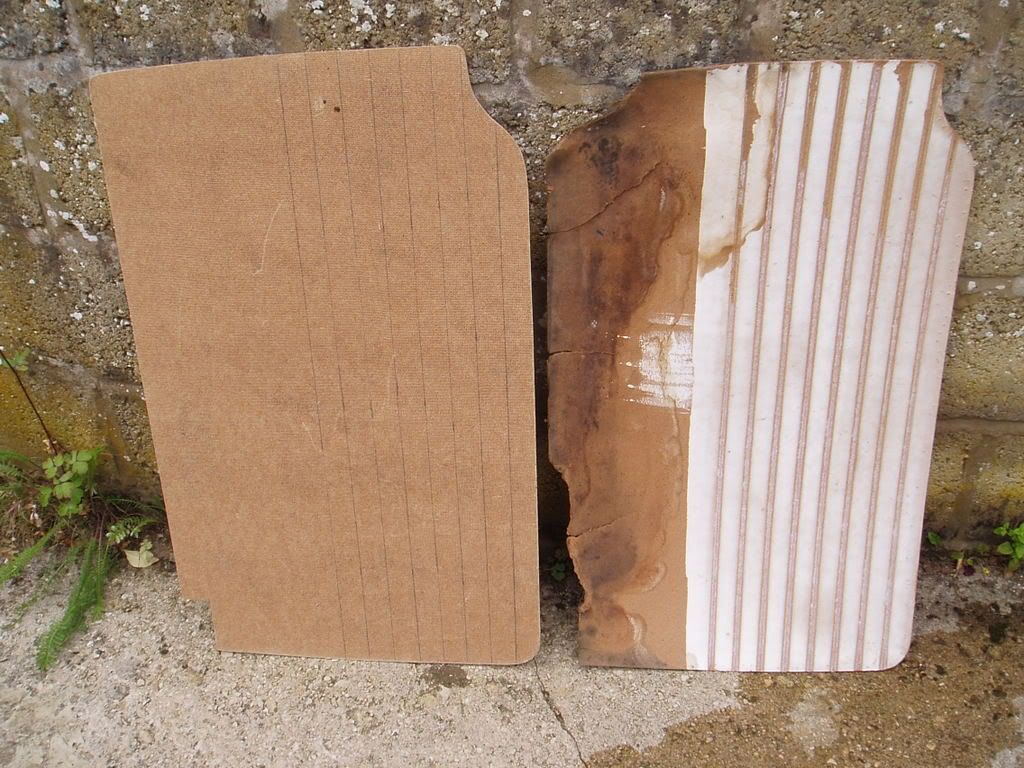
Mark onto the new card where the brocade pleats were stuck down, this is important to get right to get the proper effect when glued.
Next up attach the top edge of the brocade to the back board. Originally this would have been stapled but as 2mm staples seem next to impossible to buy I used evostick , use on both surfaces and leave until touch dry before sticking down. I started at the front top of the door corner and worked back along sticking 3” down at a time, do not at this stage glue any more than the very top edge also leave the scallop where the door lock is unglued.
The next thing to do is stick down the pleats to get these to sit nice I used a bit of flat metal bar to hold the vinyl just off the surface, again glue both the hardboard and the vinyl this time the full width in one go and wait till touch dry and then pull the vinyl tight and press down along the pleat working from the middle out. Leave to dry for ½ hr then repeat until all 8 are glued.
Once the pleats are stuck down you can then check that the hardboard is the right depth, any excess can be shaved off with a plane just take enough off so the vinyl pulls over the edge without straining it too much as age is not on it’s side. Once sized right glue it down I did it a bit at a time working from the middle out, this is to get rid of any wrinkles that may occur if you worked from one side to the other, once this is dry the sides can then be glued. Bulldog clips or the like are handy to keep pressure whilst gluing any of the edges.
Once the gluing is all done you can start removing the paint!!!
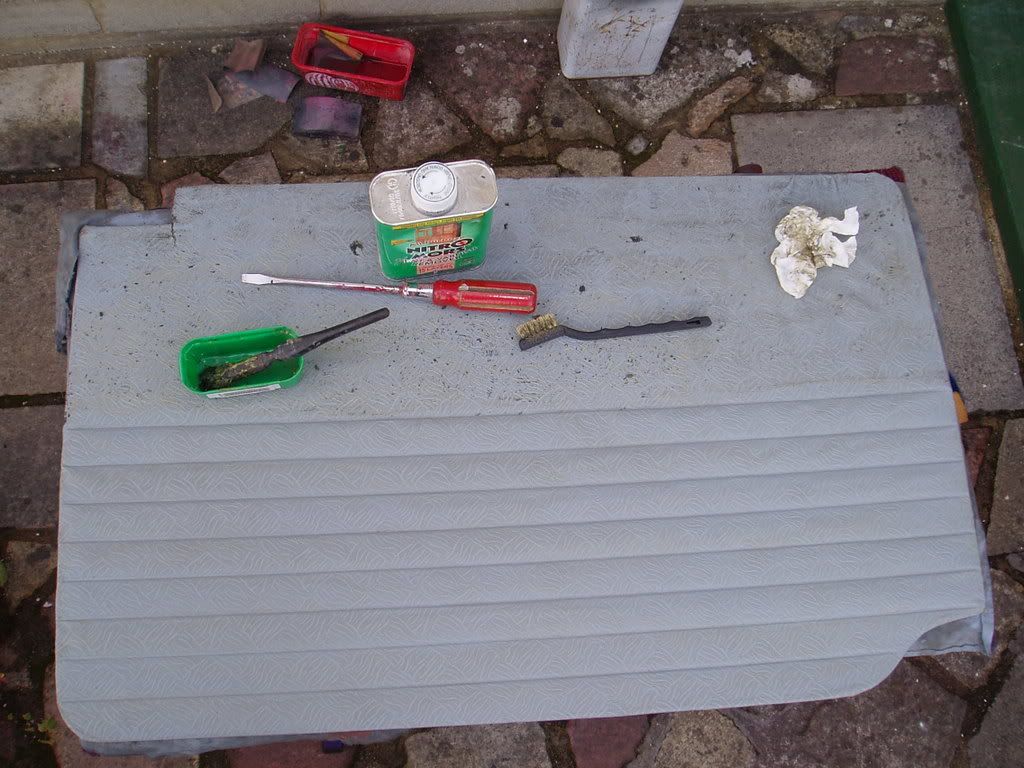
I use nitromors for this, I find it very effective but you do also remove the gold with it but old gold can look more dull yellow so to give it a freshen up does no harm.
I work an area of about 4 sq” at a time, this is because the paint stripper alarmingly puckers up the brocade and softens it momentarily, once wiped off it takes back its original look.
With the stripper applied use a wide blunt screwdriver to drag very lightly across the surface at an angle of about 40 degrees, never push as it will probably just go straight through the vinyl. This first application and scrape will get the worst off, wipe off any surplus and repeat again, this will usually just leave a few stubborn marks in the grain, move onto the next patch and repeat until the whole panel has been cleaned.
Once at this stage I then give it a good wipe off and then put some fresh stripper on, this time I tend to apply it to an area of one whole pleat at a time then using a brass style wire brush (the small ones that come in packs of 3 from the £ shop) I work any remaining paint out the grain then wipe off.
When the whole panel is done brush and wipe off and you will probably find the odd little mark still remaining, at this stage I use a scaple to flick the paint out the grain as it is still soft from the paint stripper.
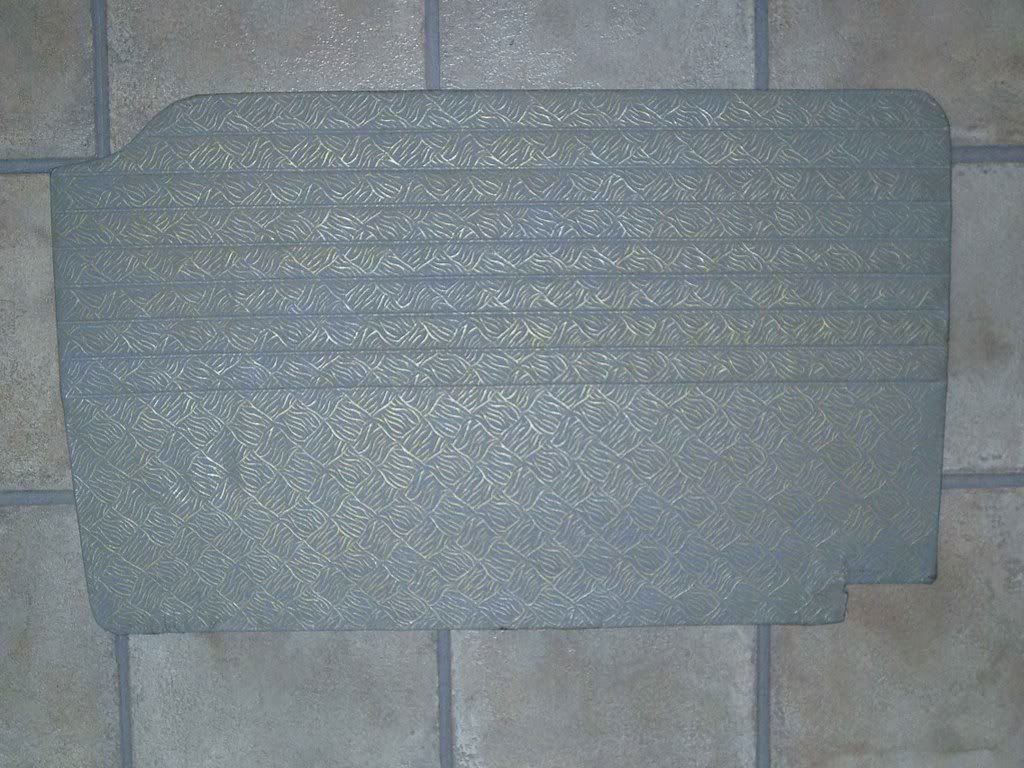
There you have a naked brocade panel .
To reapply the gold I use a unibal gold gel pen, try a few different ones to what matches your other panels finish as they all tend to be varying colours but when you find one which you like buy a whole batch at once to get a good colour match.
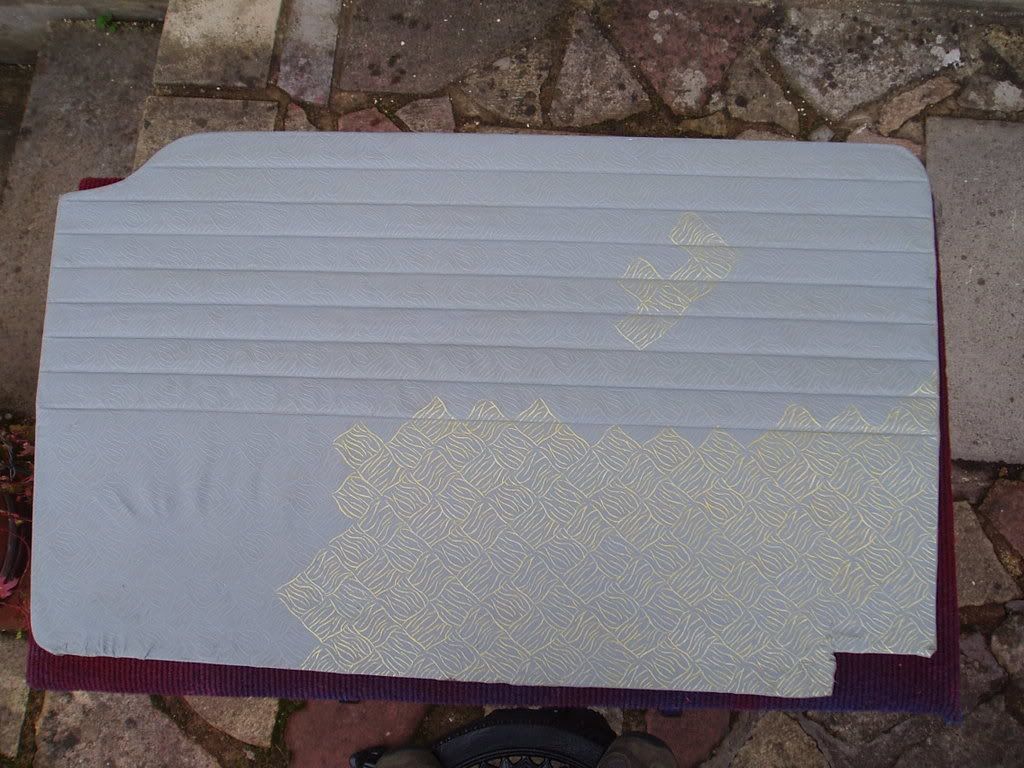
Drawing the gold back in is time consuming but at least it can be done indoors in the warm in front of the tv!! A bit at a time
It can be a bit confusing which of the lines of the brocade need to be coloured, get some tracing paper and mark a block of about 9 gold squares onto it, this can then be used as a quick reference so you don’t mess up at this late stage.
When doing your colouring watch you do not rub what you have just done with the side of your hand smudging it everywhere.
If any of the splits that you repaired earlier are still visible, I found Zinc 182 paint a great colour match so you can spot out the joins.