You did a great job on the W&P Jens.
Mhuffy The Traveller.
-
InimiaD
- 1275 Cooper S
- Posts: 1526
- Joined: Thu Jul 01, 2010 11:20 pm
- Location: West of Offas Dyke.
-
JC T ONE
- 1275 Cooper S
- Posts: 3180
- Joined: Fri Aug 13, 2010 5:25 am
- Location: Denmark
Re: Mhuffy The Traveller.
InimiaD wrote:Thanks Jens and Pete.
You did a great job on the W&P Jens.
Thanks for the kind words, however I did have help, with the bodywork.
I have now "restartet" the thread about my car, as I didnt have a computer back then
It will tell about the resto process in "real time" from October 2006 to July 2007.
Jens Christian
Last edited by JC T ONE on Wed Nov 09, 2011 4:13 am, edited 1 time in total.
-
36inter
- 998 Cooper
- Posts: 506
- Joined: Sun Jul 04, 2010 8:15 pm
Re: Mhuffy The Traveller.
I have not had time to rummage in the garage yet but from memory I think we fabricated a front mount for the timing plate using the standard 1100 rubber mount but at the back I think we started with a metro engine mount that bolts to the flywheel housing and modified the big circular rubber mount to sit on a fabricated plate welded to the subframe, its all a long time ago now, however I concocted it, it worked brilliant.
With a bit of lateral thinking I am sure you will come up with something but the 1100 timing plate as a starting point is the answer, hope this helps.
Pete
With a bit of lateral thinking I am sure you will come up with something but the 1100 timing plate as a starting point is the answer, hope this helps.
Pete
-
georgek
- 850 Super
- Posts: 223
- Joined: Sun Oct 09, 2011 3:56 pm
Re: Mhuffy The Traveller.
Your a wizard with the welder!!! Nice to see how you've tackled the repairs in such detail it must be very rewarding for you to see it coming together thanks for posting the pictures.
-
InimiaD
- 1275 Cooper S
- Posts: 1526
- Joined: Thu Jul 01, 2010 11:20 pm
- Location: West of Offas Dyke.
Re: Mhuffy The Traveller.
@ Pete. Thanks for the info on the mounting method. (should I rephrase that?) 
Did you still use the original engine mount under the rad.?
@georgek. Thanks for the kind words. The best way to describe my welding is,,,erm,,, agricultural, but it gets the job done. It's amazing what a flap wheel can do.
Did you still use the original engine mount under the rad.?
@georgek. Thanks for the kind words. The best way to describe my welding is,,,erm,,, agricultural, but it gets the job done. It's amazing what a flap wheel can do.
-
InimiaD
- 1275 Cooper S
- Posts: 1526
- Joined: Thu Jul 01, 2010 11:20 pm
- Location: West of Offas Dyke.
Re: Mhuffy The Traveller.
Next on the to do list is the doors. I'd decided to reskin the drivers door from the outset.
The original drivers door had been, uuumm, borrowed and was hastily resprayed and fitted as an emergency on to my MK2 saloon when it's door decided to disintegrate just before an MOT.
So the best o/side spare door was dragged out of the shed and was duly attacked with a flap wheel, in all the right places.
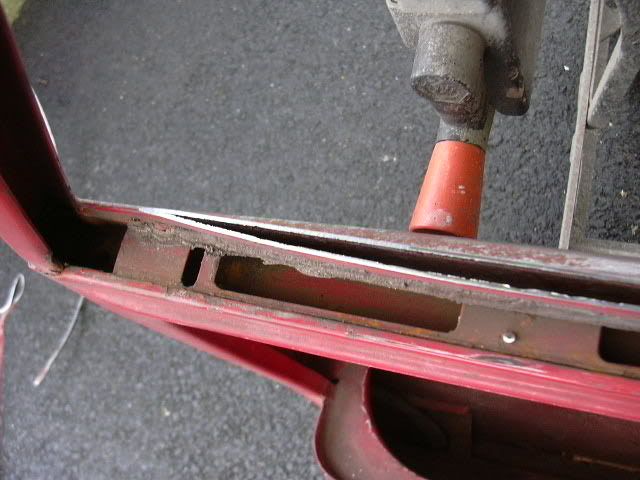
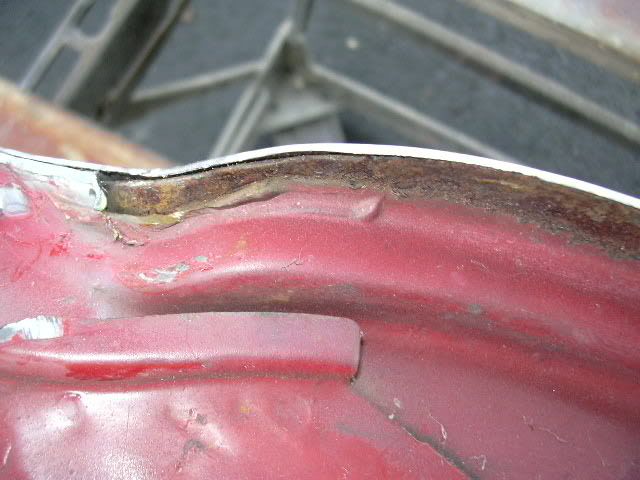
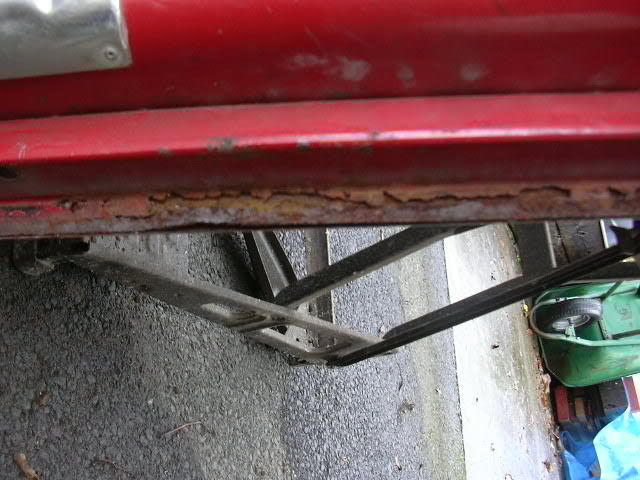
,,,,,,to reveal the hidden teabag ridden mess at the bottom of the frame.
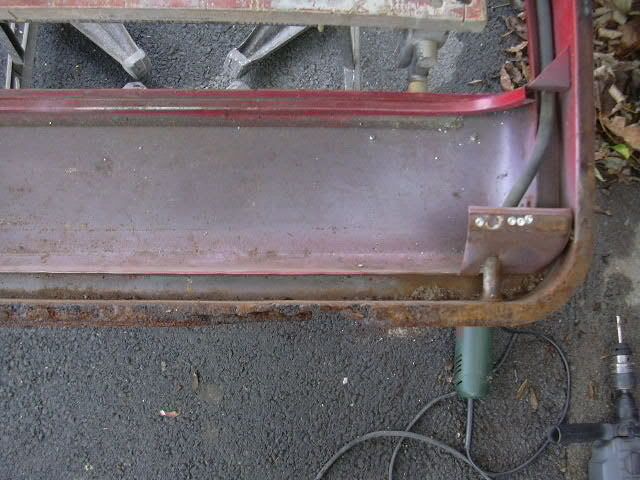
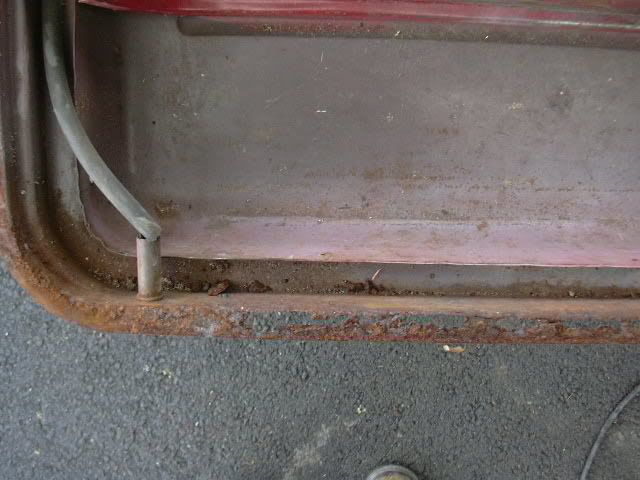
The quality of the replacement door bottom repair panels are pretty poor so as usual I had no choice but to make my own.
Another old doorskin off a scrapper was duly chopped up and supplied the steel for the home made repair.
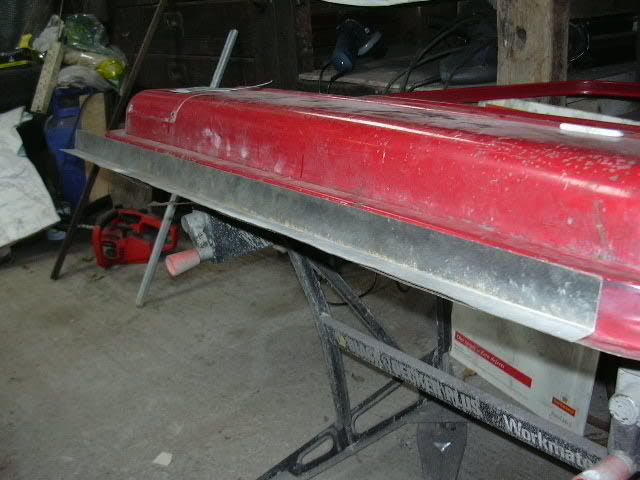
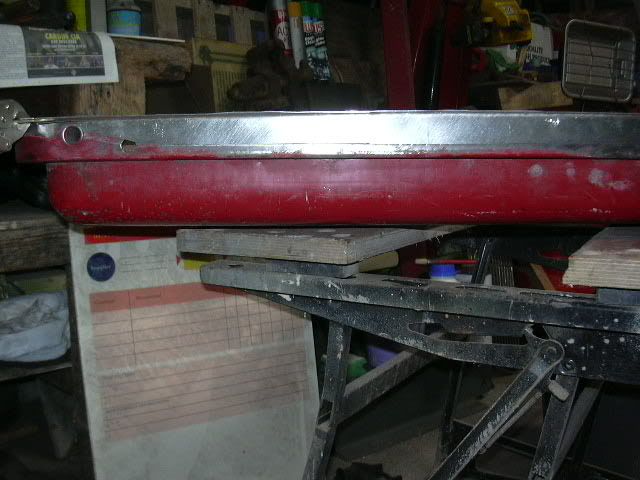
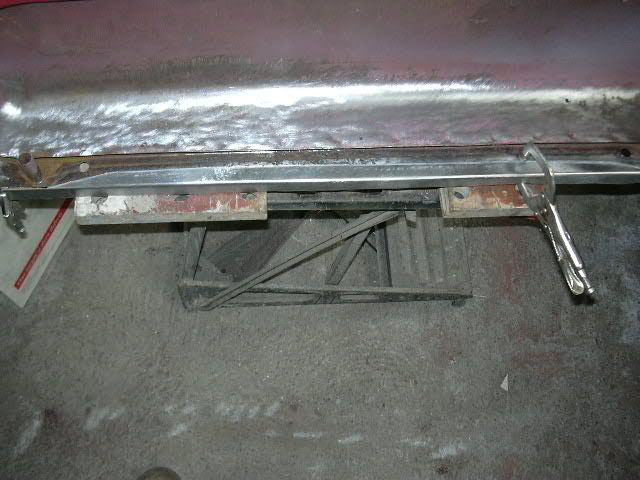
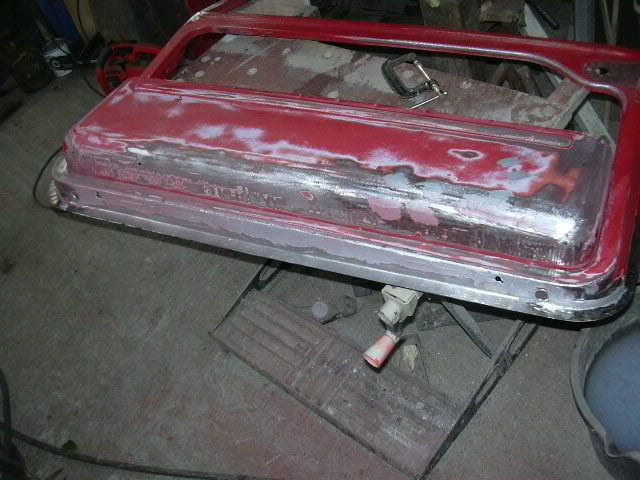
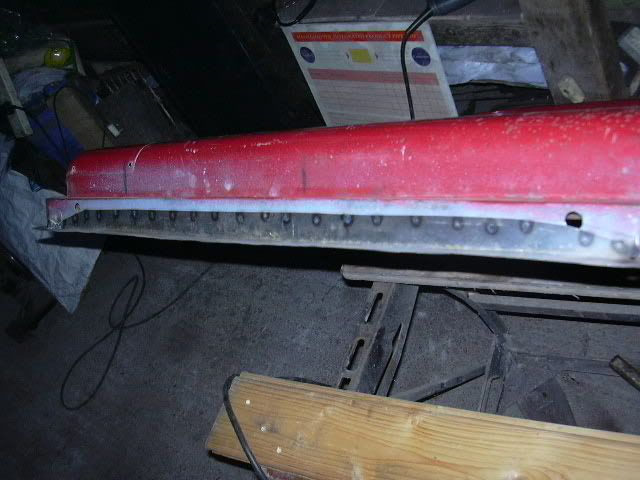
The frame before it got cleaned up and primed ready for the skin.
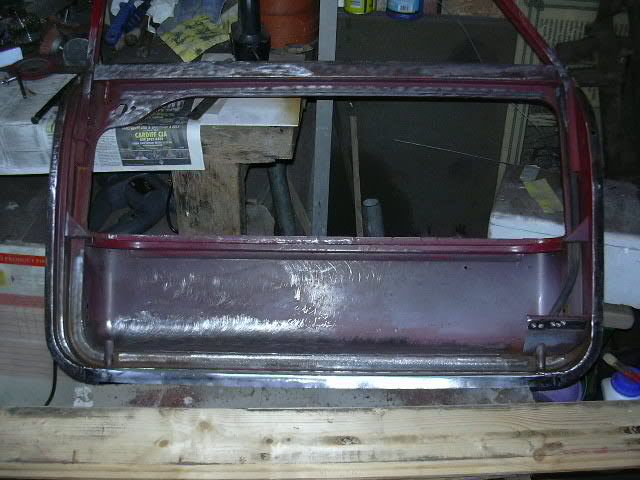
,,,,,,,and finally, stick the skin on.
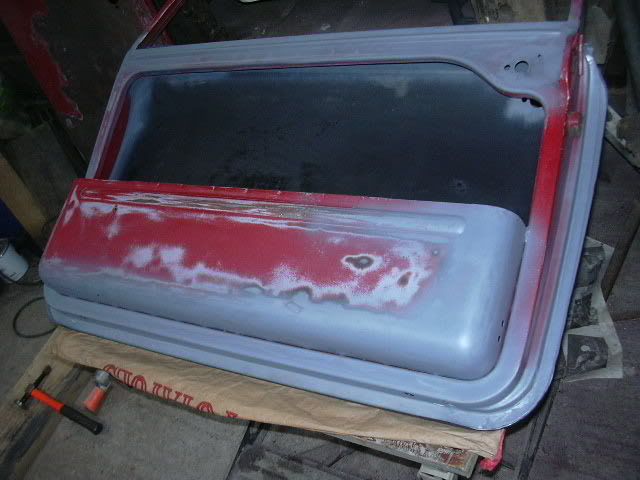
The channel area was in surprisingly good nick and only needed a rub down and some rustproofer. Happy days.
The original drivers door had been, uuumm, borrowed and was hastily resprayed and fitted as an emergency on to my MK2 saloon when it's door decided to disintegrate just before an MOT.
So the best o/side spare door was dragged out of the shed and was duly attacked with a flap wheel, in all the right places.


,,,,,,to reveal the hidden teabag ridden mess at the bottom of the frame.


The quality of the replacement door bottom repair panels are pretty poor so as usual I had no choice but to make my own.
Another old doorskin off a scrapper was duly chopped up and supplied the steel for the home made repair.


The frame before it got cleaned up and primed ready for the skin.

,,,,,,,and finally, stick the skin on.

The channel area was in surprisingly good nick and only needed a rub down and some rustproofer. Happy days.
-
36inter
- 998 Cooper
- Posts: 506
- Joined: Sun Jul 04, 2010 8:15 pm
Re: Mhuffy The Traveller.
Dispensed with the rad mounting alltogether so it became a three point fixing with the one under the flywheel housing.
Mounting is what I used to do years ago, sleeping has replaced that, mostly....
Mounting is what I used to do years ago, sleeping has replaced that, mostly....
-
JC T ONE
- 1275 Cooper S
- Posts: 3180
- Joined: Fri Aug 13, 2010 5:25 am
- Location: Denmark
Re: Mhuffy The Traveller.
36inter wrote:
Dispensed with the rad mounting alltogether so it became a three point fixing,
with the one under the flywheel housing.
Same way JanSpeed did it on my car.
36inter wrote:
Mounting is what I used to do years ago, sleeping has replaced that, mostly....
Ditto
-
JC T ONE
- 1275 Cooper S
- Posts: 3180
- Joined: Fri Aug 13, 2010 5:25 am
- Location: Denmark
-
InimiaD
- 1275 Cooper S
- Posts: 1526
- Joined: Thu Jul 01, 2010 11:20 pm
- Location: West of Offas Dyke.
Re: Mhuffy The Traveller.
Thanks for that info Pete.36inter wrote:Dispensed with the rad mounting alltogether so it became a three point fixing with the one under the flywheel housing.
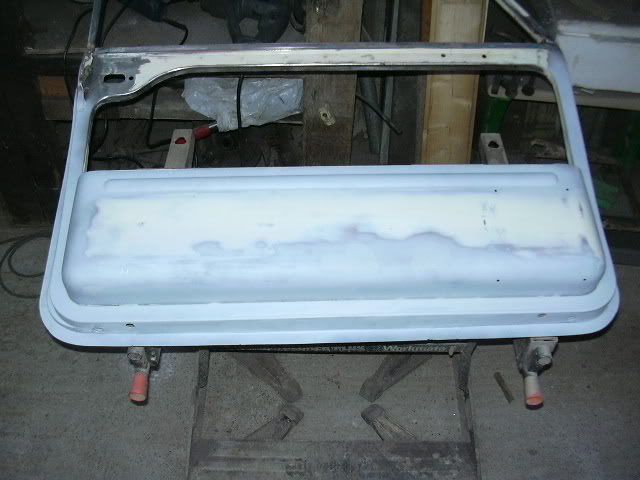
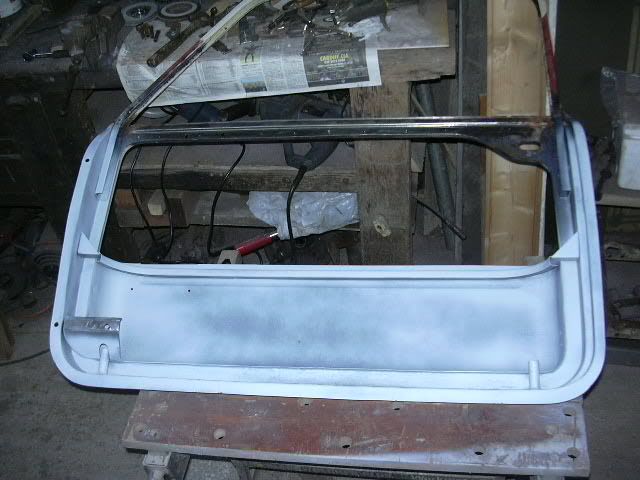
,,,,,,,,,and so it was time to have a look at the n/side door.
The sprayer had a look at it before I started and he said that apart from slight bubbling at the bottom rear of the skin it was good to go.
I personally didn't like the look of the bubbly bits so decided to reskin it anyway. I am soooo glad I did. The following pics will reveal all. What a nightmare of a job. The drivers door repair was a piece of pi*s compared.
The old skin was removed to reveal the following.
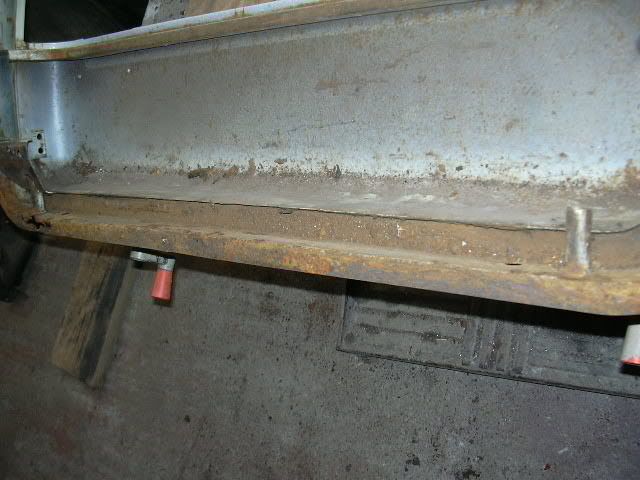
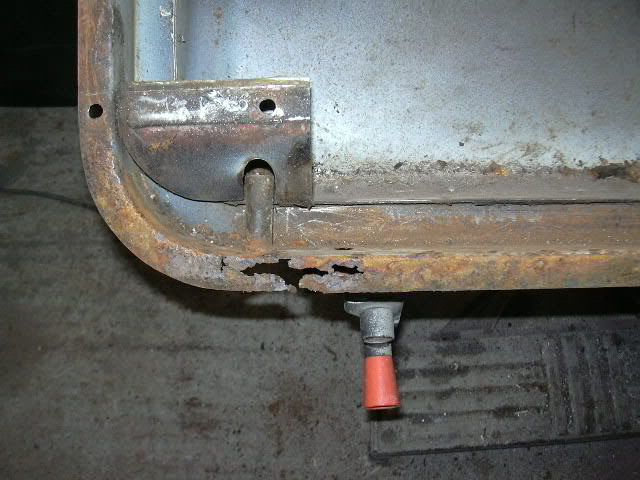
Oh happy days. NOT.
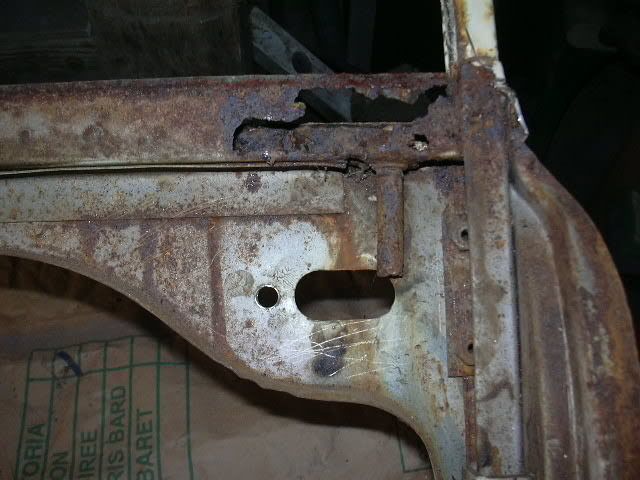
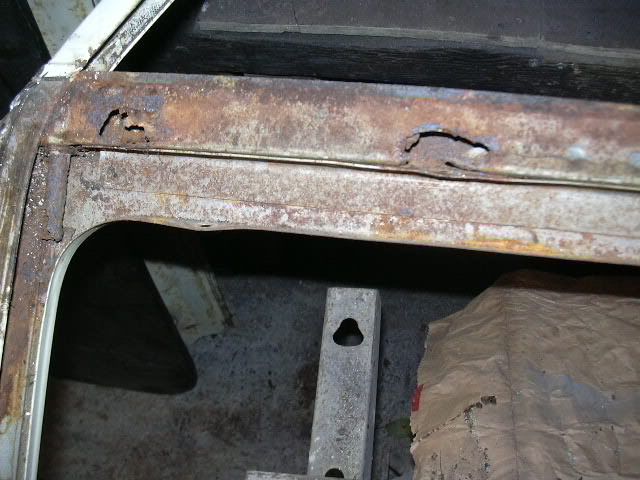
Is it any wonder the channel area rots.? There is no paint at all in this area.
Straight on the phone to Doreen to order some more repair bits from M Machine.
Carried on with the bottom repairs. Much the same as the o/side door, but a bit more involved on the corners.
Fully rust proofed and primed ready for the skin, but not before the channel repair was done.
Where's that postie.??
-
36inter
- 998 Cooper
- Posts: 506
- Joined: Sun Jul 04, 2010 8:15 pm
Re: Mhuffy The Traveller.
Thats great work, I bet you could make something out of nothing......
Pete
Pete
-
georgek
- 850 Super
- Posts: 223
- Joined: Sun Oct 09, 2011 3:56 pm
Re: Mhuffy The Traveller.
Nice to see a craftsman at work! and so well documented which is a nice part of the cars history.
-
InimiaD
- 1275 Cooper S
- Posts: 1526
- Joined: Thu Jul 01, 2010 11:20 pm
- Location: West of Offas Dyke.
Re: Mhuffy The Traveller.
Thank you for the encouraging comments guys. Appreciated.
Carrying on where I left off, the next task is to repair the channel area. This was my first attempt at reskinning / repairing early doors, but seeing as I'd used up my stock of decent doors and my unwillingness to dip my hand into the wallet and fork out for new ones
 it was time to bite the bullet and delve into the unknown.
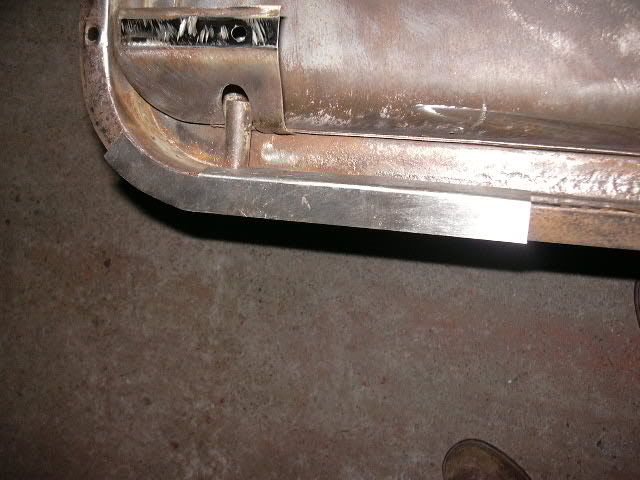
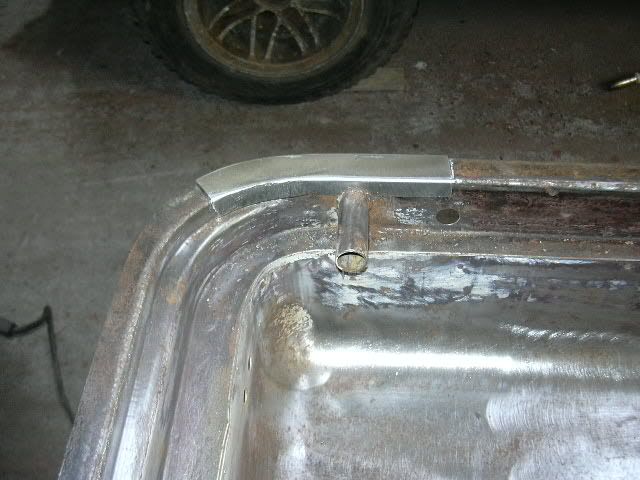
The channel repair kit comes in 3 pieces, an L shaped support section, the U shaped channel section and the nicely made top section that the window runners fix onto.
Sound simple enough, stick them altogether and weld them into the door frame. Yeah.
All the new sections are over length so have to be trimmed to fit. No big deal.
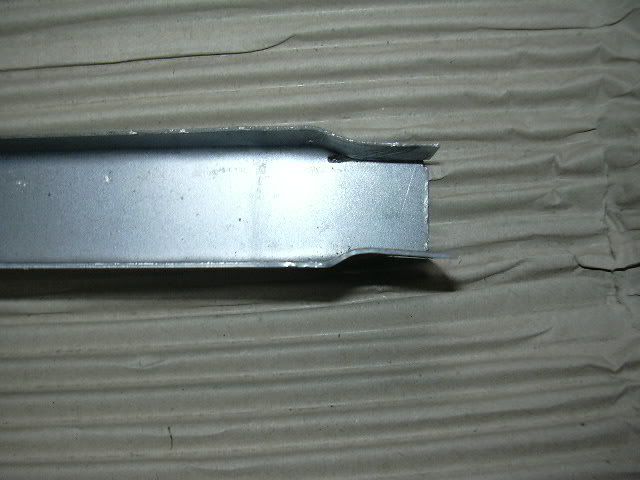
The U section channel can only be fitted downwards with both ends inside the upper window frame.
The ends of the U channel need to be narrowed to fit into the window frame.
There are no drain holes or tubes. Hmmmm, second thoughts time.
The old and the new.
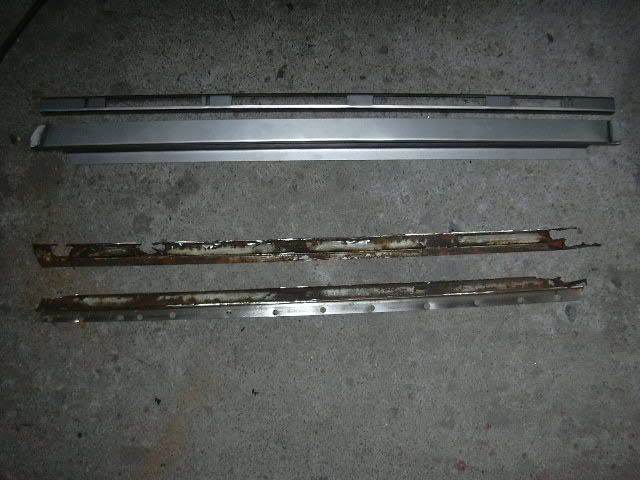
The ends of the U channel, after being cut to length, narrowed, before being welded up.
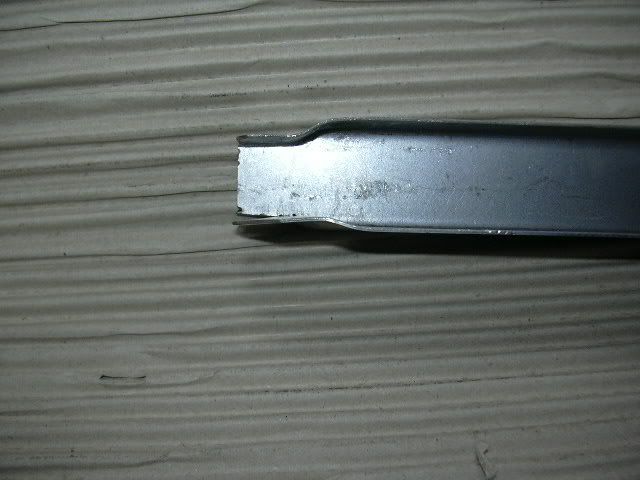
I used a length of old hydrolastic pipe, (knew I'd find a use for it eventually), flared the end, bashed a recess in the channel with some small sockets acting as formers, then tack welded the tubes in from underneath.
Looks agricultural and it is.
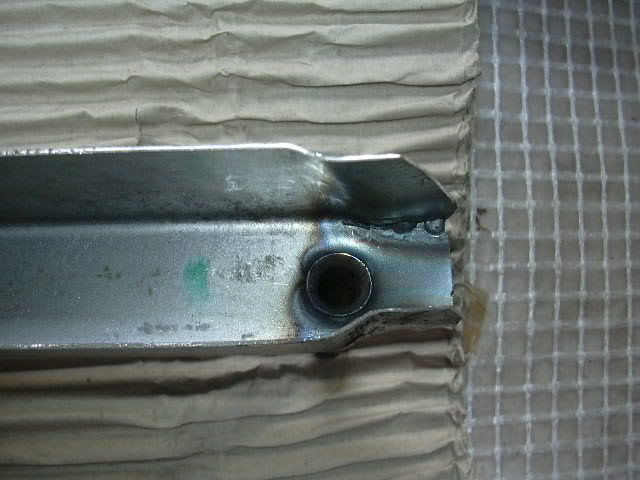
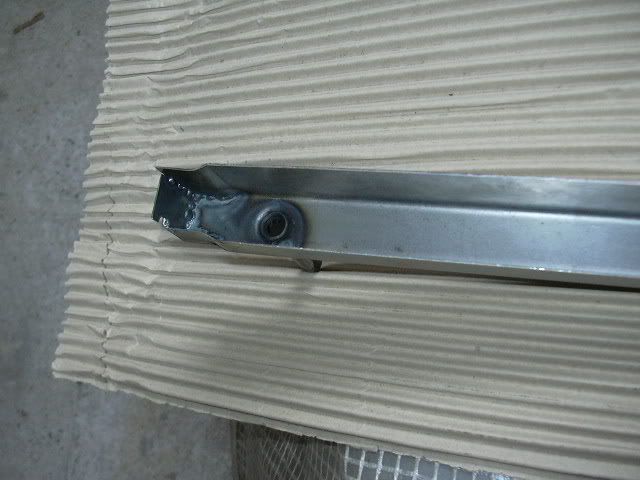
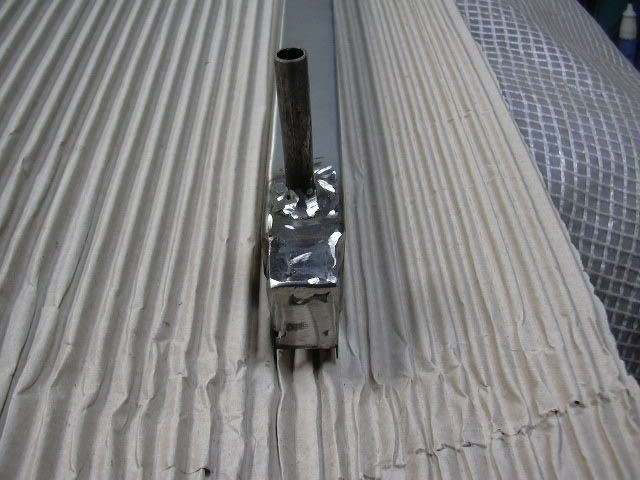
The rest of the battle will follow soon.
Carrying on where I left off, the next task is to repair the channel area. This was my first attempt at reskinning / repairing early doors, but seeing as I'd used up my stock of decent doors and my unwillingness to dip my hand into the wallet and fork out for new ones
The channel repair kit comes in 3 pieces, an L shaped support section, the U shaped channel section and the nicely made top section that the window runners fix onto.
Sound simple enough, stick them altogether and weld them into the door frame. Yeah.
All the new sections are over length so have to be trimmed to fit. No big deal.
The U section channel can only be fitted downwards with both ends inside the upper window frame.
The ends of the U channel need to be narrowed to fit into the window frame.
There are no drain holes or tubes. Hmmmm, second thoughts time.
The old and the new.

The ends of the U channel, after being cut to length, narrowed, before being welded up.


I used a length of old hydrolastic pipe, (knew I'd find a use for it eventually), flared the end, bashed a recess in the channel with some small sockets acting as formers, then tack welded the tubes in from underneath.
Looks agricultural and it is.


The rest of the battle will follow soon.
-
InimiaD
- 1275 Cooper S
- Posts: 1526
- Joined: Thu Jul 01, 2010 11:20 pm
- Location: West of Offas Dyke.
Re: Mhuffy The Traveller.
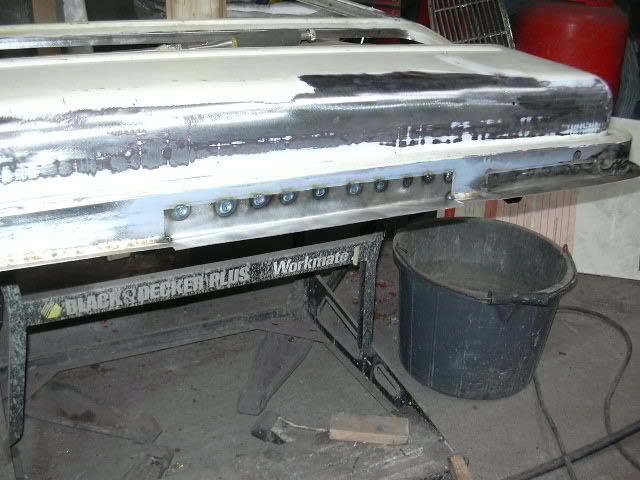
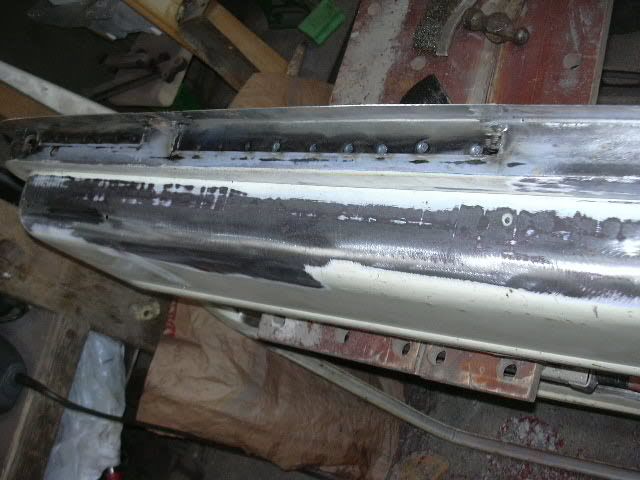
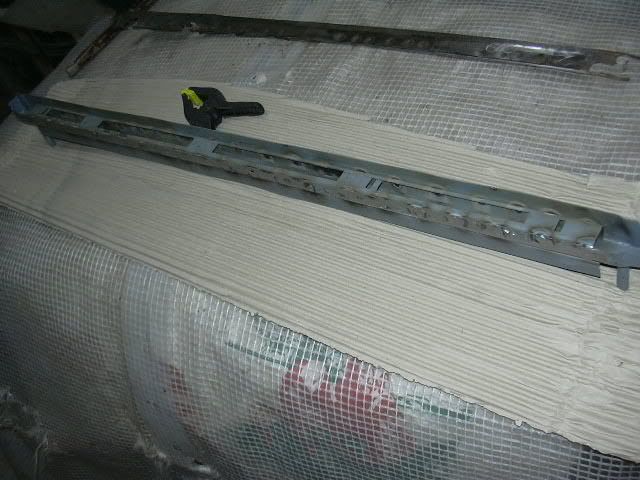
Next job was to stick all the repair bits together before welding them to the door frame as one piece.
I tried to utilise the spot welder as much as possible so that was used to attach the L section support to the underside of the U channel.
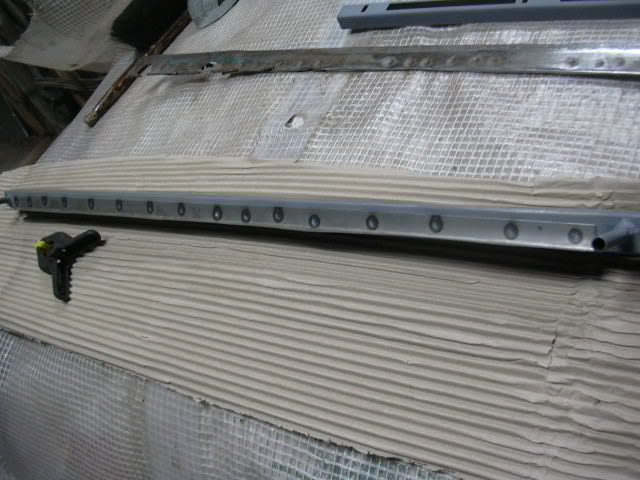
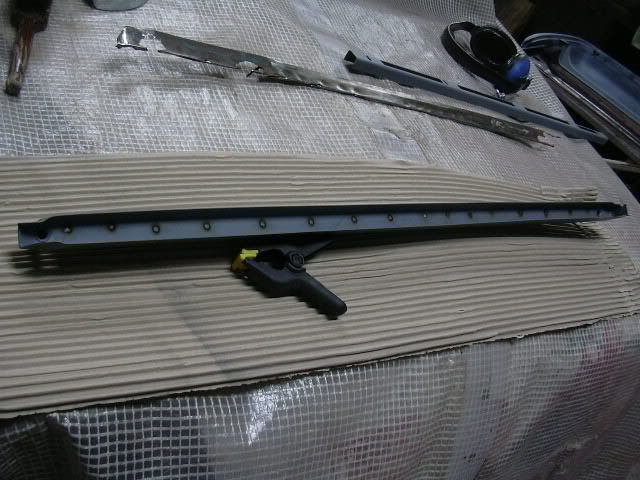
With that done the top section could only be welded in with plug welds. The U section drilled and ready for plug welding the top section in.
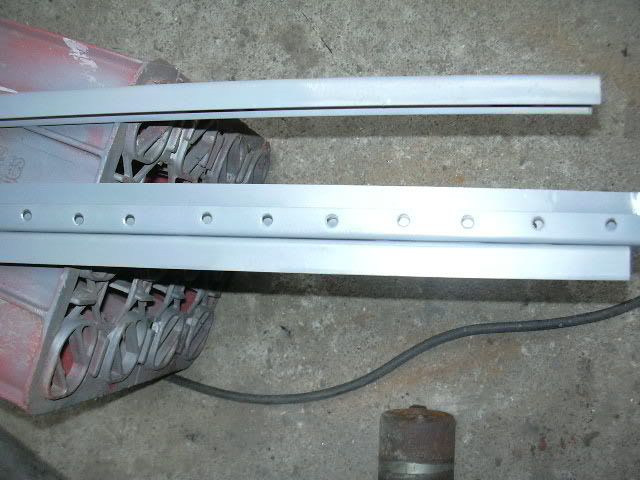
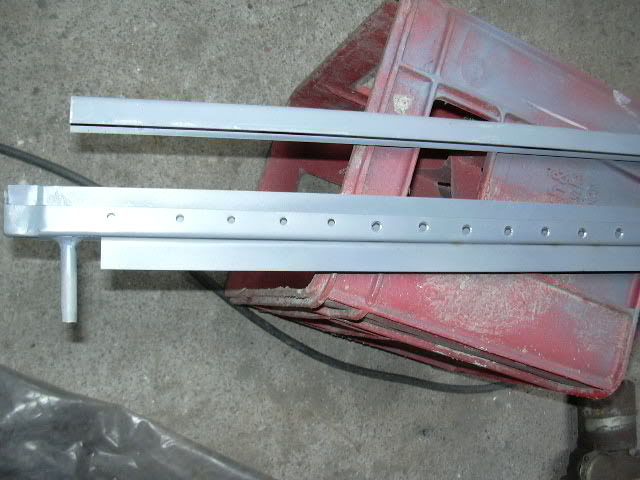
The top section plugged into place.
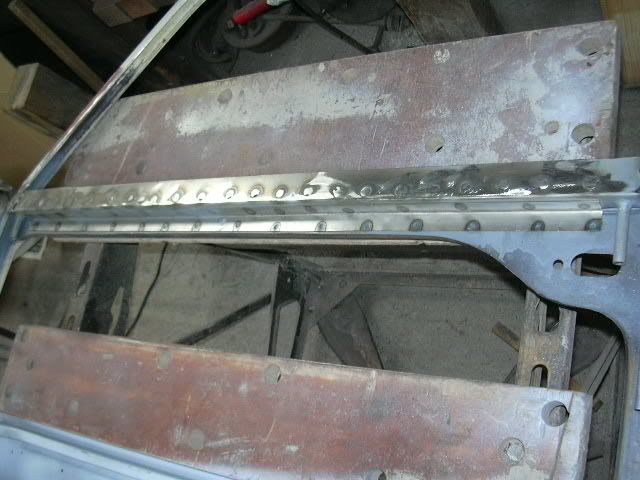
Spot welded into place on the door frame.
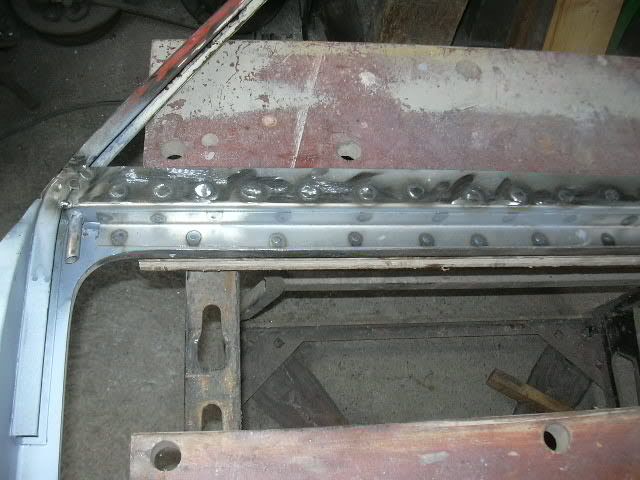
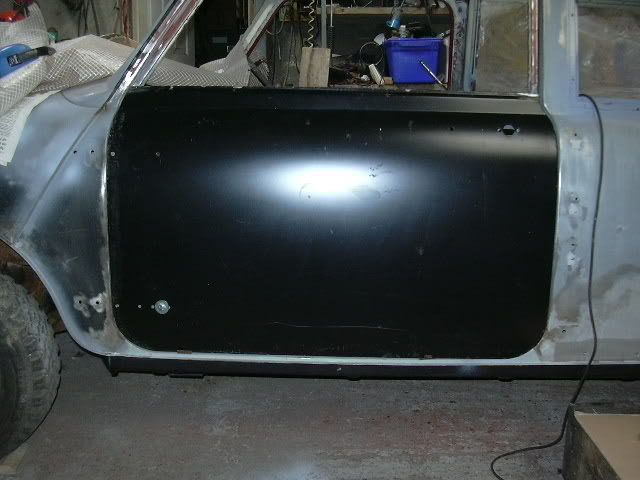
Tidied up and ready for the door skin.
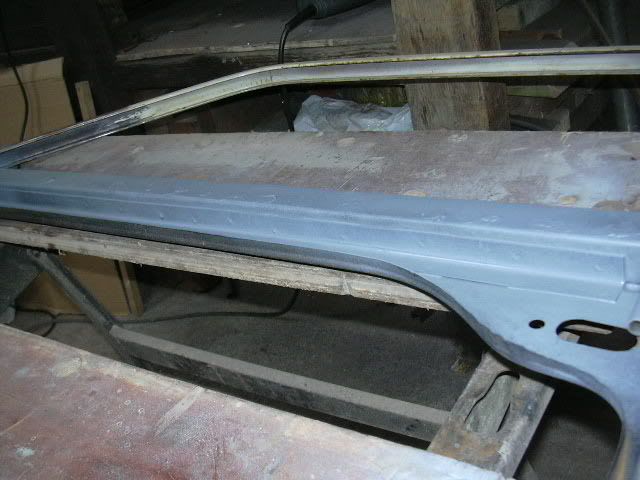
Doorskin on and "manipulated" to fit the bodyshell.
I tried to utilise the spot welder as much as possible so that was used to attach the L section support to the underside of the U channel.


With that done the top section could only be welded in with plug welds.


The top section plugged into place.

Spot welded into place on the door frame.


Tidied up and ready for the door skin.

Doorskin on and "manipulated" to fit the bodyshell.

-
georgek
- 850 Super
- Posts: 223
- Joined: Sun Oct 09, 2011 3:56 pm
Re: Mhuffy The Traveller.
Nice work as usual, it's a shame we haven't got a "thumbs up" sign in with the smilies it would get used a lot! 
-
InimiaD
- 1275 Cooper S
- Posts: 1526
- Joined: Thu Jul 01, 2010 11:20 pm
- Location: West of Offas Dyke.
Re: Mhuffy The Traveller.
Thank you George. 
Not much to do before it was trailered away for paint, so,,,,,,,,,,,,,,,,,,,,,,,,,,,,,,,,,,,,,,,,,,,,,,,,,,,,,,,,,,,,,,,,,,,,,,,,,,,,,
,,,,,I turned the old girl over and gave her a good rubbing down,,,,,,,,,,,,,,,,,,,,,,,,,,,,,,,,,,,,,,,,,,,,,,,,,,,,,,
,,,,,,,,,,,,,,,,,,,,,with a zip wheel etc.
I then turned my attention to the Woody.
Seam sealer applied to all the usual places plus some extra places which included the inner apex hinge support brackets. Thought I may as well do these, anything to stop the dreaded rust returning.
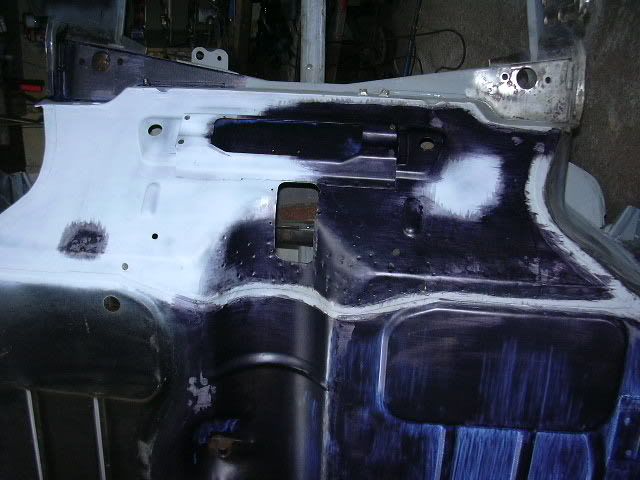
The milky blue paint is Bilt Hambers Hydrate 80 rust proofing gear. It changes colour as it dries.
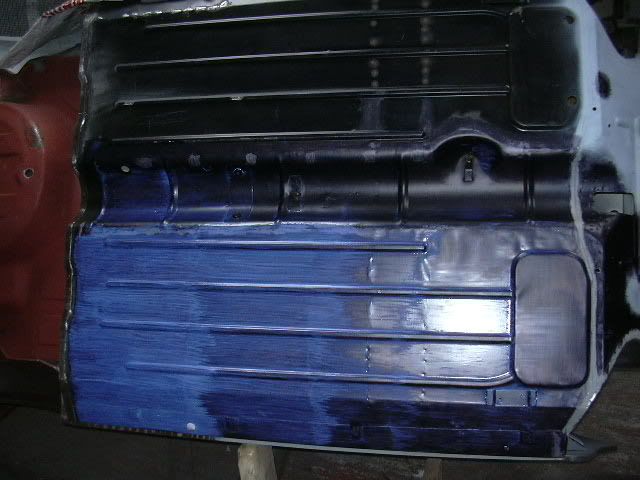
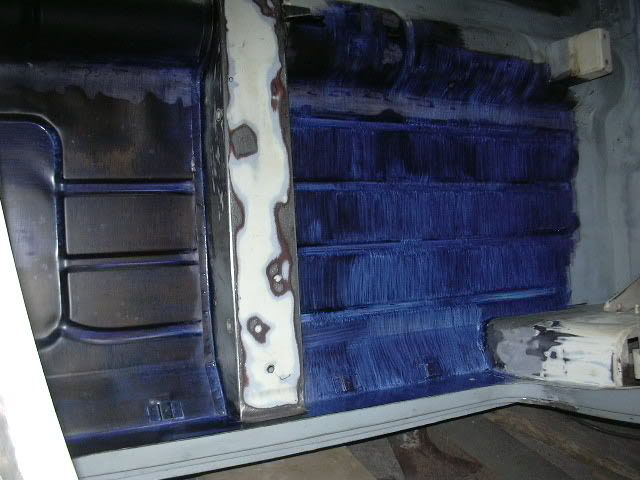
Most of the underside was coated with this gear in the hope of stopping the darn thing rusting in the future.
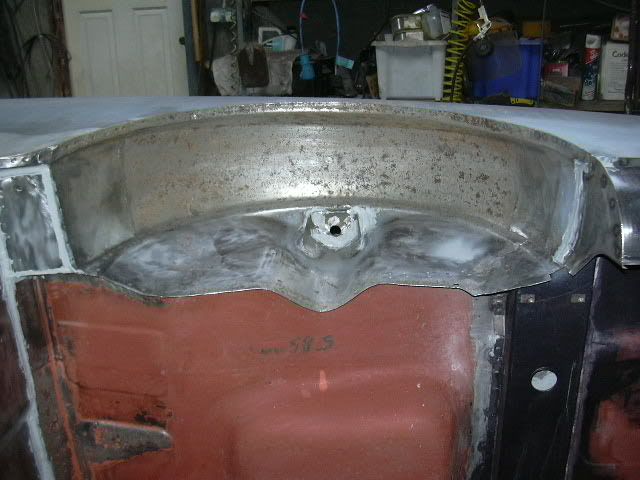
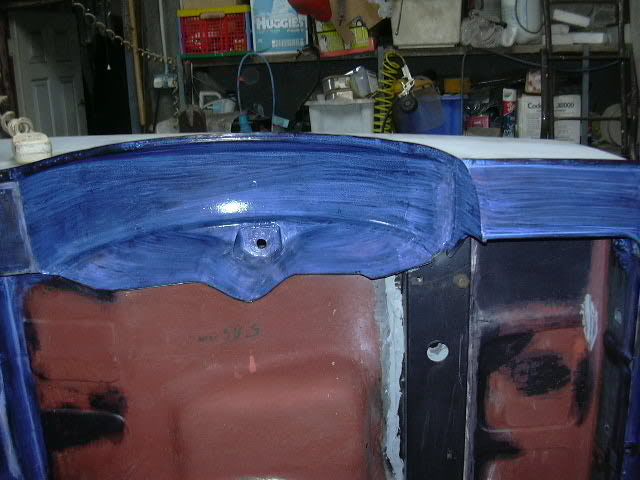
That's just about it with the body repairs. The sharp eyed amongst you may have noticed that I have not included the rear doors. It's a closely guarded secret at the moment, but the rear door will be something a bit different to the norm. If I can get it to blinking work.
Not much to do before it was trailered away for paint, so,,,,,,,,,,,,,,,,,,,,,,,,,,,,,,,,,,,,,,,,,,,,,,,,,,,,,,,,,,,,,,,,,,,,,,,,,,,,,
,,,,,I turned the old girl over and gave her a good rubbing down,,,,,,,,,,,,,,,,,,,,,,,,,,,,,,,,,,,,,,,,,,,,,,,,,,,,,,
,,,,,,,,,,,,,,,,,,,,,with a zip wheel etc.
I then turned my attention to the Woody.
Seam sealer applied to all the usual places plus some extra places which included the inner apex hinge support brackets. Thought I may as well do these, anything to stop the dreaded rust returning.

The milky blue paint is Bilt Hambers Hydrate 80 rust proofing gear. It changes colour as it dries.


Most of the underside was coated with this gear in the hope of stopping the darn thing rusting in the future.


That's just about it with the body repairs. The sharp eyed amongst you may have noticed that I have not included the rear doors. It's a closely guarded secret at the moment, but the rear door will be something a bit different to the norm. If I can get it to blinking work.
-
georgek
- 850 Super
- Posts: 223
- Joined: Sun Oct 09, 2011 3:56 pm
Re: Mhuffy The Traveller.
A bit like this perhaps? 
You do not have the required permissions to view the files attached to this post.
-
surfblue63
Re: Mhuffy The Traveller.
Could it be like this Portugese Mini IMA
http://minitravellerandcountrymanregist ... &Itemid=12


or could you be going for an Austin A40 Countryman split tailgate?
http://minitravellerandcountrymanregist ... &Itemid=12
Mini IMA
The Portuguese company IMA (Industria de Montagem de Automoveis) assembled Austin, Morris, Mini and LandRover cars.
From 1975 Portuguese legislation was brought in to allow so-called hybrid vehicles to be sold at a lower price than other cars. By "hybrid" we are not talking about fuel, but more about multi-purpose vehicles. In any case, this legislation almost certainly led to the creation of the Mini IMA, which was made between 1976 and 1980.
The Mini IMA was based on the Mini Van, so retained the external door hinges, but technicians at British Leyland of Portugal designed a single rear door, hinged at the top, which is unique to this version of the Mini estate. The Mini IMA also featured more comfortable, clubman-style seats and we believe it was a 5 seater!


or could you be going for an Austin A40 Countryman split tailgate?
-
InimiaD
- 1275 Cooper S
- Posts: 1526
- Joined: Thu Jul 01, 2010 11:20 pm
- Location: West of Offas Dyke.
Re: Mhuffy The Traveller.
The A40 tailgate was an option that I was keen on trying, but the K.I.S.S. principle kicked in.  The bottom hinges would have been a nightmare to sort out, not impossible, but a lot of fabricating needed..
As for the other suggestions, mmmm, nice.
As for the other suggestions, mmmm, nice.