Mhuffy The Traveller.
-
guru_1071
- 1275 Cooper S
- Posts: 2109
- Joined: Thu Jun 24, 2010 7:47 pm
Re: Mhuffy The Traveller.
you could have used a two speed wiper and run it through the original holes, all you do is use the mk1 rack and bits on a mk 2 motor.
or, do the wiring conversion for a mk1 motor and use that.
or, do the wiring conversion for a mk1 motor and use that.
please note, these are my own, individual sales, nothing whatsoever to do with my employer, minispares
-
InimiaD
- 1275 Cooper S
- Posts: 1526
- Joined: Thu Jul 01, 2010 11:20 pm
- Location: West of Offas Dyke.
Re: Mhuffy The Traveller.
There's a saying around these parts along the lines of, "If it can't be fixed with a hammer, then it's probably electrical". Sadly I fit that category and my car electrical knowledge is very basic.guru_1071 wrote:you could have used a two speed wiper and run it through the original holes, all you do is use the mk1 rack and bits on a mk 2 motor.
or, do the wiring conversion for a mk1 motor and use that.
Your tip is very useful though Rich.
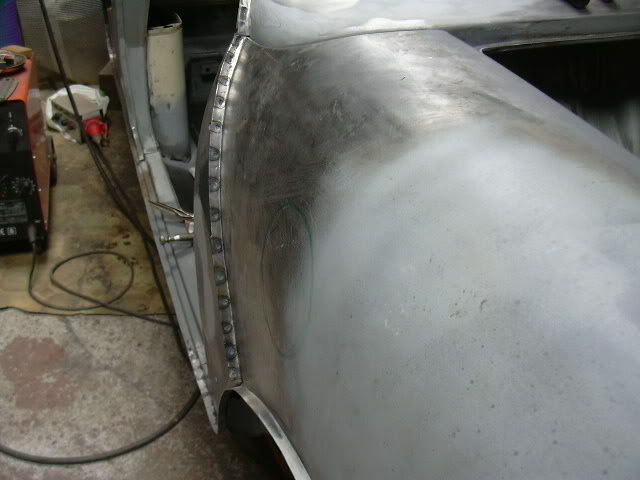
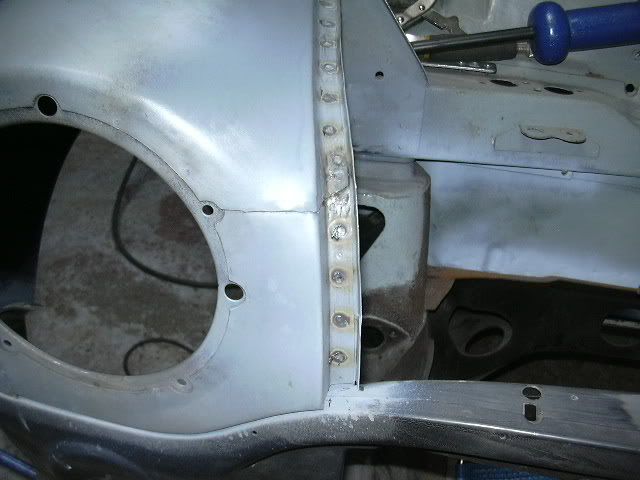
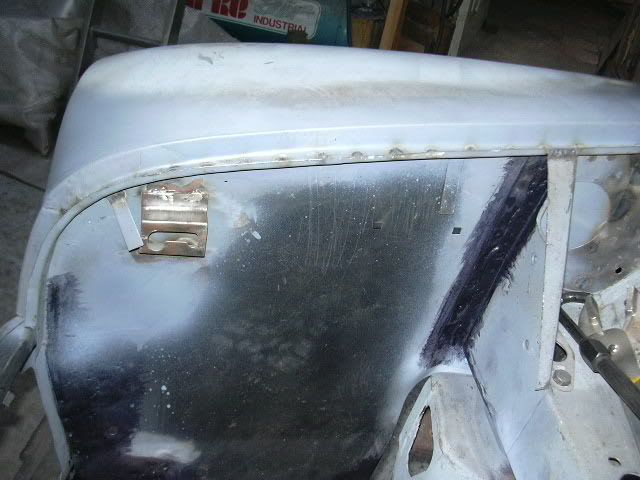
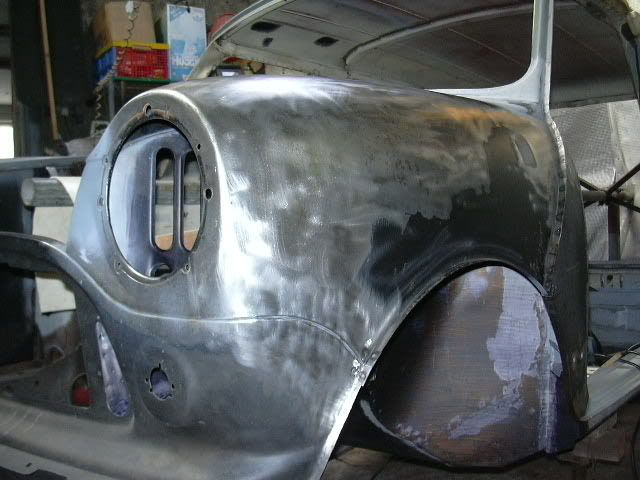
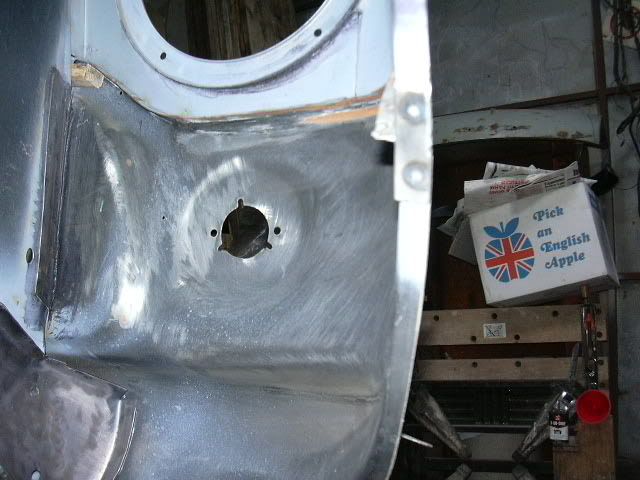
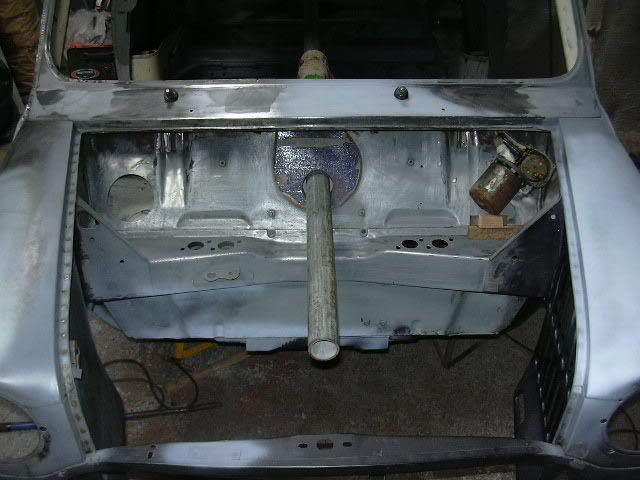
Time for the wings to be spotted on. Managed to find a pair of originals which made fitting them a tad easier although the back edge where they meet the front panel proved awkward, probably due to the poor quality of the front panel.
-
JC T ONE
- 1275 Cooper S
- Posts: 3180
- Joined: Fri Aug 13, 2010 5:25 am
- Location: Denmark
Re: Mhuffy The Traveller.
I would love to "swap" electric work, for body work 
When are we going to see the painted shell
Keep up the good work
When are we going to see the painted shell
Keep up the good work
- tomkidd
- 998 Cooper
- Posts: 727
- Joined: Thu Jun 24, 2010 6:44 pm
- Location: Lancaster
- Contact:
Re: Mhuffy The Traveller.
Looking good, you've got some good skills with the old welder machine
Classic Mini Steering Drop Brackets here Kiddspeed
-
InimiaD
- 1275 Cooper S
- Posts: 1526
- Joined: Thu Jul 01, 2010 11:20 pm
- Location: West of Offas Dyke.
Re: Mhuffy The Traveller.
Thankyou guys..
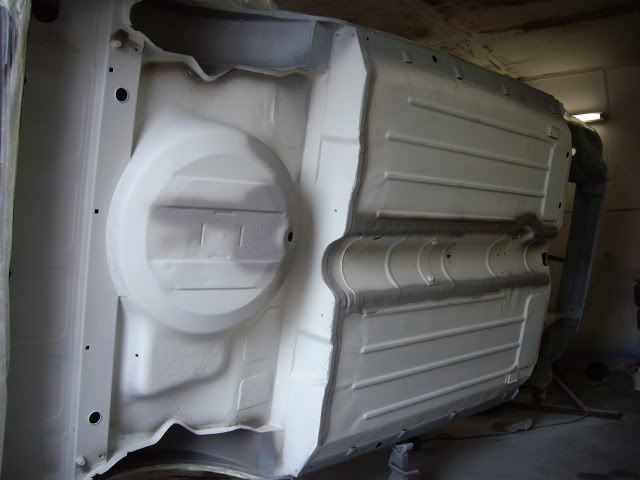
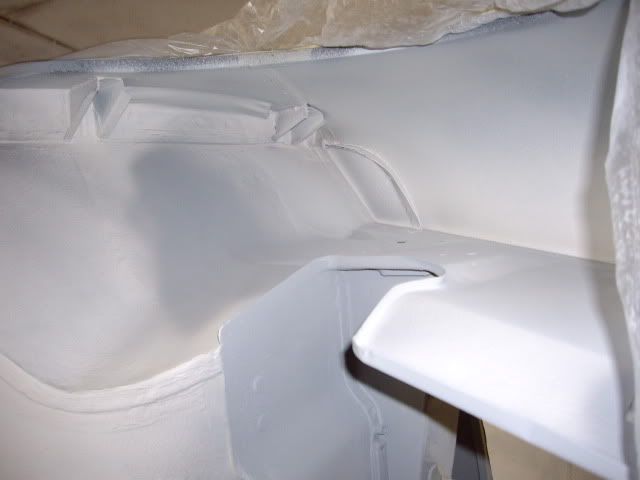
Jens, just for you , here's a sneak preview of what the shell looked like about a month ago.
The roof had been primered and the arches / underside had been primered and stone chipped.
I haven't been back to the sprayers since, so I've no idea what it looks like now.
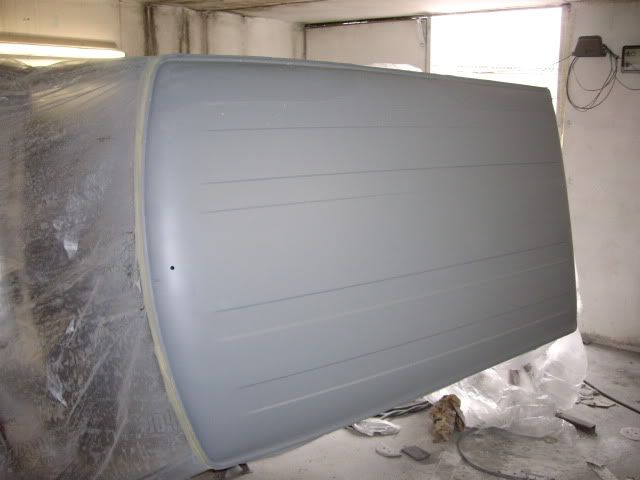
Jens, just for you
The roof had been primered and the arches / underside had been primered and stone chipped.
I haven't been back to the sprayers since, so I've no idea what it looks like now.


-
JC T ONE
- 1275 Cooper S
- Posts: 3180
- Joined: Fri Aug 13, 2010 5:25 am
- Location: Denmark
Re: Mhuffy The Traveller.
Nice 
must say, that is coming on strong
just clicked on page one of the thread, hard to belive its the same car
I thought about making a thread with some of my resto pics & story,
as I didnt have a computer in 2007 when it was restored
Yes I know -- just becourse I think about putting a saddle is on the Horse, it does not mean, I actually have to go for a ride
Jens Christian
-
georgek
- 850 Super
- Posts: 223
- Joined: Sun Oct 09, 2011 3:56 pm
Re: Mhuffy The Traveller.
Great work, what you've done so far is a work of art!!! thanks for posting the detailed images.
-
InimiaD
- 1275 Cooper S
- Posts: 1526
- Joined: Thu Jul 01, 2010 11:20 pm
- Location: West of Offas Dyke.
Re: Mhuffy The Traveller.
Thanks guys.
@ Jens. It would be great to see pics of your Woody resto. As with my other projects most of the pics were taken with a 35mm camera and are photo's. If you've got a scanner it's possible to scan photo's, save them as images and then upload them on here, or anywhere really.
@ GeorgeK. I'm not sure if it's a work of art, but when I look back at what has been achieved, bodywork wise, I think a check up from the neck up is needed, for me.

If the detailed pics help other like minded Mini folk then I'm more than happy to impart what little knowledge I have.
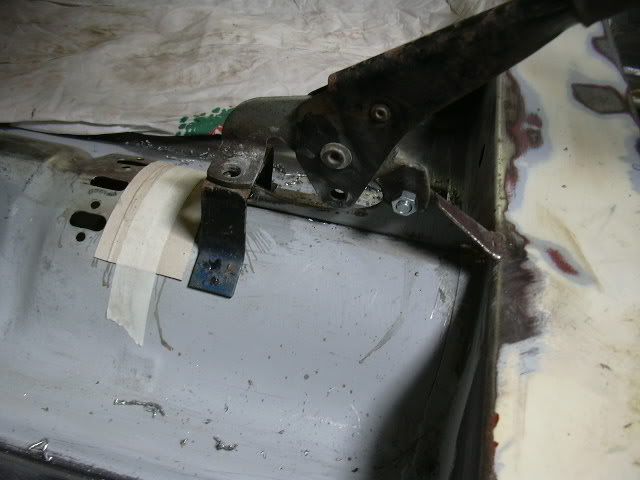
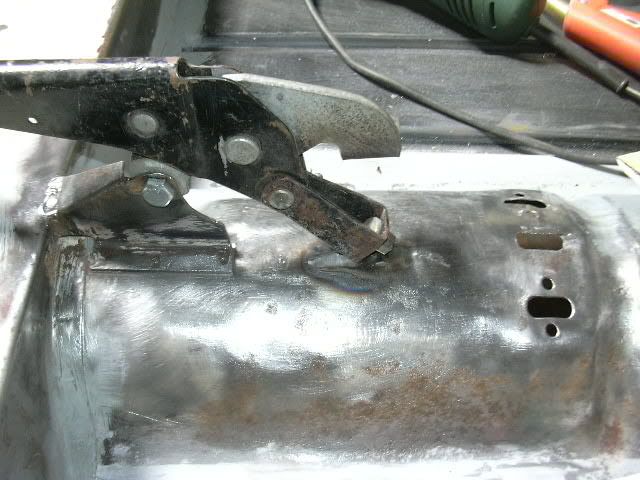
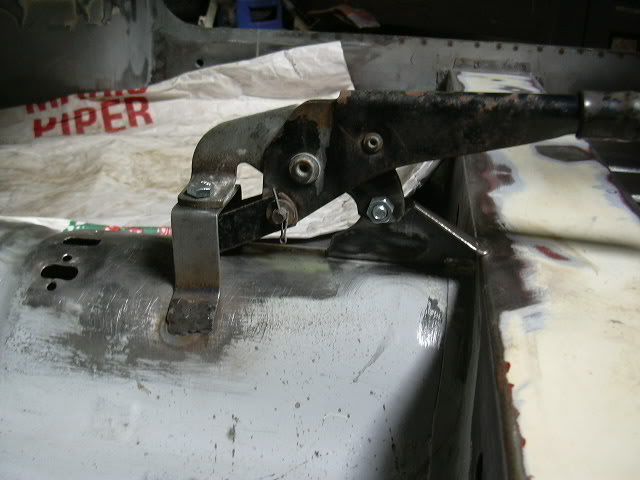
Another modern (ish) addition to the resto was to use a later handbrake cable set up which I feel is far superior to the twin pull system.
I took a few measurements from an associates Clubby Estate to make sure the holes / bracketry was in the right place/s and added a rear support bracket chopped out of a scrapper.
@ Jens. It would be great to see pics of your Woody resto. As with my other projects most of the pics were taken with a 35mm camera and are photo's. If you've got a scanner it's possible to scan photo's, save them as images and then upload them on here, or anywhere really.
@ GeorgeK. I'm not sure if it's a work of art, but when I look back at what has been achieved, bodywork wise, I think a check up from the neck up is needed, for me.
If the detailed pics help other like minded Mini folk then I'm more than happy to impart what little knowledge I have.
Another modern (ish) addition to the resto was to use a later handbrake cable set up which I feel is far superior to the twin pull system.
I took a few measurements from an associates Clubby Estate to make sure the holes / bracketry was in the right place/s and added a rear support bracket chopped out of a scrapper.


-
JC T ONE
- 1275 Cooper S
- Posts: 3180
- Joined: Fri Aug 13, 2010 5:25 am
- Location: Denmark
Re: Mhuffy The Traveller.
I have most of the pics on DVD,s already, its only the "pre resto" pics that are actual photos.InimiaD wrote:Thanks guys.
@ Jens. It would be great to see pics of your Woody resto. As with my other projects most of the pics were taken with a 35mm camera and are photo's. If you've got a scanner it's possible to scan photo's, save them as images and then upload them on here, or anywhere really.
I did have one, taken a few days after I bought her, but that ended up here
http://www.carmagreviews.co.nz/NonCMS/R ... Review=207
in cars reunited-look familar section.
My friend Richard had it off me, to see if he could find info
If I make a thread, will I do it "in real time" so it follows the actual timeframe, from when I restored her.
Jens Christian
-
InimiaD
- 1275 Cooper S
- Posts: 1526
- Joined: Thu Jul 01, 2010 11:20 pm
- Location: West of Offas Dyke.
Re: Mhuffy The Traveller.
The next task was to repair the tops of the rear wheelarches / turrets. Earlier in this thread I alluded to the fact that all the replacement wheelarches and repair bits were too thin a gauge compared to the original wheelarches. 
So I had no choice, but to repair as best I could. It was a pig of a job and unless you've got the patience of a saint, I would not recommend it.
Just some pics to show how involving a job it was.
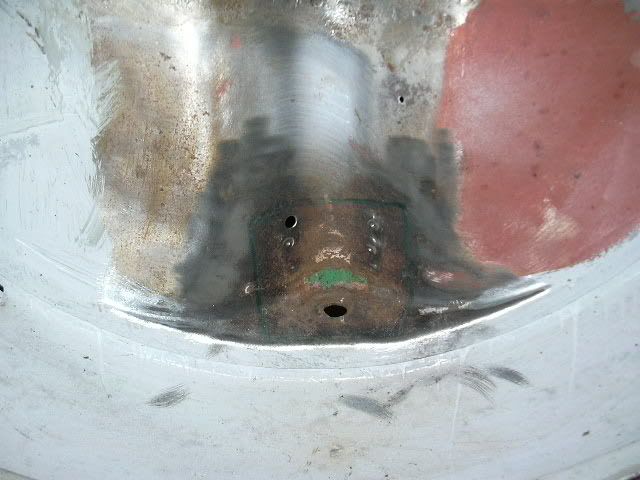
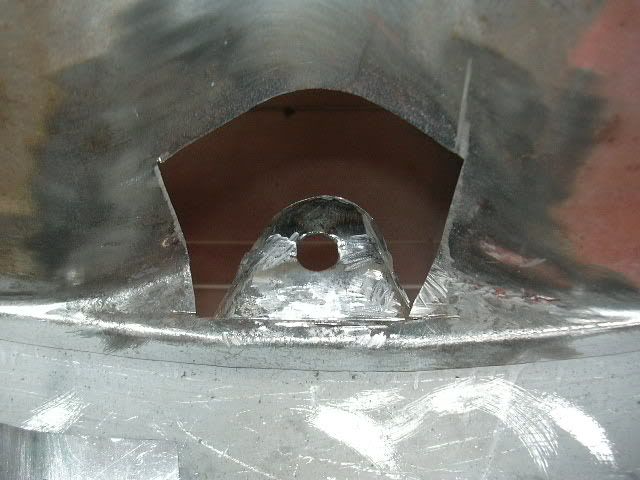
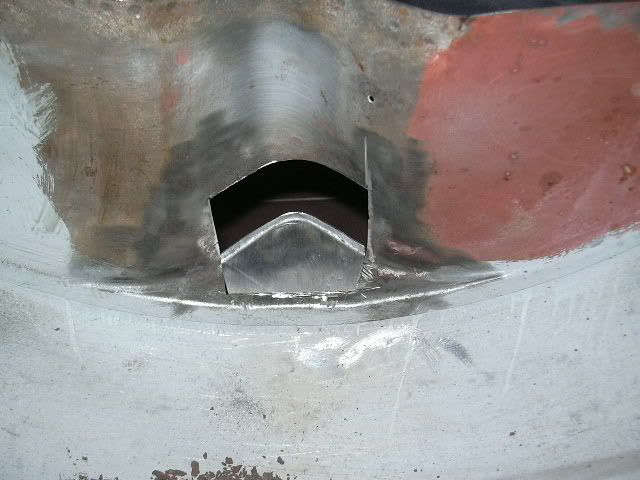
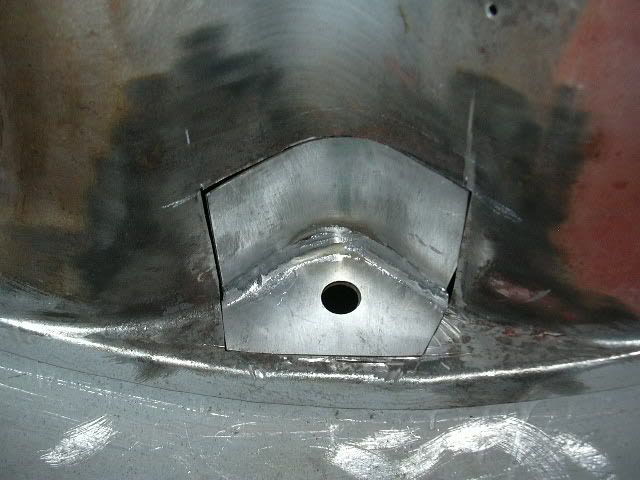
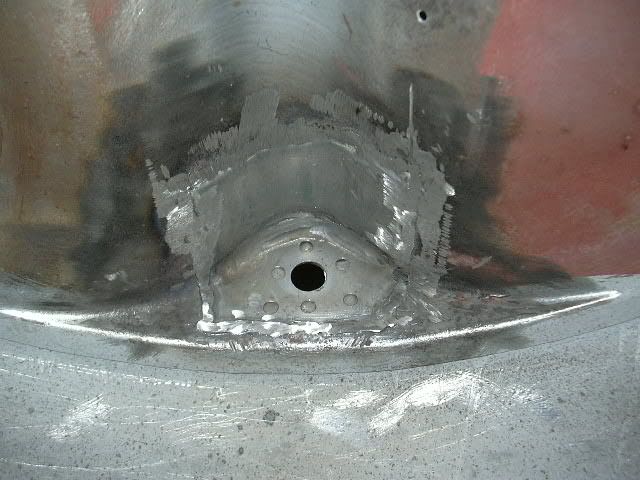
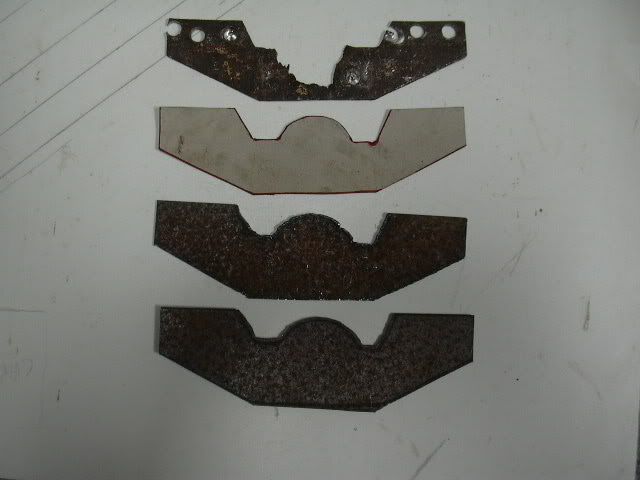
Managed to save one of the stiffeners, made a template and had an associate cut some new heavier duty ones with his Plasma cutter.
P Bucket is having a hissy fit now.
So I had no choice, but to repair as best I could. It was a pig of a job and unless you've got the patience of a saint, I would not recommend it.
Just some pics to show how involving a job it was.


Managed to save one of the stiffeners, made a template and had an associate cut some new heavier duty ones with his Plasma cutter.

P Bucket is having a hissy fit now.
-
InimiaD
- 1275 Cooper S
- Posts: 1526
- Joined: Thu Jul 01, 2010 11:20 pm
- Location: West of Offas Dyke.
Re: Mhuffy The Traveller.
Let's see if Pee Bucket behaves tonight. 
New, heavier duty turret stiffener ready to be plugged in,
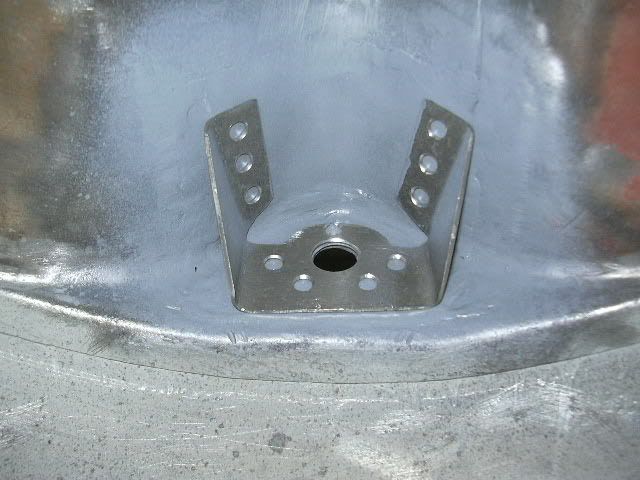
Much the same on the other rear arch. Cut any rotten steel out and start afresh.
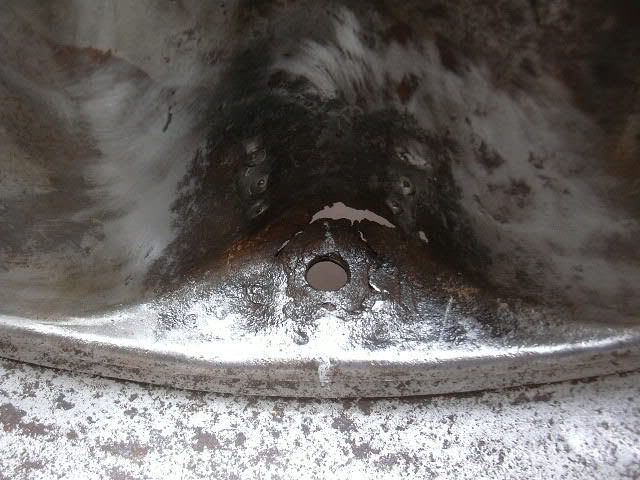
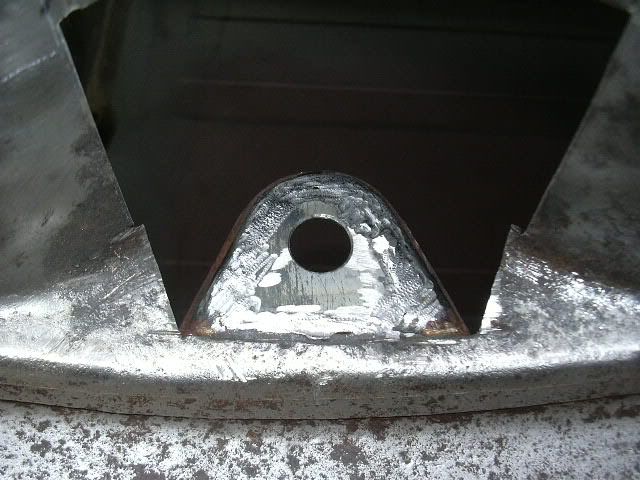
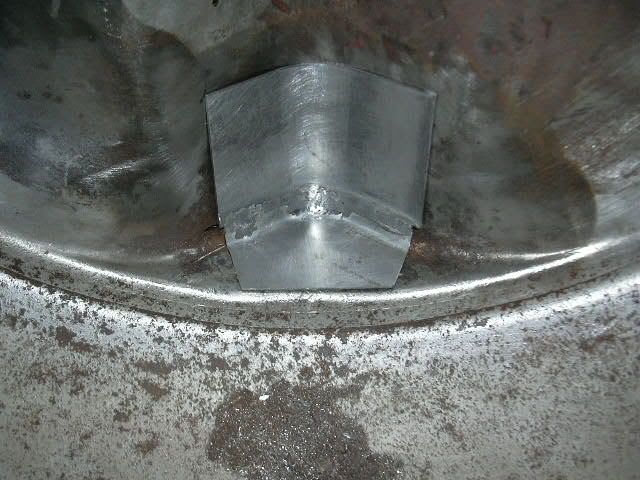
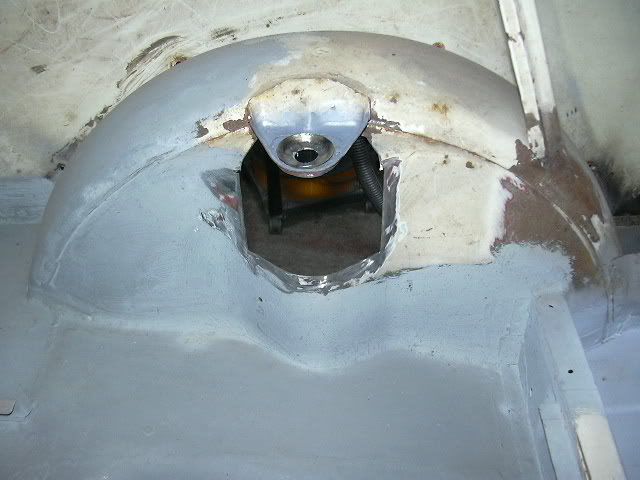
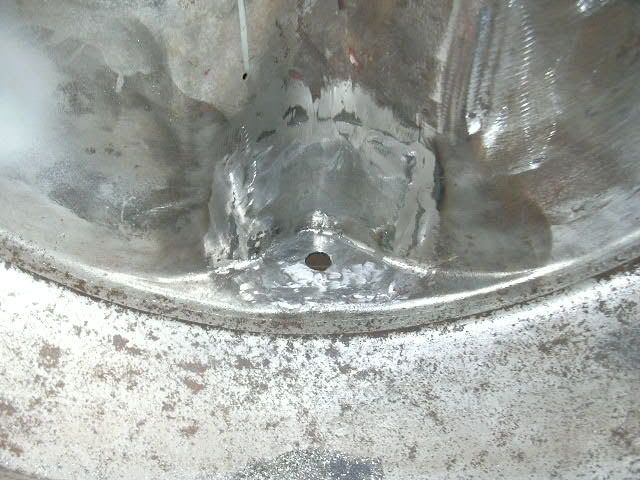
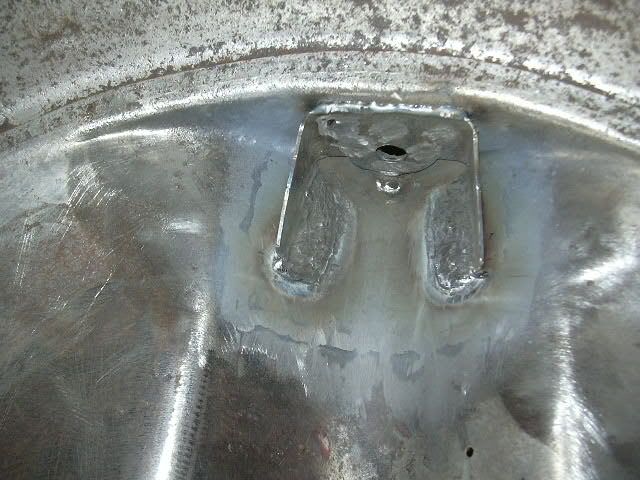
All done, bar some tidying up.
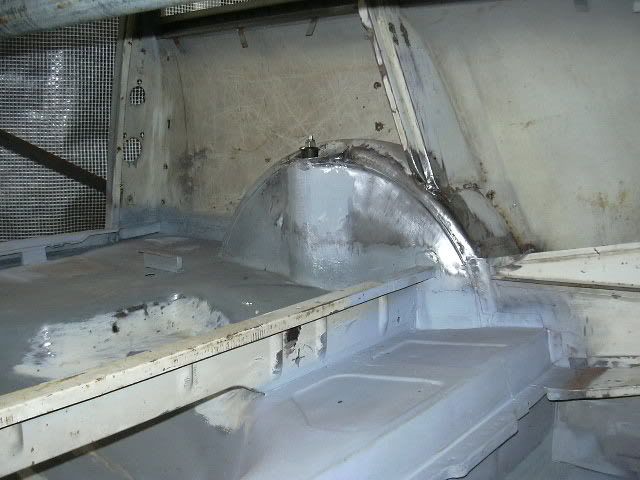
New, heavier duty turret stiffener ready to be plugged in,

Much the same on the other rear arch. Cut any rotten steel out and start afresh.


All done, bar some tidying up.

-
InimiaD
- 1275 Cooper S
- Posts: 1526
- Joined: Thu Jul 01, 2010 11:20 pm
- Location: West of Offas Dyke.
Re: Mhuffy The Traveller.
The final bit of panel attachment was the rear aprons. I gave up trying to fit the rear apron that I had available to me, so I bit the bullet and bought another one which only needed a small amount of tin bashing to fit.
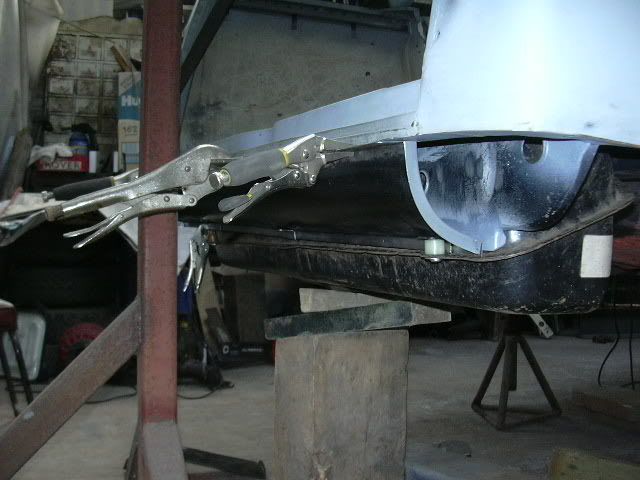
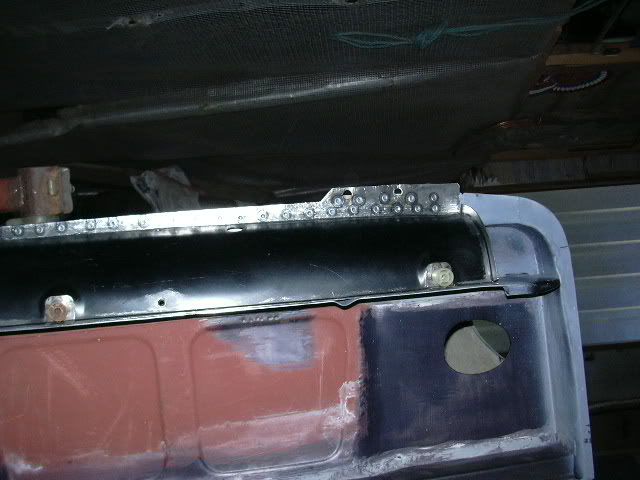
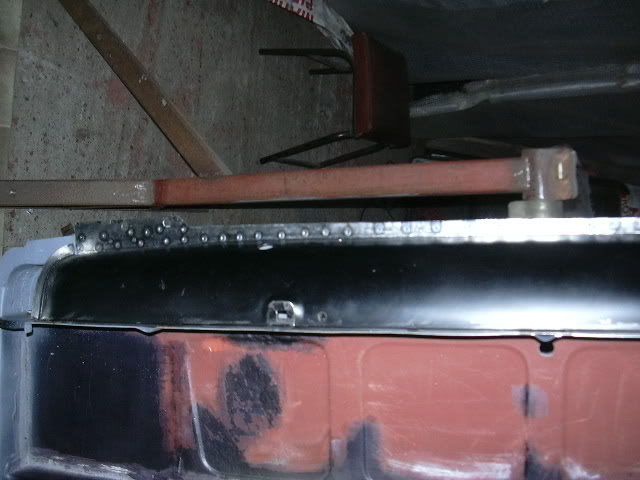
Side aprons, one original and one repro.
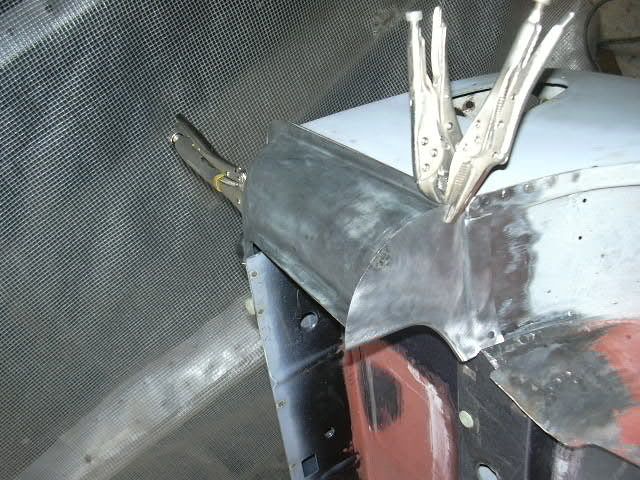
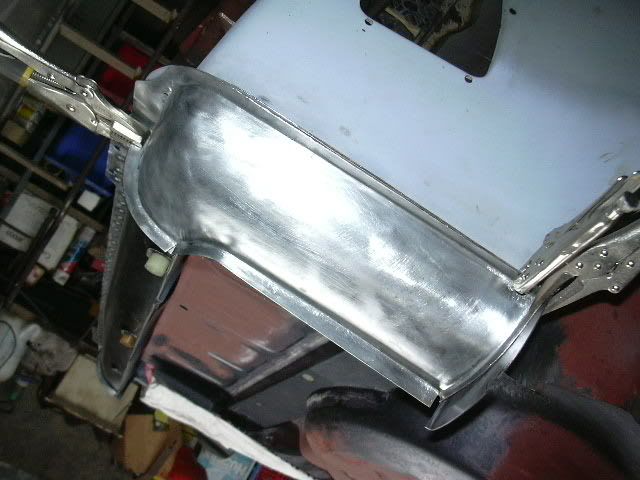
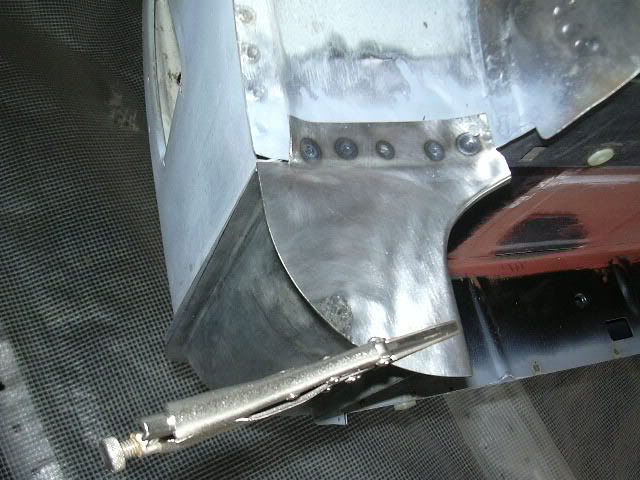
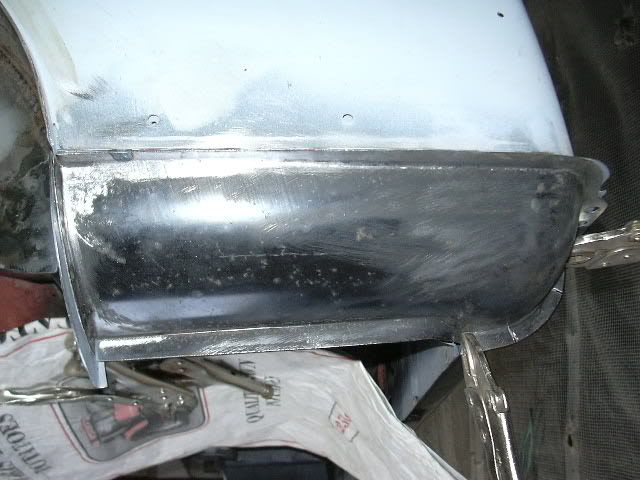
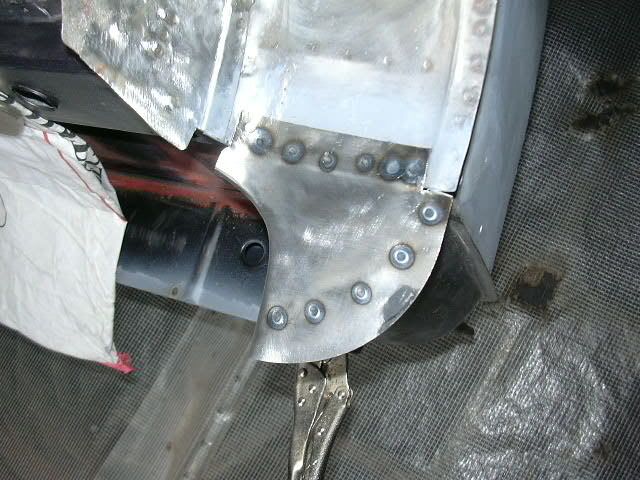


Side aprons, one original and one repro.


-
InimiaD
- 1275 Cooper S
- Posts: 1526
- Joined: Thu Jul 01, 2010 11:20 pm
- Location: West of Offas Dyke.
Re: Mhuffy The Traveller.
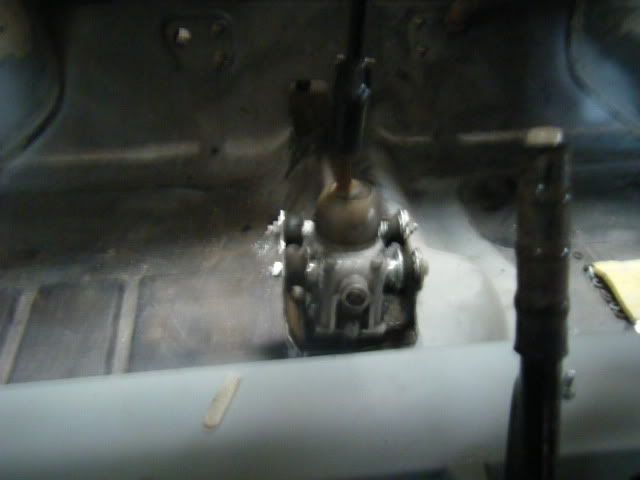
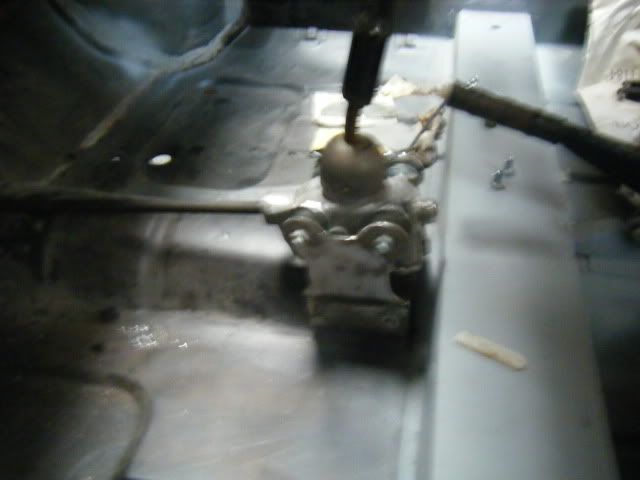
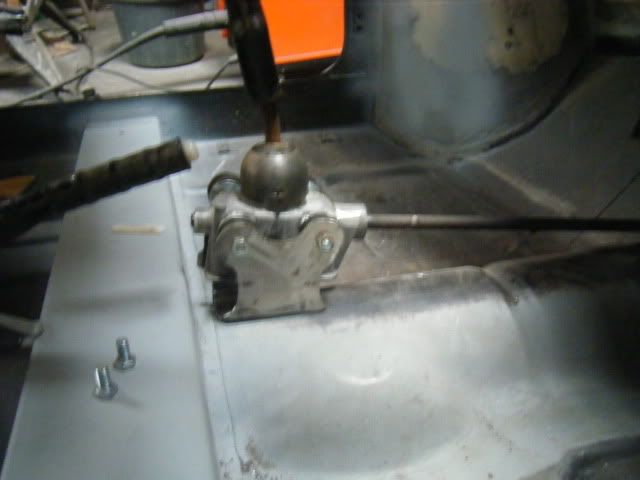
This mod is rather unorthodox and not in keeping with the age of the Woody, but due to the shortage of A series gearboxes and an even shorter supply of spares I have to use a Rod change gearbox of which I have a good supply.
So with that in mind I decided to mount the Gear lever housing in the car, on the tunnel.
An associate welded some lugs onto the housing which were then tapped to accept 4 bobbins and i made up some bracketry out of heavy duty steel.
My associate reckons the system should work ok so long as the engine has enough steadies attached and 2 knuckle joints are used on the extension rod.
The bracketry needs a few mods, but is otherwise the finished article.


-
36inter
- 998 Cooper
- Posts: 506
- Joined: Sun Jul 04, 2010 8:15 pm
Re: Mhuffy The Traveller.
What you really need now, if you are going non standard is the plate from an 1100 that fits behind the timing gear, this has forward and rearward facing engine mounts, if you have a tame welder he can fabricate these extra mounts onto the suframe and the engine will never move, I did this with my sons Mini because he drove it with no mechanical sympathy and was forever breaking exhausts, engine mounts, carb jets,etc, etc.
It is really worth doing if you are not bothered about originality, remote change boxes have their own torque arm, rod boxes are notoriously difficult to stop rocking.
Worth a try, worked for me.
Pete
It is really worth doing if you are not bothered about originality, remote change boxes have their own torque arm, rod boxes are notoriously difficult to stop rocking.
Worth a try, worked for me.
Pete
-
JC T ONE
- 1275 Cooper S
- Posts: 3180
- Joined: Fri Aug 13, 2010 5:25 am
- Location: Denmark
Re: Mhuffy The Traveller.
36inter wrote:What you really need now, if you are going non standard is the plate from an 1100 that fits behind the timing gear, this has forward and rearward facing engine mounts, if you have a tame welder he can fabricate these extra mounts onto the suframe and the engine will never move, I did this with my sons Mini because he drove it with no mechanical sympathy and was forever breaking exhausts, engine mounts, carb jets,etc, etc.
It is really worth doing if you are not bothered about originality, remote change boxes have their own torque arm, rod boxes are notoriously difficult to stop rocking.
Worth a try, worked for me.
Pete
I can only agree
Jens Christian
-
Tim
- 1275 Cooper S
- Posts: 1265
- Joined: Thu Jun 24, 2010 11:55 pm
- Location: Tasmania, Australia
- Has thanked: 3 times
- Been thanked: 8 times
Re: Mhuffy The Traveller.
Is it practical to shorten the rods and mount the gearchange housing under the floor where it belongs? This was done by the factory for rod-change Mokes, but I don't know if its ever been done in a Mini. In an early rod-change Moke the rods are 330mm shorter than the Mini ones.
Tim
Tim
1951 Morris Commercial J Type Van
1955 BSA C11G
1961 Morris Mini Traveller
1969 Triumph TR6R
1977 Leyland Moke Californian
1955 BSA C11G
1961 Morris Mini Traveller
1969 Triumph TR6R
1977 Leyland Moke Californian
-
guru_1071
- 1275 Cooper S
- Posts: 2109
- Joined: Thu Jun 24, 2010 7:47 pm
Re: Mhuffy The Traveller.
its easy to fit a rod change into a remote shell, you just have to either make (or buy from mini mania) a conversion bracket that bolts through the two front holes that remote bracket would screw into.
please note, these are my own, individual sales, nothing whatsoever to do with my employer, minispares
-
InimiaD
- 1275 Cooper S
- Posts: 1526
- Joined: Thu Jul 01, 2010 11:20 pm
- Location: West of Offas Dyke.
Re: Mhuffy The Traveller.
Interesting comments which have got me thinking guys. 
There was / is a few posts on the subject of 1100 engine mounts being used on a Mini on here somewhere which made for interesting reading.
The donor engine for the Woody is a 1300GT which has the correct endplate and I have already found a supply of engine mounts. That's 2 hurdles overcome.
The subframe for the Woody is or should have been powdercoated last week. .
.
A "tame welder" (love that description ) is not a problem. An associate of mine builds spaceframes and is an ace welder, but he certainly isn't tame.
Do I mess up a newly powdercoated subframe by welding new bracketry to it.? I'm not sure yet.
There's a spare wet subframe and a complete engine in the shed that could be used as a donkey to get the bracketry in the correct positions. decisions, decisions.
If you've got some pics of your set up/s Pete or Jens, I wouldn't mind seeing them.
The last thing I want to do is use solid engine steadies which would make the car unbearable to drive on long hauls. It's my age see.
There was / is a few posts on the subject of 1100 engine mounts being used on a Mini on here somewhere which made for interesting reading.
The donor engine for the Woody is a 1300GT which has the correct endplate and I have already found a supply of engine mounts. That's 2 hurdles overcome.
The subframe for the Woody is or should have been powdercoated last week.
A "tame welder" (love that description
Do I mess up a newly powdercoated subframe by welding new bracketry to it.? I'm not sure yet.
There's a spare wet subframe and a complete engine in the shed that could be used as a donkey to get the bracketry in the correct positions. decisions, decisions.
If you've got some pics of your set up/s Pete or Jens, I wouldn't mind seeing them.
The last thing I want to do is use solid engine steadies which would make the car unbearable to drive on long hauls. It's my age see.
-
36inter
- 998 Cooper
- Posts: 506
- Joined: Sun Jul 04, 2010 8:15 pm
Re: Mhuffy The Traveller.
My sons Mini was sold last year, it never recovered from a rotting shell and a wrecked gearbox plus the fact that I was fed up repairing it every other week, I will look in the garage though to see if I still have that set up on any of my other engines.
Pete
Pete
-
JC T ONE
- 1275 Cooper S
- Posts: 3180
- Joined: Fri Aug 13, 2010 5:25 am
- Location: Denmark
Re: Mhuffy The Traveller.
Here are the pic,s I have.InimiaD wrote:
If you've got some pics of your set up/s Pete or Jens, I wouldn't mind seeing them.
http://www.showcars.dk/images/basicfile ... 710014.htm
one more
http://www.showcars.dk/images/basicfile ... 910035.htm
engine (this link dont seem to work? but the pic, is in the same gallery as the other 2)
http://www.showcars.dk/images/basicfile ... -07(1).htm
Jens Christian