1964 Rust project again
- Frogeye61
- 998 Cooper
- Posts: 372
- Joined: Sun Mar 18, 2012 8:56 pm
- Location: Storkøbenhavn
1964 Rust project again
Different thread for different car.
While I'm waiting for the paint on Peter's car,
IMG_20180605_194340 by frogeye61, on Flickr
and I'm waiting for Tim to come around so I can help him build the engine, I decided it's time to start on my own rusty 64 Mini.
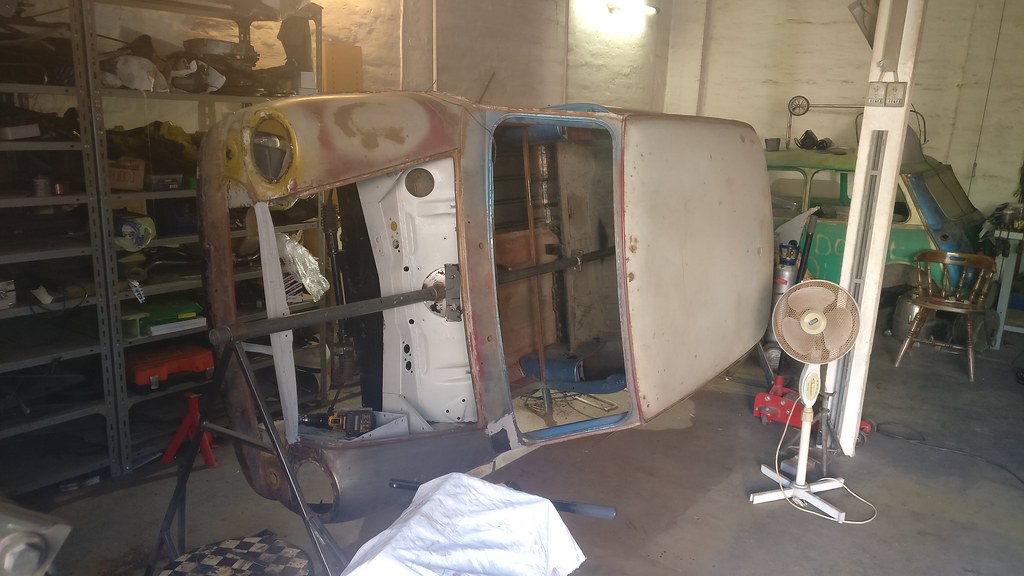
Peter and I pulled the windows out, got it up onto the Spyt,
IMG_20180612_190251 by frogeye61, on Flickr
Pulled the rear subframe off
IMG_20180612_193842 by frogeye61, on Flickr
Which I will say is in rather good nick.
And then started pulling off the oversills
IMG_20180612_203833 by frogeye61, on Flickr
I've already changed the left front floor and rebuilt the left A post. The right front floor is out so I put in some braces while I take away the right side oversill.
- Frogeye61
- 998 Cooper
- Posts: 372
- Joined: Sun Mar 18, 2012 8:56 pm
- Location: Storkøbenhavn
Re: 1964 Rust project again
I really don't like oversills at all.
VID_20180613_180640 by frogeye61, on Flickr
But once it is off, at least there's a chance of putting in new floors.
IMG_20180614_071248 by frogeye61, on Flickr
VID_20180613_180640 by frogeye61, on Flickr
But once it is off, at least there's a chance of putting in new floors.
IMG_20180614_071248 by frogeye61, on Flickr
- Frogeye61
- 998 Cooper
- Posts: 372
- Joined: Sun Mar 18, 2012 8:56 pm
- Location: Storkøbenhavn
Re: 1964 Rust project again
Well, that fell out!
IMG_20180614_164013 by frogeye61, on Flickr
Back edge is half-way cleaned up
IMG_20180616_165736 by frogeye61, on Flickr
After cleaning around all the edges, the new piece fits, so the back is plug-welded on.
IMG_20180619_194405 by frogeye61, on Flickr
This thing has original front wings and front end.
IMG_20180619_200859 by frogeye61, on Flickr
- Frogeye61
- 998 Cooper
- Posts: 372
- Joined: Sun Mar 18, 2012 8:56 pm
- Location: Storkøbenhavn
Re: 1964 Rust project again
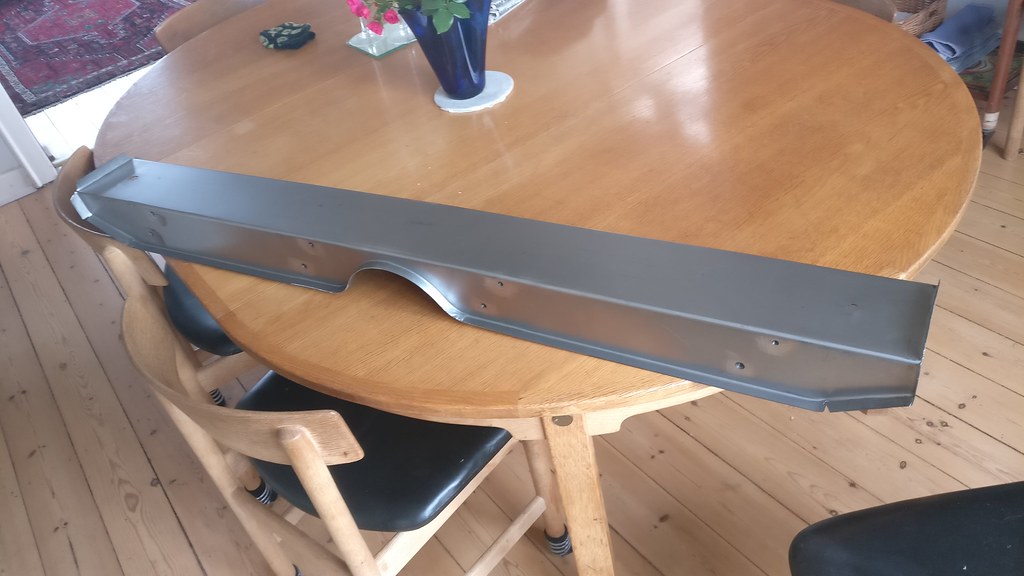
I got this beast in the post from M-machine. I think it's the only repair panel I'm missing (Yeah, right)
I need it now to be certain the floor parts align with the straight bottom of the cross brace.
IMG_20180625_172324 by frogeye61, on Flickr
I had already replaced the left front floor so it is time to start on the left rear
IMG_20180627_173008 by frogeye61, on Flickr
It was removed in a similar fashion to the right rear
IMG_20180628_190134 by frogeye61, on Flickr
Tonight is again Tuesday, my regular Mini-work day.
- trevorhp
- 1275 Cooper S
- Posts: 884
- Joined: Thu Feb 17, 2011 9:38 pm
- Location: Taunton Somerset UK Formerly Kingswinford
- Has thanked: 3 times
- Been thanked: 1 time
- Contact:
Re: 1964 Rust project again
Well done for inspiring the rest of us
Brilliant work
Brilliant work
"Ambition: the first step on the road to disappointment" Homer. J. Simpson
"Disappointment: the first step on the road to enlightenment" Buddha
"Enlightenment: the first step on the road to ambition" Dalai Lama
No point in hoping to go to Heaven...... I won't know anyone there.
KDK 320F
HDK 443E
DJJ 226H
TFD 47G
PKV 375
I x un-identified Ex-Race Cooper S Bodyshell
1 x chassis 007 1967 Cox GTM Originally from Bolton, then Swansea.
- Frogeye61
- 998 Cooper
- Posts: 372
- Joined: Sun Mar 18, 2012 8:56 pm
- Location: Storkøbenhavn
Re: 1964 Rust project again
In the last week, I have been just fiddling around with this project, (and a bunch of other projects) so here I've just repaired the bottom of the side bin rether than change the whole thing.
IMG_20180706_221637 by frogeye61, on Flickr
Then I got the left rear floor trimmed and installed, at least partially.
IMG_20180709_212242 by frogeye61, on Flickr
I have also been trying to clean my motor, but I'm afraid I might need a bit stronger cleaner.
IMG_20180709_194138 by frogeye61, on Flickr
It has all new seals and head gasket, and a gray clutch and something that looks like a kent 276 cam but with higher lift! I got this at ÅKM a while ago.
- Frogeye61
- 998 Cooper
- Posts: 372
- Joined: Sun Mar 18, 2012 8:56 pm
- Location: Storkøbenhavn
Re: 1964 Rust project again
Just a quick update.
Two piece floors not perfect, but good enough for me.
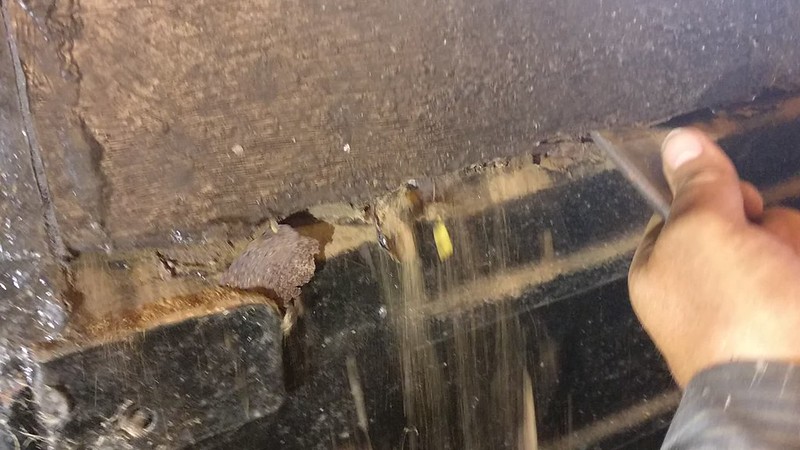
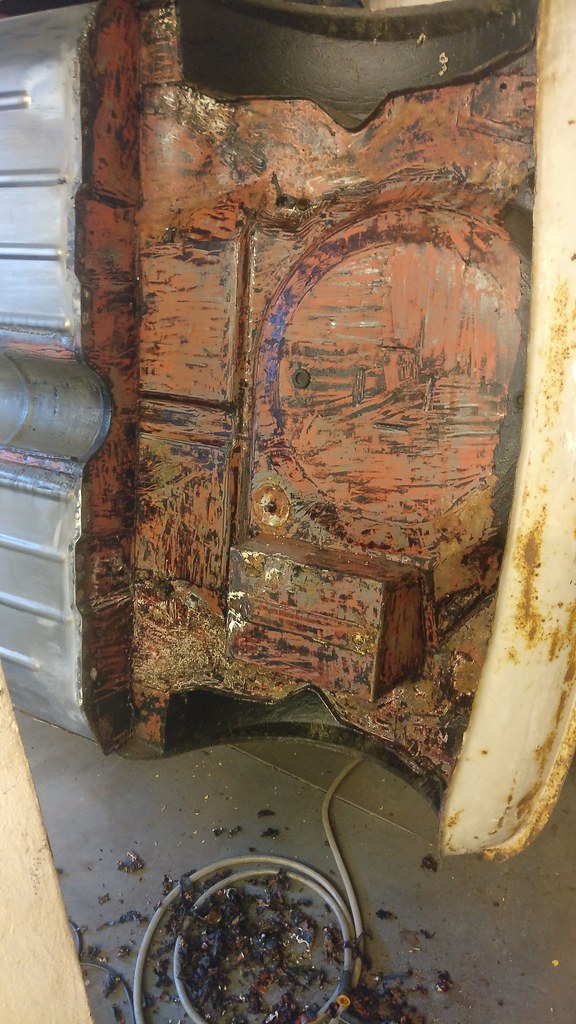
Now just to scrape all that undercoating off.
Still have to do the sills.
IMG_20180826_180618 by frogeye61, on Flickr
Two piece floors not perfect, but good enough for me.
Now just to scrape all that undercoating off.
Still have to do the sills.
IMG_20180826_180618 by frogeye61, on Flickr
- Frogeye61
- 998 Cooper
- Posts: 372
- Joined: Sun Mar 18, 2012 8:56 pm
- Location: Storkøbenhavn
Re: 1964 Rust project again
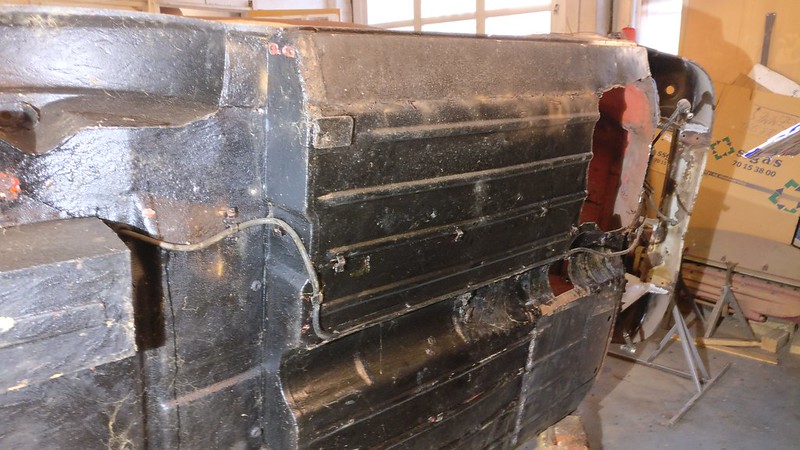
Another Tuesday evening and Peter helped with stripping the bottom of the boot, and the front panel.
How I left it:
IMG_20180827_181402 by frogeye61, on Flickr
I pulled the lower back panel off and Peter cleaned the boot floor
IMG_20180828_193047 by frogeye61, on Flickr
The Swedes found new resourceful ways of making an over-panel.
IMG_20180828_193628 by frogeye61, on Flickr
Only small rust spots to be addressed
IMG_20180828_210536 by frogeye61, on Flickr
Cleaned, but dented with many holes, but generally not too bad for an original panel.
IMG_20180829_070948 by frogeye61, on Flickr
- Frogeye61
- 998 Cooper
- Posts: 372
- Joined: Sun Mar 18, 2012 8:56 pm
- Location: Storkøbenhavn
Re: 1964 Rust project again
I've always wanted one of these. they have been very elusive, maybe because the Aussies never valued them. But thanks to a sleezebayer diddle4, who was so kind, I now have one. OK, it's rusty has he!!, but nothing any self-respecting car restorer can't take care of.
IMG_20180903_170203 by
frogeye61, on Flickr
s-l1600 (1) by frogeye61, on Flickr
This isn't the final condition. I'm still working on the internal rust, but it looks a sight better. It will be the proper green when done - and it's going onto my Frogeye!
IMG_20180903_192156 by frogeye61, on Flickr
Among the many small repairs to the 64 Mini, I have replaced the floor tabs as original (after only one mistake). I will have to find out where the pipes go, and what type rubbers they are fitted with.
IMG_20180909_171911 by frogeye61, on Flickr
Rather than replace the entire rear valence cover, it was in reasonable shape so I did a repair panel, this one made from the old floor pan so it still has some of the same undercoat.
IMG_20180909_171923 by frogeye61, on Flickr
IMG_20180909_172031 by frogeye61, on Flickr
It still needs a bit of cleanup.
The battery box is ok, but for a couple small rust holes in the bottom. I have two new battery boxes, but am considering making a new bottom from stainless steel. On my Frogeye, I did the battery tray in stainless and am happy with it.
IMG_20180909_172040 by frogeye61, on Flickr
The rear frame mount has been more difficult, especially so since I haven't gotten any new panels but made everything myself. I still have to clean up the welds, but here it is. The patch on the inner wing was done by a previous owner. It wasn't causing any problems so I left it for now.
IMG_20180910_200911 by frogeye61, on Flickr
IMG_20180910_201015 by frogeye61, on Flickr
I will do as the factory did and drill & tap the mounting nuts after the subframe is in place, to ensure a proper fit.
IMG_20180903_170203 by
frogeye61, on Flickr
s-l1600 (1) by frogeye61, on Flickr
This isn't the final condition. I'm still working on the internal rust, but it looks a sight better. It will be the proper green when done - and it's going onto my Frogeye!
IMG_20180903_192156 by frogeye61, on Flickr
Among the many small repairs to the 64 Mini, I have replaced the floor tabs as original (after only one mistake). I will have to find out where the pipes go, and what type rubbers they are fitted with.
IMG_20180909_171911 by frogeye61, on Flickr
Rather than replace the entire rear valence cover, it was in reasonable shape so I did a repair panel, this one made from the old floor pan so it still has some of the same undercoat.
IMG_20180909_171923 by frogeye61, on Flickr
IMG_20180909_172031 by frogeye61, on Flickr
It still needs a bit of cleanup.
The battery box is ok, but for a couple small rust holes in the bottom. I have two new battery boxes, but am considering making a new bottom from stainless steel. On my Frogeye, I did the battery tray in stainless and am happy with it.
IMG_20180909_172040 by frogeye61, on Flickr
The rear frame mount has been more difficult, especially so since I haven't gotten any new panels but made everything myself. I still have to clean up the welds, but here it is. The patch on the inner wing was done by a previous owner. It wasn't causing any problems so I left it for now.
IMG_20180910_200911 by frogeye61, on Flickr
IMG_20180910_201015 by frogeye61, on Flickr
I will do as the factory did and drill & tap the mounting nuts after the subframe is in place, to ensure a proper fit.
Last edited by Frogeye61 on Fri Sep 14, 2018 9:52 am, edited 1 time in total.
- timmy201
- 1275 Cooper S
- Posts: 1914
- Joined: Mon Jun 10, 2013 9:57 am
- Location: Australia
- Been thanked: 4 times
Re: 1964 Rust project again
I think those ones were only fitted to the standard mini and 1100 models when they started pressing and assembling engines here. The Cooper S engines were imported whole with the standard UK type with no breather
I’ve got one of those for my new engine
They also made baffled ones later on
And plain
I’ve got one of those for my new engine
They also made baffled ones later on
And plain
- Frogeye61
- 998 Cooper
- Posts: 372
- Joined: Sun Mar 18, 2012 8:56 pm
- Location: Storkøbenhavn
Re: 1964 Rust project again
Brilliant, wonderful! Thanks.
Do you know which years they were produced?
- timmy201
- 1275 Cooper S
- Posts: 1914
- Joined: Mon Jun 10, 2013 9:57 am
- Location: Australia
- Been thanked: 4 times
Re: 1964 Rust project again
I'm not sure but I can ask
This is my best guess at the moment:
Type 1 (curved breather) : 1964 to 1966
Type 2 (no breather) : 1967 onwards? Morris 1100S and GT (With PCV system)
Type 3 (with baffled breather) : 1966 till the imported engines started again.
This is my best guess at the moment:
Type 1 (curved breather) : 1964 to 1966
Type 2 (no breather) : 1967 onwards? Morris 1100S and GT (With PCV system)
Type 3 (with baffled breather) : 1966 till the imported engines started again.
- Bertam
- 998 Cooper
- Posts: 353
- Joined: Sat Mar 29, 2014 6:06 am
- Location: Way out west
- timmy201
- 1275 Cooper S
- Posts: 1914
- Joined: Mon Jun 10, 2013 9:57 am
- Location: Australia
- Been thanked: 4 times
Re: 1964 Rust project again
Already done!Bertam wrote:That "Hot Run Tested" decal would be a fun one to reproduce.
BMC version
https://minikingdomonline.com.au/produc ... ed-bmc-ok/
Leyland version
https://minikingdomonline.com.au/produc ... d-leyland/
- Frogeye61
- 998 Cooper
- Posts: 372
- Joined: Sun Mar 18, 2012 8:56 pm
- Location: Storkøbenhavn
Re: 1964 Rust project again
Well, I have finished the left panel and structure. It's done with epoxy paint inside, then rust protection. I mounted the rear subframe before drilling and tapping the mounting threads. Once all done, the cover went on and welded around the edges. Yes, a few small pieces to go but it's whole and strong.
IMG_20180926_070240 by frogeye61, on Flickr
I then started on the right side again.
IMG_20180926_070124 by frogeye61, on Flickr
IMG_20180926_070240 by frogeye61, on Flickr
I then started on the right side again.
IMG_20180926_070124 by frogeye61, on Flickr
- Frogeye61
- 998 Cooper
- Posts: 372
- Joined: Sun Mar 18, 2012 8:56 pm
- Location: Storkøbenhavn
Re: 1964 Rust project again
OK, I haven't posted for a while. that doesn't mean I haven't been working on the car. Just that I've had a lot of other things on my mind.
One is that I had to study for the citizenship exam. then problems at the office that required my full undivided attention. But I actually made time almost every Tuesday to work on the car.
December through February, I repaired the other front inner wing and triangle. I wanted to keep all the original metal I could (silly, I know), so just couldn't change all of the inner wing, but the triangle is of course all new.
IMG_20181204_204944 by frogeye61, on Flickr
Welded in place, but not completely pretty until ground down, and apparently still a tweak out of line as seen later.
IMG_20190109_065530 by frogeye61, on Flickr
All straight now.
IMG_20190129_181851 by frogeye61, on Flickr
Then welded solid
IMG_20190210_191727 by frogeye61, on Flickr
One is that I had to study for the citizenship exam. then problems at the office that required my full undivided attention. But I actually made time almost every Tuesday to work on the car.
December through February, I repaired the other front inner wing and triangle. I wanted to keep all the original metal I could (silly, I know), so just couldn't change all of the inner wing, but the triangle is of course all new.
IMG_20181204_204944 by frogeye61, on Flickr
Welded in place, but not completely pretty until ground down, and apparently still a tweak out of line as seen later.
IMG_20190109_065530 by frogeye61, on Flickr
All straight now.
IMG_20190129_181851 by frogeye61, on Flickr
Then welded solid
IMG_20190210_191727 by frogeye61, on Flickr
- Frogeye61
- 998 Cooper
- Posts: 372
- Joined: Sun Mar 18, 2012 8:56 pm
- Location: Storkøbenhavn
Re: 1964 Rust project again
March saw the rear valence repair. The boot floor was still nearly good enough, as was the boot hinge panel. But the valence was rot.
I pulled it off and there was just a bit of the boot floor that needed attention.
IMG_20190301_070258 by frogeye61, on Flickr
The entire rear edge needed renewing, as did the "closing" panels. The closing panels I did on Peter's car did actually close the valence, where mine didn't. I decided to do it as original so I made bits from 1.5mm plate.
I cleaned all the undercoating by hand and sanded it all down. there was quite a bit of surface rust and a number of Swedish human induced holes, round and big, some like 50mm. They all got welded and smoothed.
IMG_20190314_195043 by frogeye61, on Flickr
After cleaning with sand paper, wire brush and phosphor acid, it was painted with very tough epoxy primer.
I made this bottom for the battery box. I have two new boxes on the shelf, but somehow I prefer stainless steel for battery boxes.
IMG_20190319_204954 by frogeye61, on Flickr
Then I went ahead and epoxy'ed the entire bottom
IMG_20190324_183609 by frogeye61, on Flickr